Wednesday, April 27, 2011

Sunday Best Scrapbook Page by Janelle Burba


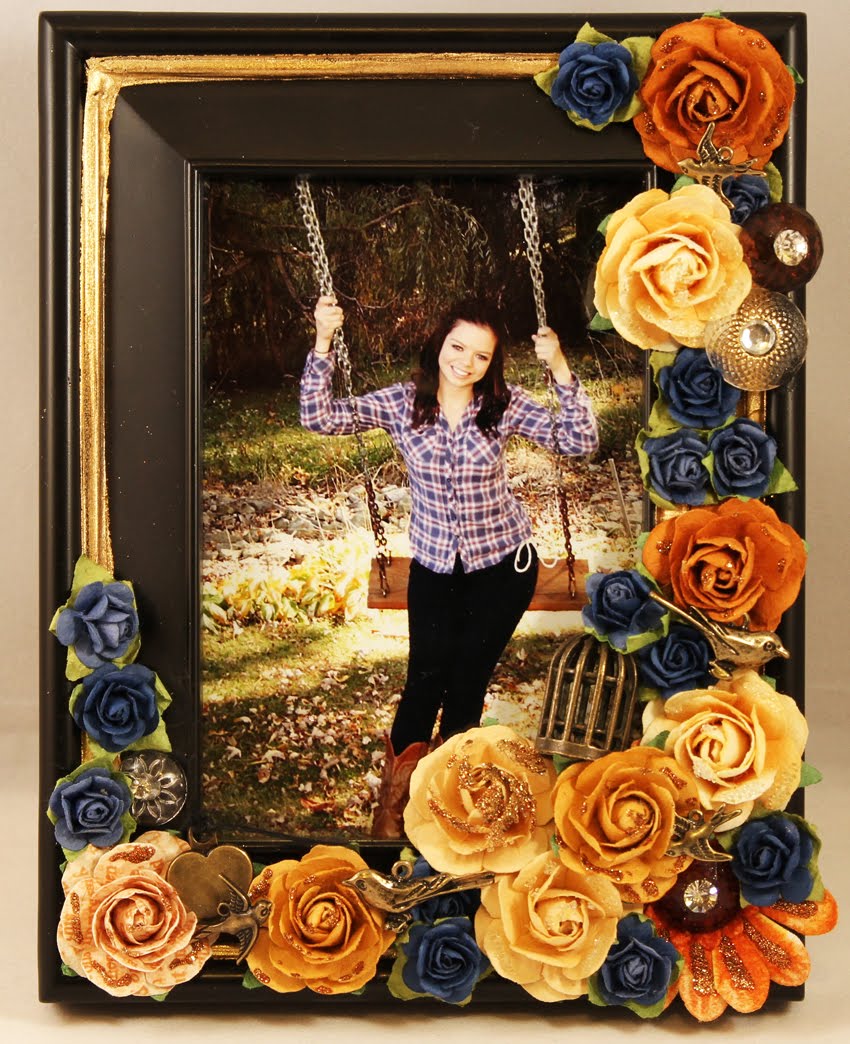
This month I wanted to use my glitter on a scrapbook layout. Since I spend more time on my pages than most, I thought it would be fun to see how I might dress one up a bit with glitter. As I commonly do, I used a photograph for my inspiration for this page. Lately, I have been busy looking through old family pictures and heritage layouts are so important. I love remembering those people, past and present that I love so much. I found an old Easter picture of my mother and sister and since it is spring, I needed to do something special with it.


I began with the Vintage Whimsy Collection by Crate Paper and went from there. I really enjoyed working with the muted pink and blues against the chocolate brown cardstock. I must say these colors are quickly becoming my favorites. After the papers were in place and the photo glued, I added prima flowers and trinkets, some random metal pieces and large letters from Heidi Swap. Tim Holtz helped with the bird cage die cut. I used a cool technique on it to make it look aged. I used several types of glitter in many different colors(see supplies) and some misc. beading. I hope you enjoy it.


Designer Dries Clear Adhesive
809 Fox Trot Large Glass Beads
914 Rich Gold Vintage Glass Glitter Shards
524 Tree Bark Microfine Opaque
292 Mint Julep Ultrafine Transparent
713 Fair Microfine Transparent

3 in 1 adhesive
Vintage Whimsy Collection by Crate Paper
Tim Holtz Cardstock
Tim Holtz Caged Bird Die Cut
Tim Holtz jump rings
Prima flowers and trinkets
Ribbon and lace(Paper and Metal Scrappers)
Making Memories metals (Michaels)
Chipboard Letters (Heidi Swap)
Jillibeab sugar pick
Scotch Liquid glue
Adirondack Alcohol Inks -butterscotch and Hazelnut
Stencil Magio Gold Paint Creme


Technique for old bird cage:

Die Cut
Cover with Scotch liquid glue...dries clear
Drop Alcohol inks in glue while wet (I used hanzelnut and butterscotch Ranger)
Use heat gun on die to create bubbles and dry glue (creates texture)
Use gold creme paint with finger to highlight section of texturizing ( I love it)

Sunday, April 24, 2011

Glittered Easter Egg Contest Winner!

Elaine Franzen is our Glittered Easter Egg Contest Winner!

Choosing a winner was not an easy task. All the designs were just gorgeous and very unique! We ended up with several honorable mentions located below. Makes me want to get started on next year already!
This real goose egg designed by Elaine has Art Glitter Ultrafine Opaque colors: Royal Wink, Deep Forest and Grape. Doesn't it look like peacock feathers!


Laura Drahozal designed this fantastic hinged egg. She used Microfine, Ultrafine, Vintage Glass Glitter and more!


Thank you for your hard work Laura!


This beautiful egg is from Alana Haas. She is a Tri-County Egg Artist in California and you can see why!


Christine Lehto designed this little cutie! What beautiful work! Thank you so much Christine.


Coleen Kappes designed this wonderful Fantasy Film goose egg. Who would have thought of using Fantasy Film on an egg. But it worked! Thanks Coleen.


These are a great group of eggs from Lori Hassler. I bet the Easter Tree they adorn is brilliant! Thank you Lori.


Vicki Parker's egg incorporates lace on the egg with glitter. Absolutely elegant! Thanks Vicki.

Thank you to all our participants. It was a joy receiving your emails with beautiful glittered eggs in them. We'll have to do it again next year! HAPPY EASTER!

Wednesday, April 20, 2011

Soleless Sandles by Clare Dempsey


There are all sorts of frame beads on the market now, that you can fill with pretty paper or stickers and enamel. Before you cover your paper or stickers, embellish them with Art Glitter! Today, I am sharing how to make soleless sandals, but you can use this idea for any jewelry piece or even a paper crafting embellishment! Have you ever seen a soleless sandal? They are the prettiest way to go barefoot poolside or at the beach! Won’t these look great with your first pedicure of the season? Disclaimer, I am not a foot model, and as you can see, I need a lot of help making my feet pretty!

Supply list:
DMC White Crochet Cotton
Memory Frames by Inkssentials (two frames, one package has three frames)
Patterned paper (I used My Mind’s Eye Breaking Free Totally Flipable” paper)
Art Glitter 278 Poppy Ultrafine Opaque Glitter
Art Glitter Fabric Dries Clear Adhesive & Ultrafine Metal Tip
Liquid Glass
Black Plastic Beads
Red abalone shell beads
Fasteners

I started by cutting a circle in my patterned paper and adhering it to the center of my Fashion Cap ring. Using my Ultrafine Metal Tip, I applied my Fabric Dries Clear adhesive with Poppy Ultrafine Opaque Glitter on the flip flops of my paper and allowed it to dry. Be sure to clean up your work area of all the extra glitter before working continuing onto the liquid glass or enamel step! Then I filled the bottle frame with liquid glass and using a pin popped any air bubbles. I allowed my Liquid glass to dry overnight.


I then staged my beads on my foot and determined about how many I wanted from my ankle to my toe ring. I also determined the pattern I wanted with my beads. Once you have determined your pattern, string the beads onto the crochet thread BEFORE you start! This will take some thought if you make your own pattern, as you will need to decide where the toe ring goes and then pattern for the beads is Mirrored.


For my specific sandal, I followed the steps below, but you can adapt your sandals to your size foot and or your favorite beads. Consider a bead that is metal or plastic if you plan on wearing them on a cement pool deck.

Step 1: I wear a size 8 shoe started by leaving a 9” tail for adding my closure later and chained 5 single crochets to start my sandals.
Step 2: I placed one small black bead, two chain stitches, one large black bead, two chain stitches, one small black bead, two chain stitches, one red abalone bangle, two chain stitches and then I repeated from Step 2 two more times. You should end up with three groupings of the three black bead and one red bangle combo.
Step 3: Now single crochet to one side of my frame.
Step 4: On the back side of the frame, chain 8 times and make 4 groups of the same bead combo above (towards the toes).
Step 5: Chain stitch around the second toe. I needed 18
Step 6: Following the stitching head back up the center of the sandal, until you get to the single stitches below the frame.
Step 7: Chain stitch eight times and single crochet to the opposite side of the frame.
Step 8: Stitch two more groups of beads on the opposite side.
Step 9: Confirm the crocheted sandal is long enough and then tie your closure pieces on to either end, fitting the sandal as needed.


Step 10: Repeat for second sandal, mirroring the stitching so that closure falls on the opposite side for the other foot.

So get out your Art Glitter and crochet hooks and give this a try. You can also try these variations: one using Fashion Caps Rings as a toe ring, and Art Glitter.


And a third option using a fabric flower and Gala Glitz Black from Art Glitter. Just cut fabric circles, finish the edges with a candle flame, and add some Gala Glitz in the center using your Art Glitter Fabric Dries Clear glue! You also use beading supplies instead of crocheting! These sandals should NOT be worn in the water!

Sunday, April 17, 2011

Altered Frame by Candy Spiegel

This frame began as a rather simple, boring and very inexpensive, black frame that I picked up at Wal-Mart for next to nothing during a Black Friday sale. After a few alterations, it is my favorite frame in the house.


I started by adding a strip of Art Glitter’s Double-Sided Sticky Tape around the frame. I then topped it with Gold Leaf for an elegant addition.

Then, because everything needs to sparkle, I altered some Prima flowers with glitter (518 Oak Microfine Opaque and 517 Aged Gold Microfine Opaque) and Small Clear Glass Beads. This process is really simple – I took Designer Dries Clear Adhesive and dabbed it randomly onto the petals I wanted to sparkle. Some flowers have a tiny bit and others are nearly covered. Then, I used a spoon to pour the glitter or beads onto the flower, shook it upside down and let it dry. It is that simple!


That finished, I began adhering a variety of flowers, charms and buttons to the frame. The birdhouse, birdcharms and all of the flowers, with the exception of the one in the lower left hand corner, are from Prima. The one in the lower left is from Petaloo. The heart charm is from My Mind’s Eye and the sparklers (buttons) are from Webster’s Pages.

I used Designer Dries Clear Adhesive to adhere everything. This is my absolute favorite wet adhesive and I use it all of the time, but I was still impressed when I used it on this project. For starters, everything, including the rather heavy (for papercrafting) bird cage is held on by a tiny drop of the glue. All of it is extremely secure.

But, although I know it “dries clear” I didn’t realize how clear until I used it to attach the clear sparklers. I’ve included a close up photo because you can’t see any adhesive at all … it looks like they are simply floating on the frame. AMAZING!

Even if you don’t go quite as elaborate as I did on this frame, I hope you’ll consider applying some of these techniques to a frame you own to make it special.

Thursday, April 14, 2011

Say Yes to the Dress Mini Album by Janelle Burba


As you might have noticed, I love color. The brighter, the better and I am always looking for inspiration. Whether it be in the beauty of nature or the vibrancy of someone's spirit...I am always looking. My inspiration for this project came from some beautiful older paper from Prima Marketing. As I was searching the net, I noticed it and just a few weeks later, my thoughts and designs erupted into what I think is a pretty wonderful project.


Being the mother of a beautiful little girl (ok..not so little anymore as she turns 17 next month), I have had many opportunities to take photographs of her all dressed up for whatever occasion. My friend, Gina Perkes, who is a master at all things crafty suggested that this mini might be a good place to catalog her growth through dresses as she has grown into the amazing young lady she is today. Thanks Gina for this great idea and what fun it has been.


I started with a pre-made chip board mini (they come all shapes and sizes) and just started covering the pages.


Dress forms seem to be one of my favorites right now so I put pencil to paper and started imagining some page designs. I drew the dress forms onto chip board and started cutting away. I think they added a nice touch!


This mini has several hand-made envelopes that can easily be made by scoring the edges with simple folding. I did add a really cool little book with a holder to my mini. I believe the idea was from Tim Holtz some time ago but I honestly can't remember and the holder came directly from Tim's house in a box of recycled goods. Thanks, Mario (I told you I would use that packaging).


The accordian page is probably my favorite and I use that technique often as I have SO MANY PHOTOS!


Last but not least, I made one of Tim's sizzix die cuts into a "mini" journaling book so I can give details about my daughters special events.


The glitter was the highlight to my book as I added it everywhere.


Materials:
Prima Marketing Paisley Road Collection
Core`dinations Card Stock - assorted colors
Art Glitter Designer Dries Clear adhesive
Ultrafine Metal tip
Beacon's 3 in 1 adhesive
Vintage Glass Glitter #910 Rose Quartz (probably my all time favorite glitter)
#304 Petal Pink Ultrafine Transparent
#79 Black Ultrafine Opaque
#247 Moulin Rouge Ultrafine Opaque Hologram
#713 Fair Microfine Transparent (perfect color for light skin tone)
D11 Roulette Dazzlers (I LOVE LOVE LOVE DAZZLERS ~ they cover so nicely)
#164 Chrysalis Ultrafine Transparent
Judikins Embossing Powder White
Cloisonne High Gloss Embossing ~ Plum Slade and Smokey Obsidian
Tattered Angels Glimmer Mist ~ Carribean Blue
Tim Holtz Florish Mask
Tim Holtz Tiny Attacher and staples
Tim Holtz Hitch Fasteners (love them for door knobs)
Tm Holtz Hanger Clips
Tim Holtz Sizzix ~ Sewing Room
Tim Holtz Distressed inks - assorted
Color Box inks - assorted
Assorted brads and ribbons from Michaels or Hobby Lobby
Prima flowers ribbon
Graphic 45 metal hinges (love them)
Martha Stewart punch
Stampendous velvet class a peel stickers
7 gypsies gaffer tape scroll
Impression Obsession, Inc. dress form stamp
Glitz mini alphabet


Friday, April 8, 2011

Work the Stash with Glitter by Clare Dempsey


Like me, you might have a stash of supplies that you keep telling yourself you need to use before you buy more. I have found it a great idea to devote a day to using up the stash and to use Art Glitter to inspire me!

This Wednesday, I went through my stash of trims and pulled out some eyelet lace trim. I love all the rosettes that people are making with paper, and decided to use that idea with my eyelet. So, I cut a strip 18” long and folded it in half right side together. I matched my pattern on the edge and sewed a seam to form a band. Then I can make a basting stitch along the inside edge of my eyelet and pulled to gather the center.


Using another piece of eyelet, I used my Art Glitter Fabric Dries Clear Glue and embellished it to match my card stock and patterned paper. I think this would look wonderful on an Easter, or Mother’s Day Page! Here is my trim before embellishment.


Using the Dries Clear Fabric Adhesive and my Hibiscus 297 Ultrafine Transparent, and Bananan 92 Ulfrafine Transparent Glitter I followed the pattern of the lace. A dries clear glue is so important with lace! Here is the after picture.


I love that my Art Glitter gives me the look of an expensive and fashion forward scrapbooking embellishment for less! Now, what if you don’t have a stash of eyelet trim? You can get some at your local fabric or craft store and buy just 1/3 yd to make a 12 x 12 scrapbooking page. Let’s say the trim runs $4.99 a yd, now use a coupon for 40% off and only purchase your 1/3 yd and you have some eyelet for $0.99.

Still think that’s more than you want to spend. Then get the look with your paper punches, embossing folders and white paper and add your Art Glitter! Here is a faux eyelet I made using my Martha Stewart border punch and my Cuttlebug embossing folder.


Now I used all of these handmade embellishments to scrapbook a special dress I designed and made: my wedding dress. Another tip I would like to share is the use of corner punches for holding your professional photos. Someday, my children may want to frame some of the professional photos I scrapbook. So, I like to use corner punches and adhere the photo mat only to my page. I then slip my photo under the corners and later, they can be removed without being damaged.


Supplies Used:
Art Glitter Fabric Dries Clear Adhesive w/ Ultrafine Metal Tip
Art Glitter 267 Hibiscus Ultrafine Transparent Glitter
Art Glitter 92 Bananan Ultrafine Transparent Glitter
Eyelet (Rosette)
Eyelet (border) Hobby Lobby
All the paper is by My Little Shoebox from the Sew Cute Line: Nothing Buttons, Made with Love, Hand Made
Stickers from My Little Shoebox Sew Cute Line
Paper Doily My Little Shoebox Garden Party Buttercup
Title Foverever Young Cricut Cartridge
Corner Punch EK Success

Monday, April 4, 2011

Steampunk Flowers by Candy Spiegel

Steampunk is all the rage in the paper crafting world right now and this is my take on it.


I used papers from Graphic 45 to cover a mini milk jar (this one once held Prima flowers). All of the papers are adhered to the glass jar with Art Glitter's Designer Dries Clear Adhesive. Then, to cover up the portion of the jar where the lid screwed on, I first glued a black ribbon around the mouth of the jar and then wrapped and tied a second ribbon on top.

Next are the flowers. Both flowers use stems from Wendy Vecchi’s Art Parts. I painted them with Adirondack Color Wash.


The smaller flower is cut out with Sizzix Bigz/Tim Holtz Alterations die Tattered Florals. I used a bit of Distress Ink and bended the edges of some of the petals. I then attached a clock face, metal leaf and spinner with a brad (all Tim Holtz products). Since the clock face is so heavy, I used Designer Dries Clear Adhesive to glue it to the flower and then made sure the Art Parts stem goes all the way across the back to hold it up.

The larger flower is one of Wendy Vecchi’s Art Parts covered in paper. I traced the flower onto the paper, cut it out and then used Designer Dries Clear Adhesive to adhere it. Once dry, I sanded the edges and then added Distress Ink to the ends of the petals.


Next, I took another paper flower (cut from the Tattered Florals die) and adhered to the center. Then, I smashed a bottle cap and glued that on. Then, I applied Designer Dries Clear Adhesive and filled it with Art Glitter Elements #3 Carrot. I absolutely love the organic effect.

Once dry, I glued on a gear and hitch from Tim Holtz with the Designer Dries Clear Adhesive.

I attached a Swivel Clasp (also from Tim Holtz) by adding a jump ring to the chain end, which goes over the hitch, and using Designer Dries Clear Adhesive to glue the clasp onto one of the petals. With additional jump rings, I attached beads from Maya Road and a charm from Tim Holtz, with Graphic 45 paper adhered onto the back.


Finally, to cover up the clasp, I cut a flower out of the Graphic 45 paper and glued it to the top. Then, using the Designer Dries Clear Adhesive with the metal fine tip, I randomly applied glue to some of the petals and then added Art Glitter Small Clear Glass Beads for a hint of sparkle without going too over the top.

Friday, April 1, 2011

No Foolin' - Art Glitter Sale and Glittered Egg Contest


Join Barbara and the Art Glitter staff for a fun filled holiday celebration!

Now through April 18th, 2011 submit your Glittered Easter Egg* for a chance to win a $50 gift certificate! Eggs will be judged on originality, color composition and overall artistic quality.

Art Glitter Ultrafine, Microfine or Hologram glitter, Vintage Glass Glitter, Glass Beads, Gala Glitz, Dazzlers or even Earth Elements, it's up to you to sparkle your eggs to your desire! We will announce the winner and share photos right here on ArtGlitterBlog!

Check out our contest and sale page for more information here.

*One entry per household

BEST GLITTER SALE YET!
30% OFF All Vintage Glass Glitter And Glass Beads!
25% OFF Selected Ultrafine 1/4 oz jars*
Now through April 18th, 2011
*only on retail orders of $50 or more


SHIPPING IS ONLY $4.95 FOR ORDERS OVER $50!**

Shipping Charge will be adjusted when order ships.
**only to addresses shipped in the Continental United States.

Just placed an order but want to take advantage of these specials? No worries, re-orders made since 1/1/11 and placed directly through Art Institute Glitter, Inc. are eligible to receive SHIPPING FOR ONLY $2.95!***


***Just mention in the comments area as you check out (found below the credit card information) that you want your SHIPPING FOR ONLY $2.95! Discount will be applied when customer re-order status has been verified on orders of $50 or more to addresses shipped in the Continental United States only.


ORDER EARLY TO RECIEVE A FREE GOOSE EGG!

First 30 orders will receive a free Goose Egg!* Just mention in the comments area as you check out (found below the credit card information) that you want your FREE Goose Egg.

*only on retail orders of $50 or more

One Special Goose Egg recipient will win a coupon for $50 off your next order! Drawing will be held after April 18th, winner to be announced here!

Remember to order soon, FREE GOOSE EGG offer valid only while supplies last!