Saturday, January 28, 2012

Goodwill's Gliitter Gala with Art Glitter

The Seattle Goodwill had a Glitter Gala fundraising event recently that Art Glitter was happy to be a part of!

Photo by Storms Photographic

Jahna Hildebrandt, Goodwill's Events Manager, tells us about it:

We received so many complements that the décor was the best it has ever been and we owe it all to Art Glitter and Barbara! Thank you! I know the guests loved the glittery centerpieces because at the end of the night there weren’t any left – they took them off the tables and took them home! We had 16 volunteers from Amazon that came and glittered all the flowers for a corporate volunteer day. They had so much fun they offered to come back and do it again next year. And not just because they were volunteering indoors while the rest of their co-workers were clearing brush in a park in the rain.

Photo by Storms Photographic

Photo by Greg Banasek, PSAV

The Fantasy Film looked amazing on the backdrop and really pulled the entire room together. We went a little glitter crazy. Kenneth Horne, our amazing volunteer did some additional fabulous arrangements for the lobby that combined glittered flowers with fresh. We also glittered hair ornaments for the models.


The event was a smashing success. We raised almost $280,00 for our Job Training Programs and had a record 661 guests. Thank you again so much!

Photo by Storms Photographic

Photo by Storms Photographic

Photo by Storms Photographic

Wednesday, January 25, 2012

Heart Sun Catcher by Cassandra Midkiff

This is one of the first projects I was able to really play with Fantasy Film. For this project I used Fantasy Film in Aurora.


I cut out two heart shapes and crumpled them in my hand, then using the flame of a candle started melting them together. I knew I wanted some holes so I held some parts on the flame longer to create them. When I was satisfied with the shape I took some tulle and glued it to one of the larger holes. I cut out a tiny heart from some pink scrapbook paper then covered it with my Designer Dries Clear Adhesive and sprinkled it with Ultrafine Transparent glitter in Miss Muffet #144.  Once it was dry I glued it onto the tulle. I also smeared some adhesive onto the fantasy film and sprinkled on Ultrafine Transparent glitter in Sea Shell #100.

Once everything was dry I took a needle and poked a hole on the bottom of the heart where I placed a jumpring and my strand of vintage glass beads. I poked another hole at the top of the heart and placed another jumpring and then threaded it with some clear fishing line. So happy with the finished piece, the Fantasy Film looks almost like an iridescent glass and it sparkles so beautifully in the light. I plan on making more to give out for Valentine gifts.

Saturday, January 21, 2012

Art Journaling that Shines - Part 2 By Laura Fraedrich

Hello again! Welcome to the second part of Journal Pages that Shine. This time we're going to use some of my favorite products in the whole world...Fantasy Film and Fantasy Fiber from  Art Glitter. These products are so versatile that you can use them on all your mixed media projects. All you need is an iron and some parchment paper and you're ready to go! I always thought it was more complicated than that, but was pleasantly surprised the first time I used them. It's so quick and easy!


Again I started my pages by using watercolors, markers to doodle with, spray inks, collage elements, and craft punches to make little windows. For the left side, I used Fantasy Fibers for hair. I mixed together a pinch of purple and yellow, spread them out into my desired shape, then sandwiched them between two sheets of parchment paper and ironed briefly. It doesn't take much heat or pressure to get the fibers to fuse together. I recycled a white circular shape that I cut out of one of the pages below for the face. I used collage medium (Collage Pauge) and a foam brush to adhere the hair and the face to my page.

To make the small squares down the left side of the page, I used a craft punch. Then I cut 1/2" strips of different colors of Fantasy film. I arranged and overlapped them randomly on one sheet of parchment, then covered them with another and ironed briefly. It came out having a nice striped effect. I cut the fused film into squares slightly larger than the punched out squares and glued them onto the back of the page. I covered them with a strip of white paper so they can't be seen from the page behind.


For the left page, I used the same technique for the earth as I did for the face above. For the sun on the right page, I fused together 2 layers of Fantasy Film and added a pinch of pink Fantasy Fiber on the top. I glued it onto the back of the page but left it translucent instead of gluing white paper over it like I did for the above squares. I wanted to let the design from the page behind it in my journal peek through.


This is what was on the page behind the sun.


The colors of the paint were so similar to the colors of fibers I used that they just gave it a subtle luster.


You can see the design behind the film better here.


Next on my list is to incorporate these products into a small art quilt!

Wednesday, January 18, 2012

Art Journaling that Shines...Part 1 by Laura Fraedrich


I have never been one to keep journals or diaries. I had a diary when I was a kid and I think I wrote in it twice, probably about a boy I had a crush on when I was about 8 years old. I tried to keep one when I was in college, and that ended up being a glorified day planner. I've tried several other times in the past and spent a few hours writing down my deepest thoughts, just to read them again months or years later and tear them up because I thought they sounded so stupid. I hated the things I wrote about and I hated my handwriting. So I gave up.

Being the huge mixed media fan that I am, I started to see this art journaling craze materialize in magazines and online. I was definitely intrigued, but not completely sold on the idea because I knew my journaling history and figured I would never commit to it. Over the next year or two it became harder and harder to resist. How could anyone look at the beautiful and colorful journals of Teesha Moore, Ingrid Dijkers, and Pam Carriker and not want to do it themselves?

I tried art journaling a little bit but was frustrated because my pages weren't even close to as cool as theirs were. It wasn't until I took a journaling class with the Journal Fodder Junkies last year at Art Unraveled that I finally gave in to the temptation and started keeping an art journal. The biggest things I learned from the workshop were pretty obvious facts, but I never thought about it before then. Every journal page doesn't have to be a masterpiece, nor does if have to be about anything particularly important. What IS important is that you continue working in it. No page ever has to be completely finished. You can start 10 pages in one sitting and take 6 months to get back to them. Have nothing to say today? That's okay. Start slapping some paint on the pages. Collage receipts, magazine clippings that you like, junk mail, postage stamps, or anything else you can find that would otherwise be destined for your trash can onto your pages. Make some random doodles on a page and see what transpires. I can't say I journal everyday, but I've been regularly keeping up with it since that class. Some pages I like so much that I actually finish them!

I started creating my pages by randomly painting watercolors on some blank journal pages. After they dried, I took a fine tipped black marker (Micron Pigmas work well) and started doodling and drawing. Most of the time I didn't have anything specific in mind. I journaled words in the empty spaces around my doodles. I enhanced my drawings by using Copic markers to color in some areas. I used craft punches on some of the pages to cut out 'windows' that look onto the page behind it. I also collaged some papers I had in my stash to some of them. To add the sparkle and shine, I used Designer Dries Clear adhesive by Art Glitter to add various colors and varieties of glitter (also by Art Glitter).  It was no exact science, I just used coordinating colors to enhance certain areas.


Stay tuned for my next post which will be about using Fantasy Fibers and Fantasy Film to enhance your art journal. See you soon!

Saturday, January 14, 2012

Elegant Votive Candle by Candy Spiegel


You can be sure of one thing when you live in Michigan — during the winter, the days are short and generally cloudy.
Christmas lights and holiday fun helps get me through November and December, but when the decorations come down in January, the cloudy, dark days can easily bring a person down.
So, I decided to extend the sparkle of the holidays right through winter by making an elegant candle holder.
I started with an inexpensive, plain votive cup. (I got mine at the Goodwill store for less than a dollar.)
At first, I planned to add just a bit of sparkle to the bottom third of the cup, so I started with strips of 1/4 inch Sticky Tape, like this.


Leaving the top of the tape on, I went in between the lines with Designer Dries Clear Adhesive and added a light layer of  glue.
NOTE: You will want to use your Ultrafine Metal Tip for this and really spread the glue around. If you put it on too thick, it may drip down the side of the glass.
On the glue, I sprinkled Ultrafine Transparent Glitter in Blue Rain (120).


Then, I peeled off the covering on the tape and added 
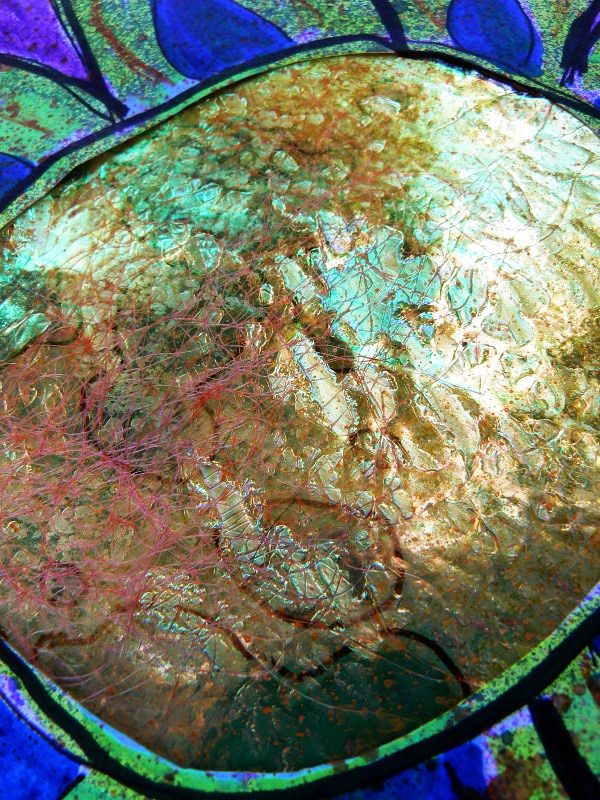
Faux Snow. And this is where I got a bit carried away … In fact, I loved the look of the Faux Snow so much, I used Designer Dries Clear Adhesive to cover almost the entire exterior of the cup! It reminded me of a sparkly sweater and I just kept going and going.
Then, using my finger, I applied a little adhesive to the top rim and dipped it in some additional glitter.
I let the cup dry over night and then gently brushed off the excess.
Naturally, I wanted a little more added to the votive. I found a couple of clear beads from Maya Road in my stash and went to work making embellishments for my votive.
The first one has a flat back, so I used Art Glitter’s Very Black Permanent Stamp Pad and a Tim Holtz snowflake stamp to add a bit of design to the back.


I then heated it to set the ink, covered the back lightly with a layer of Designer Dries Clear Adhesive and dusted it with the same Blue Rain glitter I used on the glass.
Then, I thought that as beautiful as this white and silvery votive was, I still might like a little color. So, I took a smaller bead and covered one side with adhesive and then a layer of Microfine Opaque Bahaman Blue (512).  Because the surface was not flat, this was a bit more difficult and I had to repeat the process once the first layer was dry. Keep in mind that if you do the same, make sure to smear the adhesive with your finger … Designer Dries Clear Adhesive can dry with a bit of dimension that you will be able to see in your finished product if you don’t smear it out.
Next, I attached a bit of ribbon and a few jump rings.


But, it still didn’t feel quite finished to me.
So, I adhered a piece of Sticky Paper to a scrap of white cardstock and then ran it through my Sizzix Big Shot with the small bird die from Tim Holtz. Then, I removed the protective layer off of the Sticky Paper and covered the image in the same Blue Rain glitter. For a final touch, I added an eye with Ranger’s Liquid Pearls and then attached it to the votive with Designer Dries Clear Adhesive. Because I was attaching it to the Faux Snow on glass, I had to hold it for a minute or two before it took hold.


Then, I inserted a flameless tea light and …


CAUTION: I have no idea how Faux Snow or glitter will hold up to heat or a flame, so I would recommend ONLY using flameless lights inside the votive. They are safer and just as pretty!
This is sure to keep the winter blues away!
I received Art Glitter products in exchange for this post.

Wednesday, January 11, 2012

Fantasy Fiber Foto Frames by Emily M. Miller

Fantasy Fiber Foto Frames...say that five times fast! I love how diverse Fantasy Fiber is and that’s why I like to use it to frame photos with. You can use just a little or a lot. Form it into a shape or just simply use it as a backdrop.


I almost always use it sparingly. You can see on this first example I simply laid a few wisps of fiber in a square shape slightly larger than my photo, overlapping 3 colors a bit. Then I put my bakers parchment paper on top and ironed for just a second or two (with my iron set to cotton/med.-high). Glue it on back with Designer Dries Clear…done!

My altered kitty photo is part of a book exchange project I'm involved in where some of the backside is visible. I really like how the fiber shows my recycled cardboard box background. I'll be making 28 of these and the fiber is by far the easiest step!


For this second set of examples I started with a thin base again like above, put my photo on top before fusing. Then I placed a few strands around my subjects, making sure the ends overlap with the ends underneath and even allowing some wisps to cover their faces. Cover with parchment paper and lightly hit with the iron just where the fiber sits on top of your photo, fusing it on the edges to the fiber layer below.


This works perfect with home printed photos, the heat won’t bother them at all. I apologize for not trying it on commercial processed photos, but I would think that they would be fine too. I will try it and give you an update later in the comments. If you want to try it, just be sure to keep the top fiber layer thin and it won’t take much heat to fuse them. With a very short dwell time the parchment paper should protect your photo.

You will need to flip the photo over and iron it again to fuse the back layer. This technique makes a nifty sandwich effect. Now you can trim away the fibers that cover your subject with scissors or simply pull them off with your fingers.


This last example uses the fiber in a shape. Place some Fantasy Fiber in the shape of a heart on top of your photo (use a variety of colors), place your hand on top of the heart and slide your photo out from underneath. Place parchment paper on top and press iron over heart for 3 seconds or so. Cut away random strands in middle for a sharp edge, or leave them shaggy for a fluffy effect. Glue onto photo with Designer Dries Clear adhesive.


Now what you do with it is up to you! Add to a scrapbook page, fit inside a Fantasy Film envelope or mount on fabric. It’ll all look fantastic! (P.S...I'll show you the Fantasy Film envelope later!)

Saturday, January 7, 2012

Glittery Necklace Holder by Cassandra Midkiff

I’ve been looking for a way to display some of my favorite vintage necklaces. I wanted it to be arsty and preferably romantic but have never found anything that suited me so I decided to make my own necklace display.


I started with a Manzanita branch that I picked up in my backyard, any interesting and sturdy branch will do.  I found one that would fit my 7" by 2 3/4" craft board. Using a paint brush and some diluted Designer Dries Clear adhesive I painted the branch and sprinkled my Ultrafine Transparent glitter in Bronze (#290) on top, after shaking off the excess glitter I sat it aside to dry.


Moving onto my board I found a simple scrapbook paper to act as my background and glued it onto my board and finished the edges with my brown ink pad.  I attached some picture frame hangers onto the back, I suggest doing two separate hangers on each corner since the necklaces are heavy. Setting my branch on top I marked off two areas with a pencil where I’d secure the branch with some wire. I drilled holes into the marked spots.  Before attaching my branch I smeared some adhesive to the top of my board sprinkled some Movie Star Shapes (Dazzlers #45) on top and then sprinkled it with Ultrafine Transparent glitter in Urchin (#169).


While the board was drying I decided to work on a vintage hummingbird I’ve had for awhile. The bottom feathers of the hummingbird had turned yellow with time and some feathers had been worn in spots so I saw the opportunity to add a little more sparkle to the piece. I used my diluted adhesive and paint brush again painting onto the bird in the discolored spots and on his plastic beak and sprinkled him with Urchin glitter.


Going back to the branch I placed it on top of my board and secured the branch in place through the holes with wire.  I then attached the bird to the back with wire onto one of my picture hangers.  Next I took some vintage Millinery flowers that I’ve been collecting and attached them with adhesive. Once everything was dry I added my vintage bling and now I have beautiful piece to show off my collection.

Tuesday, January 3, 2012

Fairy Globe Art by Candy Spiegel

Last May, at the Great Lakes Mega Meet, I discovered a new product and promptly fell in love … Globecraft Memories. The globes come in kits with chipboard frames that can be layered around a globe — which is perfect for 3-D items.

It’s taken me a while, but I finally put one together using some wonderful products from Art Glitter.


This one was particularly challenging to photograph because of the reflections in the globe, so I’ve included some close up photos to help you see all of the dimension and sparkle in this project.


First, I stamped the fairy (from JudiKins) three times on X-Press It Blending Card and colored each image with Copic Sketch Markers. Then, I cut the three images out and used foam adhesive to attach them together for dimension.

I thought her dress and hat should be really special. I imagined the dress as layers of beaded fringe, so using Designer Dries Clear Adhesive with the Ultrafine Metal Tip, I covered her dress and hat in Small Glass Beads in Clear (810) from Art Glitter.


Then, I added Microfine Transparent Winter White Glitter (711) to the spots on the wings and her socks. Since this glitter is transparent, the color shows through underneath.


I wanted her to have a bit more sparkle, so I added Microfine Transparent in Poupon (717), which is also transparent, to the place where her wings come out from her body.

While that dried, I turned my attention to the frame.

I wasn’t in the mood to trace, cut and sand, so I decided to ink the frame instead of covering it with paper. I used Rusty Hinge Distress Ink to cover each piece. Then, I used stamps from Tim Holtz and Studio 490, along with Ranger Archival Ink, to create pattern.

Next, I used Designer Dries Clear Adhesive to adhere the fairy and the globe to the background, and then to attach each of the frames to the top.

For accents, I covered some Grungeboard flowers from Tim Holtz with Vintage Glass Glitter in Chocolatta (624). (you could use cardstock or chipboard to make your own, if you need to). I glued those to the frame and then found a few dried flowers in my garden and added them. Once the adhesive was dry, I added a bit of twine from May Arts and some additional glue underneath to make it all stay put.

I love the juxtaposition of the Vintage Glass Glitter with the dried flower pods …


(TIP: It takes a bit more time for Designer Dries Clear Adhesive to set up on surfaces other than paper or fabric. So, I took my time and watched television while I held each flower in place and waited for the glue to set. It does adhere beautifully, it just requires a bit more patience than we are used to.)

I covered some additional Grungeboard die cuts (of butterflies and dragonflies) in Ultrafine Transparent Halo (230), Ultrafine Opaque Sand (68) and Ultrafine Opaque Sage (122) and adhered them around the frame.


Finally, I added a few brads and pronounced it finished.

(I received Art Glitter products in exchange for this post)