Pages

Sunday, June 30, 2013

Happy 4th of July


Supply List:
Art Glitter #349 Garnet Ultrafine Opaque glitter
Art Glitter #335 Sun Ray Chunky Opaque Hologram Glitter
Art Glitter Dries Clear adhesive
Authentique Paper- Pride
Authentique Pride- Details sticker sheet
Assorted die cut shapes for title bracket shape

As I scrapbook in 8x8 rather than 12x12 I began by cutting my base layer down to size.  Then I added the first elements to the page.  I used Authentique Pride detail stickers (banner) in the upper left corner of the page and used the stickers to anchor bakers twine in place.


To add a little extra bling to the banner I used Art Glitter Dries clear adhesive and garnet glitter on the stars. 

Using my die cut machine I created a bracket shape and a matching base.  I covered the mat (base) with Garnet red glitter then added pattern paper on top.


As July 4th is still a few days away, I have chosen to simply add a photo mat to the layout with the intention of adding a photo after the 4th.  I actually do this quite a bit.  I find that when I scrapbook ahead of an even I can pose my boys perfectly and ensure that they are dressed correctly to coordinate with the layout.  I guess that makes me a real scrapbooking geek, but by boys seem to think it is fun!

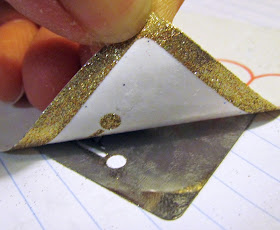
To create the glitter stars I used die cut shapes (but this could be done with punches, or hand cut stars).  I ran the stars through my Xyron X to totally coat them in adhesive, then glittered.  HERE IS A GREAT GLITTER TIP FOR YOU- when glittering small items like the stars, I like to simply dip the paper into the glitter rather than dumping out the glitter.  The mess is less and I use less glitter in the process.


After glittering the stars in both Sun Ray and Garnet Glitter from Art Glitter the stars were added to the layout.  Some were placed flat on the page, and some were popped up using foam adhesive.

The title was created using die cut double sided adhesive and Garnet Glitter.

I hope you have enjoyed this glittered layout as much as I enjoyed creating it! 


Thanks for stopping by to see my creations.
Missie Todd
createdbymissie.blogspot.com


Remember, for the entire month of June any order you place at http://artglitter.com/ of $25 or more you can use the coupon code of AQ20 for a 20% discount! You can also be entered in a prize drawing at the end of the month by commenting on this blog all month long! One comment per person per post! Also, every Wednesday for the month of June Authentique Paper will be featuring Art Glitter on there blog with a prize package offered also.  Check them out at http://blog.authentiquepaper.com/

Friday, June 28, 2013

Old Glory

The month of June Art Glitter is partnering with Authentique Papers. The papers are so pretty and the addition of Art Glitter Makes them POP! Use the code AQ20 on your order at www.artglitter.com to save 20% on your order of $25 or more! Happy Shopping and hope you enjoy the month of Art Glitter with Authentique!

This time, we have created with the gorgeous Freedom Collection.  I made two creations.  The first is a card.  


MATERIALS:
Art Glitter Microfine Pearlescent 533 Mini Pearl
Authentique Pride Collection Papers
Authentique Pride Collection Sticker Sheet
White Card Stock
Dreamweaver Stencil LL 359 Flag
Dreamweaver Double Sided Mounting Paper
Dreamweaver Handmade Hawaiian Coconut Soap
Dreamweaver Large Stencil Brush
Pencil
Craft Knife
Adhesive

DIRECTIONS:
1)  Center the flag on top of the Double Sided Adhesive Paper, being sure to leave a border around the stencil, and trace the blue area with a pencil.

 2)  Very gently use the craft knife to cut through the protective layer of paper around the tracing and remove.
3)  Rub the bar of soap across the back of the stencil to create a light, cloudy, layer.
4)  Use the stencil brush to remove any of the soap "crumblies" that cling to the edges of the openings on the stencil.
5)  Place the stencil, soap side down, so that the stars are on the opening in the paper.
6)  Pour a little Art Glitter 533 Mini Pearl over the stars and rub in with your finger.  This is the perfect glitter for this because the small grind allows it to get into all of the detail, and the pearlescent effect makes the stars more opaque.
7)  Brush off excess glitter with the stencil brush.
8)  Carefully remove the stencil.
9)  Remove the remaining paper from the adhesive and place the stencil, soap side down, so that the blue square surrounds the stars.
10)  Pour a little Gold Tone onto the pole and the edges and rub in with your finger.
11)  Pour the Ruby Red onto the stripes and carefully rub in with your finger.  Avoid the square.
12)  Pour a little Terra Nova into the square, right over the stars, and rub in with your finger.
13)  Brush off any excess glitter with your stencil brush.
14)  Place the whole thing face down on a flat surface and carefully remove the adhesive paper from the stencil.  Make sure the stencil stays flat on the surface the entire time.
 15)  Brush off the excess with your stencil brush.
16)  Assemble the card.

Now for the bonus project!  A cute, little patriotic birdhouse.


MATERIALS:
Art Glitter Vintage Glass Glitter 611 Antique Silver
Authentique Pride Collection Papers
Authentique Pride Freedom Collection Sticker Sheet
Authentique Pride Collection Alphabet Sticker Sheet
Authentique Pride Freedom Collection Word Sticker Sheet
Small Birdhouse
Blue Acrylic Paint
Cotton Swab or Paintbrush
Ruler
Big Bite
Craft Knife

I won't go through an entire tutorial on this one.  Suffice to say, first you paint the edges.  I used a cotton swab, but you can use a paintbrush.  Then, you measure and cut the panels from your choice of paper.  I pressed the front onto the birdhouse to determine where the perch was, and then used the Big Bite to punch the hole there.  
When you adhere your papers, don't forget to use a little Designer Dries Clear.
Finally, you add the stickers and beautiful glitter.  I chose the colors I did because they had a vintage feel.  When applying the stripes and edges, I used the Sticky Tape so that I did not have to worry about the edges being crooked.  I simply peeled off one side, adhered it to the house, and then peeled the other side and poured the glitter on.
Here is a quick peek at the back of the house.
Thanks for stopping by today.  Come visit my blog some time at www.rememberinglifesmoments.blogspot.com.  
Until next time, glitter on!


Remember, for the entire month of June any order you place at http://artglitter.com/ of $25 or more you can use the coupon code of AQ20 for a 20% discount! You can also be entered in a prize drawing at the end of the month by commenting on this blog all month long! One comment per person per post! Also, every Wednesday for the month of June Authentique Paper will be featuring Art Glitter on there blog with a prize package offered also.  Check them out at http://blog.authentiquepaper.com/

Wednesday, June 26, 2013

American Lady

SuppliesArt Glitter Sticky paperArt Glitter Fantasy Film Spring MorningArt Glitter 211 Glacier Ultrafine Transparent Glitter (Lady Liberty)Art Glitter 346 Warm White Chunky Transparent GlitterArt Glitter D18 Showgirll DAZZLERSArt Glitter D56 Dragonfly DAZZLERS (center of flower)
Art Glitter Designer Dries Clear glue
Art Glitter Metal Ultrafine Tip
Authentique "Dignity" Paper Authentique "Pride" DetailsAuthentique "Independence" PaperTimeless Twine
Mon Ami Gabby Couture Accents (flower)
Cricut
Cricut George Basic Shapes,
Cricut Wall Decor
Cricut Craft Room Software
Cricut Independence Day
Mini Pom Pom Trim
Sizzix Tim Holtz Texture Fades Rays Embossing Folder
Star Conch
American Crafts Premium Ribbon Bleu Velvet

How To's
The month of June Art Glitter is partnering with Authentique Papers. The papers are so pretty and the addition of Art Glitter Makes them POP! Use the code AQ20 on your order at www.artglitter.com
 to save 20% on your order of $25 or more! Happy Shopping and hope you enjoy the month of Art Glitter with Authentique!


The Authentique Pride line is perfect for scrap booking the 4th of July, Memorial Day, and any historical site.  Use it to scrapbook those Statue of Liberty pictures.  And use the Art Glitter products for all the firework details!  To create the title, cut Art Glitter Sticky Paper with a digital cutter such as a Cricut or Cameo.  For this title, Cricut Craft Room Basics formed the word Lady, and Wall Decor was used for liberty.  Use a heavy duty blade in the Cricut with the red printed side of the sticky paper facing up.  Peel of the red sticky paper and sprinkle glitter over the sticky side.  Shake off excess and apply to page with designer dries clear glue.Get the look of a flag with the Authentic paper, and embellish with a circle of stars.  This circle was created with Cricut Craft Room software, George, Basic Shapes, and Independence Day.  It was then embellished with Timeless Twine.
To add the sparkle of fireworks, use the Art Glitter Fantasy Film with the Sizzix Tim Holtz Texture Fades Rays embossing folder for a star burst effect.  Just place three sheets of the Fantasy film inside your embossing folder and one sheet of parchment paper on top, leaving the embossing folder open.  Press with your iron for three to five seconds, close the embossing folder (leaving parchment paper in place) and run it through your embossing machine as usual.  By running the Fantasy film through the embossing machine while it is still warm with parchment paper in place, it will hold it's shape better and be less likely to tare.  Embellish the lines with Warm White and speckles with Showgirl DAZZLERS, using the Art Glitter Metal Ultra Fine Tip and Designer Dries Clear Adhesive.
And custom match your embellishments with Art Glitter's colored glitter.  This flower originally had brown stamens, and was custom matched to the Authentique Pride line with Art Glitter's  Dragonfly DAZZLERS.  What a fabulous blue, perfect for the patriotic paper crafter!  The Authentique embellishment is embellished with some mini pom pom trim.


By Clare Dempsey,  you can find more of Clare'e work at her blog:  Cricutcraftyclare.blogspot.com. 

Remember, for the entire month of June any order you place at http://artglitter.com/ of $25 or more you can use the coupon code of AQ20 for a 20% discount! You can also be entered in a prize drawing at the end of the month by commenting on this blog all month long! One comment per person per post! Also, every Wednesday for the month of June Authentique Paper will be featuring Art Glitter on there blog with a prize package offered also.  Check them out at http://blog.authentiquepaper.com/

Monday, June 24, 2013

Celebrate With Authentique and Art Glitter

 
For the month of June, Art Glitter is partnering with Authentique Papers to bring you some great new creations. The papers are so pretty and the addition of Art Glitter is sure to make them POP! Use the code : AQ20 on your order at www.artglitter.com to save on your order of $25.00 or more, Happy Shopping and hope you enjoy the month of Art Glitter and Authentique.
Supplies used from Art Glitter
Micro fine Opaque Glitter
#300 Ruby Red
#27 Navy
#508 Silver Moon
Ultrafine Transparent Glitter
#85 Crystal
Small Sticky Paper

My card today uses the "Pride" collection of papers from Authentique
The card is a pocket card that has openings for and a tag and anything else you might want to give. I made the card by first cutting a cat that when folded is 4 1/2 X 6 1/4
then I cut a second card the same size using an different pattern. I folded the front of the card in and the inside of the card back to form the pockets which the used adhesive to adhere to the card. I added the silver glittered stars to the front pocket.
The tag was done using the star stencil from Dreamweaver stencils and the double glitter technique . I used Ruby red for the stars and Navy for the flourishes and for the background I used Crystal glitter. Here is the finished project.
                        I hope everyone has a glittering and sparkling  4th of July!
To see more ideas for cards using Art Glitter go to my blog


Remember, for the entire month of June any order you place at http://artglitter.com/ of $25 or more you can use the coupon code of AQ20 for a 20% discount! You can also be entered in a prize drawing at the end of the month by commenting on this blog all month long! One comment per person per post! Also, every Wednesday for the month of June Authentique Paper will be featuring Art Glitter on there blog with a prize package offered also.  Check them out at http://blog.authentiquepaper.com/

Saturday, June 22, 2013

Star Spangled 4th


Deck out your party and show your patriotism this July 4th with these 3-d stars.  No matter if the party is indoors or out, they make the perfect decorations to welcome your guests and bring  on the fun.  The fabulous glitter from makes these stars a celebration of your liberty this 4th of July. 
 
 
Supplies Needed:
    From Art Glitter:                                                   
       Garnet Ultrafine Opaque Glitter                                                     
     Crystal Ultrafine Transparent Glitter                                             
     Atlantis Ultrafine Transparent  Glitter                                          
 
Additional Supplies:  Paint Brush-to spread glue, star template or die cut, scoring tool, hole punch, twine such as baker's twine 


Begin by creating the star using your favorite method to do that.  A couple of ideas are to use a template printed off the Internet or by using a die cut machine to cut one.   You can cut different sizes of stars or all of the same.  For each 3-d star you make you will need 3 stars cut.  I chose to make two 4" sized stars and one 6". 
 
 
Once you have the stars made, squeeze small amount of glue onto one side of them and use the paint brush to spread it out.  


Sprinkle the Crystal glitter over the glue making sure to work quickly so the glue doesn't dry.  You can save time and do all of the stars on one side first and allow them to dry and once those sides are dried flip them over and do the same to the other sides. 
 
Using the metal tip on the Designer Dries Clear, run a small line of glue along the edge of the star and sprinkle on the glitter.  I alternated the glittered edges by doing some using the Garnet glitter and some using the Atlantis glitter to give the stars their own individual looks to match the paper designs.  If you work on this step while glue used for the base coat is still a little tacky, you will get some of the glitter to adhere as seen in this picture.  That's okay.  It will add more shine and color.
 
 
Once all the stars have completed dried and outlined in glitter, score 2 of them down the center.  Run a line of glue down the center of the one that was not scored and adhere the scored stars one on each side and lightly fold outwards the stars at the fold lines to create the 3-d look.   Punch a hole in the top and add some twine to create the hangers. 
 
You are now ready for the perfect star spangled party.  Your guests can be greeted as they enter with these sparkling stars that will add to the excitement of your event.  If you're not having a celebration create some anyways to ring in your own July 4th pride.  


Remember, for the entire month of June any order you place at http://artglitter.com/ of $25 or more you can use the coupon code of AQ20 for a 20% discount! You can also be entered in a prize drawing at the end of the month by commenting on this blog all month long! One comment per person per post! Also, every Wednesday for the month of June Authentique Paper will be featuring Art Glitter on there blog with a prize package offered also.  Check them out at http://blog.authentiquepaper.com/