My life is always an adventure, and since we are here in Hawaii, I am going to be living more of the Hawaiian way... a slower pace, relaxing, and I want to see as much as I can while we are here, so my time will be more limited. I promise I will not stop crafting or using glitter. Glitter will ALWAYS be a part of me.
For my last project, I wanted to do something fun, a little recycled, and glittery (duh, isn't that what this is all about)!
I made party lights, perfect for spring and summer!
Products used:
Art Glitter: Ultrafine Opaque in #355 Sunrise, #44 Kelly, #233 Blue Hawaii, Chunky Opaque Hologram in #124 Jet Eye.
Designer Dries Clear Adhesive
Christmas Lights or Party Lights
Egg Cartons. At least as many "eggs" as you have lights. My strand had 25 lights, so I used three dozen egg cartons.
Spray Paint - I went with white (if you want to alter the egg carton colors)
Paint brush
knife to cut, I used a pocket knife since that is what I could find. (gotta love moving).
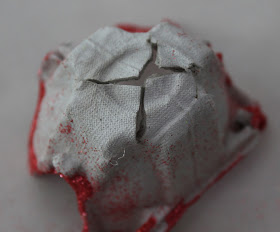
I started with the egg cartons. I used the paper ones, since I was planning on spray painting them. Spray painting on the Styrofoam ones do not work as well since spray paint eats at the Styrofoam. So I cut them apart and laid them out on a piece of cardboard outside.
I then sprayed them with spray paint. This is tricky since they kind of blow around because they are so light weight. But I did a couple coats. The cartons really soak up the spray, but I wanted them to be a little lighter color.
After they dried overnight, it was humid in Hawaii so it took a little longer, I began to add the glitter. I knew that I wanted to alternate between the three glitters I chose so I did at least 8 of each color.
I painted Designer Dries Clear Adhesive around the edges of the egg carton, and then dunked them into the glitter to cover them.
Now after those dried, I needed to add the lights. I took my knife, and cut an "x" in the bottom of each "flower".
I still wanted to add more glitter at this point, probably because there are so many beautiful Art Glitter colors. I have been wanting to use the Chunky Opaque Hologram Glitter, because it is my favorite. So I busted out my Jet Eye. It may be true love, since I love its super bling. I painted the tip of the light with Designer Dries Clear Adhesive, and just dipped it into the container.
The next step was to hang them up! Here are a bunch of amazing pictures of the final project.
Thank you all for your kind feedback over the year. This was a fun project and a great way to welcome Spring, and all those Back Yard Barbeques coming up! Now please stop by my blog oneheartscrapper, for another glitter project. I will also be sharing a story on why glitter is so important to me.
Have a wonderfully glittery year, and good luck to the New Design Team!! I can't wait to see what they have created!!


Oh, I have tried lights with AG before, but never thought to put it on the lights! How pretty!
ReplyDeleteLOVE it!!
ReplyDelete