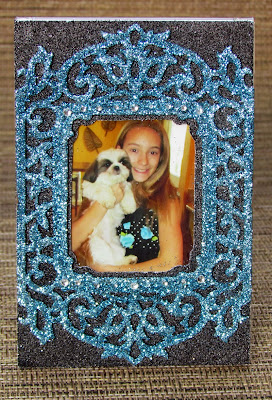
Art Glitter is partnering with Want to Scrap for the month of August. For this post, I was inspired by their beautiful frame set. I made two different functional, glittering frames. It was simple, cheap, and fun.
For the blue frame, here are the materials:
Art Glitter Designer Dries Clear with the ultrafine metal tip
Art Glitter Ultrafine Opaque 233 Blue Hawaii
Art Glitter Ultrafine Opaque 113 Sky
Art Glitter Ultrafine Pearlescent 188 Black Vinyl
Art Glitter Sticky Paper
Art Glitter Sticky Tape
Want 2 Scrap Vintage Fancy Frames
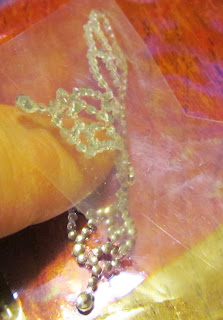
Want 2 Scrap Clear Rhinestone Jewels
3.5 x 5 Plain Plastic Frame
Ultrafine Point Sharpie Pen
Craft Knife
Sponge Paint Brush
Picture
Adhesive
Paper Trimmer
DIRECTIONS:
1) Use the Sharpie to trace around the inside of the frame on the sticky paper and the photograph.
2) Use the craft knife to cut a little bit in from the tracing on the paper.
3) Use the paper trimmer to cut a little around the outside of the photo. (The tracing and cutting are unnecessary if you have a picture that fits well in the frame without cutting it down).
4) Use the sponge brush to cover the top of the frame with Designer Dries Clear.
5) Cover the frame with Blue Hawaii and let dry.
6) Peel the adhesive off of the paper and attach the frame.
7) Pour the Black Vinyl glitter over the whole thing and shake or brush off the excess.
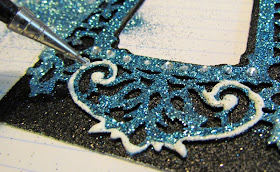
8) Use the Designer Dries Clear with the fine metal tip to add the rhinestones and details with the Sky glitter. Let dry.
9) Use the adhesive to position the photograph on the background paper that came with the frame.
10) Use the sticky tape to adhere the frame.
This is what it looks like done!
For the purple frame, most of the techniques are the same, but I added a couple of things.
MATERIALS:
Art Glitter Designer Dries Clear with the ultrafine metal tip
Art Glitter Ultrafine Pearlescent 186 Purple Polkadot
Art Glitter Ultrafine Transparent 151 Butterfly
Art Glitter Ultrafine Transparent 85 Crystal
Art Glitter Fantasy Film Strawberry
Art Glitter Sticky Paper
Art Glitter Sticky Tape
Polyester Lace
Want 2 Scrap Vintage Fancy Frames
Want 2 Scrap Wonderful Wings Bling
3.5 x 5 Plain Plastic Frame (this one had a magnet)
Ultrafine Point Sharpie Pen
Craft Knife
Sponge Paint Brush
Picture
Adhesive
Paper Trimmer
DIRECTIONS:
1) Follow the previous project steps 1-5, changing the color of the frame to Purple Polkadot.
2) Decide where to place the lace.
3) Peel off the paper, exposing the adhesive, and adhere the lace.
4) Cover the area with Butterfly.
5) Rub the glitter in with your finger and brush off the excess.
6) Peel off the lace, exposing the adhesive underneath.
7) Pour Crystal Glitter over the top of the paper and brush off the excess.
8) Adhere the purple frame with sticky tape and the Designer Dries Clear. Let dry.
9) Adhere the whole frame to the plastic with sticky tape and insert the photograph.
10) Cut a butterfly from the set and "roll" off the plastic onto the Fantasy Film
11) Cut around the butterfly. Adhere to the frame with regular adhesive.
Here is what it looks like completed.Thanks for stopping by today. I hope you enjoyed the post. Please visit me any time at my blog www.rememberinglifesmoments.blogspot.com.


These are absolutely beautiful!
ReplyDeleteOh, I love all these layering tips! I'm gonna have to play with AG today!
ReplyDeleteLove all the sparkly layers.
ReplyDeleteAllie Gower
Want2Scrap