We crafters are so fortunate to have a wide variety of gorgeous materials available! The colors, the textures, the shapes give us so many opportunities to create unique and beautiful things. I really love the effects you get with Fantasy Film – use it for a great play of color and texture.
For this project I crumpled up some Art Glitter Fantasy Film in Krista’s Eyes color. Crumpling gives the light lots of surface area to bounce off. I used two layers because I wanted deeper color and more depth.
I used some metal stain to color the inside of the heart pendant blank/bezel.
Then using Art Glitter Designer Dries Clear adhesive I glued down both layers of the Fantasy Film into the blank. I weighted it down while drying to make sure the film stayed in place.
This alone would make a beautiful simple pendant. But I chose to add a few more elements and use the Fantasy Film as the background. This seahorse charm was the absolute perfect one! I further accented with Dazzlers, Borealis #D26 and Dazzlers, Movie Stars #D45 and some wire.
Topping it with resin gives it that professional look while locking everything in. (I use Easy Cast epoxy). Let cure for 3 days.
Use this technique to create a stunning, and completely unique, pendant which can be used for a necklace, backpack pull, key chain, magnet, or brooch.
Note: I was given product in exchange for this article..
Wednesday, November 16, 2011
Wednesday, November 9, 2011
Glittery Jar of Delight by Diana Gonzalez
Recently, I acquired about 2 lbs or so of Red Glitter (by Art Institute Glitter, it was on sale, and it still is HERE). So, I put it together with sentiment stickers from a past Sampler Kit, and little bottles by Tim Holtz, and some hemp rope, and came up with this:
I antiqued the jar, by rubbing a nail file onto it, and all around the sides. The nail file is one of those rough and tough ones that you use on acrylic or false nails.
That’s all, really. I glued the cork to the jar, and wrapped a little bit of hemp rope around the rim, then glued the sentiment, “delight” because really, what else do you call a tiny little jar filled with glitter, right?
Oh, and of course wondrous, fabulous, amazing red glitter by Art Institute Glitter.
Then, a jump ring, and chain put it all together.
Tuesday, November 8, 2011
Thanksgiving Hostess Gift by Clare Dempsey
I love to bring a little something for the hostess on Thanksgiving! I know how much work goes into cooking for this holiday and love to have a little thank you for the cook! This year, I will be bringing a pin I made with Art Glitter and organza. And just so the host does not feel left out, I will pin it to a ribbon and tie the ribbon around a bottle of their favorite beverage!
Supplies:
Art Glitter Ultrafine Opaque Glitter #343 Chestnut
Art Glitter Fabric Dries Clear Adhesive
Brown Organza fabric cut 3” x 42”
Thread
Sewing Machine
Low Temp Glue Gun
Pretty Button
Chipboard 2 inch circle
Brown Felt 2 inch circle
Pin back
Start by cutting your organza. I actually used a roll of organza I found at JoAnn’s and cut it 21 inches long. I then cut it in half lengthwise, so that I had two strips 3 inches wide by 21 inches long. I overlapped my two strips by an inch and ran a basting stitch down the center lengthwise.
I then added a bead of glue using Art Glitter Fabric Dries Clear Adhesive and sprinkled on my Chestnut glitter. Shake off excess and allow to dry. I pulled my basting thread so that the finished length of the strip was 14” and folded the strip in half.
I followed the instructions on the Maya Road Flower video HERE.http://www.youtube.com/watch?v=Ez6MLD_hTDc
Some tips for the organza instead of ribbon:
• Tie a knot at both ends after to gather and clip off the lose threads before gluing with the hot glue gun.
• Don’t wrap your center too tight or you won’t have a good space for your button. Use a hole about the size of a pencil in the middle of your flower.
• You will have to fold your organza in half as you go.
Here is a close up of the finished flower pin.
I just used more of the organza strip to tie a bow around the bottle and then pinned the flower to the center.
Friday, November 4, 2011
Glitter-Backed Mini Mosaic by Lori Mendenhall
I love making mosaics, but they take a long time to complete – and I don’t like grouting. So to get around my impatience I make mini-mosaics. But instead of traditional glass/tile and grout I go for the mixed media look incorporating glass, metal, pearls, and glitter. So cute, fun, and quick!
Here’s how to put together one of these sparkly mini mosaics:
1. Start with a pendant blank (bezel). I like to purchase these from Etsy. Coat the entire bezel with clear-drying glue such as Art Glitter’s Designer Dries Clear Adhesive. Then fill the whole area with glitter and shake out the excess. In this piece I used Art Glitter Chunky Opaque Hologram, Comet, #251. Let dry.
2. This glitter is extremely sparkly so I chose muted materials to balance it out. I lined the edges with tiny glass tiles. To make it more interesting I added some pearls. In the center I used a copper charm – don’t forget to snip off the ring. My final touch was a couple of wire spirals. I didn’t want to leave too much glitter showing because it might be overpowering. Had I used a less intense glitter I might have left more exposed. The artist gets to decide what is “right” – I love that, don’t you?
3. Once you pick your elements and are happy with their placement, glue them down. Let dry thoroughly. This is very important because any remaining moisture can ruin your resin and therefore your whole piece.
3. Fill your bezel with resin. I use casting resin. The kind you buy at the craft store is fine, just be sure to buy the epoxy resin and not the polyester kind. Let cure overnight until hard, and three days for a full cure.
Note, I received product in exchange for the write-up of this project.
Tuesday, November 1, 2011
Glitter Fabric Frame Fun by Emily M. Miller
Happy Dia de los Muertos to you all! Day of the Dead has become a favorite holiday of mine. Living in Arizona for the past 20 years has put me in tune with the traditions for this holiday celebrated in Mexico and around the world in many cultures. The holiday focuses on gatherings of family and friends to pray for and remember friends and family members who have died. It is particularly celebrated in Mexico, where it attains the quality of a National Holiday. The celebration takes place on November 1st and 2nd, in connection with the Catholic holidays of All Saints' Day (November 1) and All Souls' Day (November 2). Traditions connected with the holiday include building private altars honoring the deceased using sugar skulls, marigolds, and the favorite foods and beverages of the departed and visiting graves with these as gifts. (I copied all this from Wikipedia)
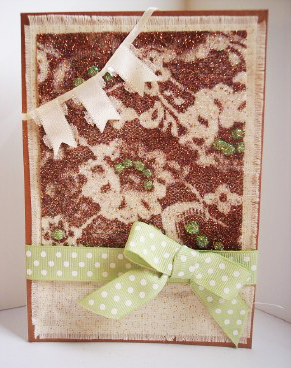
I love all the imagery and wonderful colors that remind me of Mexico and Day of the Dead. When I saw this material I just had to glitter it! I wanted to put it in a recycled 5 x 7 frame I had, but 5 x 7 didn’t showcase the material enough. So I covered the frame with it too! This can be done with any size frame.
Take out the back cardboard in your frame. Center it over the backside of your fabric and trace around it. Then move in at least ½ inch in on all sides and draw another rectangle. This inner rectangle is the one you will cut out and place in the center of your back cardboard. With fabric scissors cut out rectangle and 4 sides as shown by blue lines below. This does not have to be perfect, I repeat, it does not have to be perfect!
Lay rectangle on cardboard and place into frame to get an idea of where it should go. Draw guide lines at corners of fabric and take out of frame. Pour some Designer Dries Clear adhesive into a tray and add a few drops of water. Using a foam brush paint glue onto cardboard in between guide lines. You don’t have to be perfect here either, just close to the edges. Hold your fabric over glue and lay it down. Again, it doesn’t have to be perfect! Do you see a pattern forming?
Paint glue onto remaining edges of cardboard and glitter with Ultrafine Opaque #79 Black. Set aside to dry.
Lay remaining 4 fabric sides on frame to see where they need to go. Slide them down far enough to go just around the inside edge of frame and to make sure all the diagonals cover frame. We are only concerning ourselves with the front and the sides of the frame, we will take care of the back later. And guess what, it doesn’t have to be perfect! Paint glue on one side at a time and glue rest of fabric onto frame.
Use backside of frame as your guide and cut off remaining fabric…doesn’t have to be perfect! Using your Designer Dries Clear bottle with the Ultrafine Metal Tip attached, glue down corners as if you were wrapping a present, it there is excess over hanging cut it off before gluing. Smash and smooth fabric corners into place (you’ll understand when your doing it, it works great!). I have covered countless frames and even wood furniture this way and the DDC really hold the fabric for ages!
Take your double-sided Sticky Tape and run it along fabric ends. Lay the sticky tape down one side at a time and remove the protective red covering first before moving on to next side. Then glitter exposed tape with #79 Black.
Now you can go back to your cardboard piece and start glittering it. First straighten your fabric edges with Sticky Tape just like above. This time I glittered it with Dazzler #D15 Sea Nymph and filled in with Ultrafine Pearlescent #185 Varsity Blue.
Glitter your fabric as desired. Start with your darkest color first and keep going until all colors are done. Here’s what I used, in this order: Ultrafine Pearlescent colors - #175 Retro Red, #186 Purple Polkadot, #185 Varsity Blue, #182 Astro Turf, #178 Duck Tail. Ultrafine Transparent colors - #94 Key Lime, #93 Lemone.
Set aside and glitter frame in same manner, doing one side at a time, allowing each side to dry some before moving onto next side. Let dry completely.
Assemble frame. You can use spacers made from black foam core if you want your cardboard piece to be recessed. As you can see, my finished one isn't "Perfect", but it'll do just fine! Enjoy!
Friday, October 28, 2011
Recycled Journal Remade by Diana Gonzalez
Recently I had shown you a set of journals that I had made. Well, today, I decided to play around with them a bit more, and get a little more crafty with them. So I remade one of them. I hope you like it.
Well, so there it is. Do you like it? The flowers are crocheted, of course. I used Fantasy Film and Fantasy Fiber, by Art Institute Glitter, and some little cabochons in the middle there, of the flowers.
I LOVE that fantasy film! It’s so cool! This time, I crinkled it up, and THEN I ironed it (in between two pieces of parchment paper).
And of course, the fantasy fiber. I used a forest green shade of film, and glued it over some pink paper, and actually it looks really cool. Then, I added fantasy fiber, that was in a clear(ish) blue shade.
Then, I added that tissue tape, by Tim Holtz and the crocheted flowers by me. And the Cabochons. Now, this journal is ready to be used!
Tuesday, October 25, 2011
Using Glitter Lace Technique on Fabric by Clare Dempsey
I love the Art Glitter Videos, and one of my favorites is the Glitter Lace Card by Barbara Trombley. You can find the video here. This week I set out to see if I could get the same look on fabric. The look is a bit more subtle, but just as beautiful with Art Glitter!
Here is what you will need to make this card:
Art Glitter Fabric Dries Clear Adhesive
Another Glue that dries tacky such as The Rubber Café or Zig 2 Way glue
Art Glitter Polyester Lace
Art Glitter 343 Chestnut Ultrafine Opaque Glitter
Art Glitter 86 Angel Dust Ultrafine Transparent Glitter
Art Glitter 295 Ensalada Ultrafine Transparent Glitter
Ivory Canvas Fabric
Ivory Calico Fabric
Assorted Ribbons
Metallic cardstock
Cut a piece of canvas at least 1 “ larger than your Art Glitter lace sheet on all sides. This is more than you will need for your card, but will allow for cutting later. Press any wrinkles out of your fabric and allow to cool. Working on top of a sheet of Parchment paper (shiny side up) or a Teflon craft mat, apply your dries tacky glue and smooth over the surface of your ivory canvas fabric. Here is a photo of the canvas fabric with the dried glue.
You will want good coverage so that the surface for the lace will be flat when glue dries. Allow to dry overnight. In the morning, remove the canvas from the Parchment paper and apply the Art Glitter Lace on top of the glue. Because these glues dry tacky you will be able to reuse your Art Glitter lace later! Smooth the lace onto fabric and make sure it is adhering well. Begin by pouring your darker color first (for this card Chestnut) and tap off the excess. You will want to see the video for the specifics! Then remove lace and poor on the Angel Dust glitter. Highlight the flower centers with the Art Glitter Fabric Dries Clear Adhesive and apply the Ensalada color. Allow to dry.
Cut the card base with metallic cardstock. Cut the calico smaller than the card base and pull a few threads on every side to achieve a frayed look. Glue the calico onto the card base with the Art Glitter Fabric Dries Clear Adhesive. Glue the glittered lace fabric on top using the Art Glitter Fabric Dries Clear Adhesive also. Make a banner with a bit of ribbon and your scissors using the same AG Fabric glue. Tie a box and apply ribbons to the card with Glue dots on the back side of the card. I love the shabby chic combined with the glamour of the glitter!
Subscribe to:
Posts (Atom)