Saturday, July 16, 2011

Clockworks by Shannon Bielke

This was such a fun project! I found a clockworks in my supplies and decided to make a clock; it had been a while. . .


So, using only things I had on hand, I put one together. The base is made of foam board, and the front is made of various bits and pieces of things I had in my vast array of miscellaneous cool stuff I can't live without. I found my theme when I came across the tag with the woman's silhouette on the front.


The original plan was to glitter most elements as I placed them, but when I started arranging things, I realized the best way utilize the glitter was to use it as a focal point. The clock was just a clock with a random smattering of like images until I added the glitter to the numbers only.


I love how that one touch seemed to pull the whole thing together! There was just a bit of glitter on a part of the background paper, but that was only one of the many pieces that made up the whole of the clock face. I love this clock! I love the randomness of the parts, and I especially love the Art Glitter!


I'm finding I'm becoming more more and more comfortable using glitter and find more ways to use it all the time. This not just because there are so many beautiful colors of glitter and endless places to use it, but because it's fun, and positively addictive!

Tuesday, July 12, 2011

Art Glitter Types and Sizes Explained...

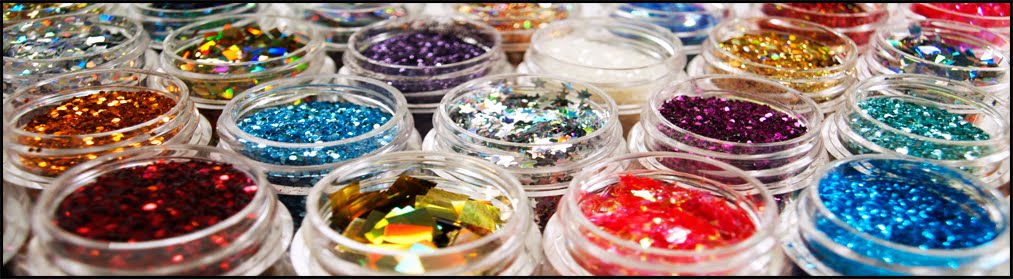
Since our fantastic designers have been skillfully experimenting with our product line I thought it might be helpful to explain the different types, sizes and cuts of glitter that we carry. I don’t know why we haven’t done it any sooner…the subject is long overdue so here we go…

The bulk of our glitter is cut from polyester films. Namely the Ultrafine, Microfine and Hologram lines. The films are very thin, so thin that you cannot see the dull side of the cut, thus giving them their high quality status. Some of the ultrafine opaque colors have a mix of metallic glitter in them as well. All the polyester glitters are acid free and safe for wearing on skin. Click here for a list of the Ultrafine Opaque colors with metallic glitter in them.

Our most popular and most sparkly line is Ultrafine. It is about 1/4 the size of that chunky craft glitter you probably used in Kindergarten. Microfine is then half the size of Ultrafine. Therefore, Microfine is a little less sparkly since it has half the surface area. It has a wonderful velvety look to it that can have a spectacular effect for the right project.


Currently we have over 400 colors in the following types:
Ultrafine opaque
Ultrafine opaque hologram
Chunky opaque hologram

Ultrafine transparent
Ultrafine pearlescent
Ultrafine neon transparent
Ultrafine neon opaque

Microfine transparent
Microfine opaque
Fine Vintage Glass Glitter
Shards Vintage Glass Glitter

Dazzlers Hexis
Dazzlers Funky
Dazzlers Slices
Dazzlers Flakes
Dazzlers Shapes

Faux Snow

The difference between Transparent and Opaque colors correlate directly to their names. The transparent colors are influenced by the surface color they are on and opaque colors completely cover the color they are on.

Hologram colors have one tone plus a full spectrum of refractive colors.

Pearlescent colors have a "satiny" look and possess both opaque and transparent qualities. Meaning they are slightly transparent.

Neon colors are of course very bright.

Vintage Glass Glitter is cut from actual glass films creating uneven sized particles. Its colors do fade with time. To help avoid fading/tarnishing you can spray your dry project with an Acrylic Spray, Matt Fixative or Spray Lacquer. Be sure to always use a spoon when applying the glass glitter and it is NOT recommended for children to use. The fine size is slightly larger than our ultrafine glitter and the shards size is several times larger.


Our newest glitter line is Dazzlers. They are much larger cuts of glitter in all kinds of shapes and sizes.
Dazzlers Hexis, you can actually see the six sides to this glitter
Dazzlers Funky, a concoction of holograms and shapes just for fun!
Dazzlers Slices, glitter cut into little slices
Dazzlers Flakes, light, thin, flakes of glitter
Dazzlers Shapes, as the name implies: stars, squares, circles, etc.

Faux Snow is a large cut of white/clear flakes. Perfect for snow and wintery effects.


And if that isn’t enough, closely related to glitter, we also carry micro Glass Beads (no hole beads). As with the glass glitter, these colors will fade with time too. With two sizes large and small, they add a nice dimension to projects.

Then there is Gala Glitz. A simply delicious medley of Vintage Glass Glitter and Glass Beads. Use in all your designs for a stunning, classy look.


Last but not least is our Elements line. Elements are organic components, grown or produced by Mother Earth and manipulated into a variety of shades and shapes with just a touch of sparkle added to them. Again, they are organic and will have to be sprayed with Acrylic Spray, Matt Fixative or Spray Lacquer or else they will disintegrate.

Next time we should talk about glue....

Saturday, July 9, 2011

Firefly Bracelet by Kaaren Poole

I frequently have occasion to use two part epoxy glue and really like how quickly it sets and its clear shiny look. Since it is a thick glue and sets quickly, I thought I might be able to successfully use it like resin to embed Art Glitter’s gorgeous Dazzlers glitter. The “collage” links and pendants seemed an obvious backing, and a pre-assembled bracelet blank by Nunn Designs made the project quick and easy.

Tiny vintage glass cabochons in the shape of fireflies were the inspiration for this bracelet. Don’t they look gorgeous against these rich Dazzler colors? Like a summer night.


You will need:
Blank collage bracelet in antique copper (available at fusionbeads.com)

firefly glass cabochons (available from splendorintheglass.net) or other small glass foil-backed cabochons (the foil back is important – it makes the cabochon stand out against the glitter)

Art Glitter Vintage Glass Glitter: Shards in Citrine #905

Art Glitter Dazzlers in Gypsy #D10, Sea Nymph #D15, and Patriot #D31
glass seed beads, size 11, to coordinate with the glitter colors 

two part epoxy glue, either 5 minute or 15 minute set

ES6000 glue

strong beading thread, beading needle

toothpicks, aluminum foil, waxed paper, small scissors

I mixed the glitter with the epoxy glue and used the mixture to fill the cavities in the bracelet links. Before the glue set, I lightly pressed the glass fireflies into the surface. For a more finished look, I surrounded the metal rim of the link cavities with strands of small seed beads.

The two-part epoxy glue sets fast, so have all your materials at hand when you begin to work. Read through the instructions first to be sure you understand them before you begin.
Cover your work surface with a sheet of waxed paper and lay the bracelet blank out right side up.

Now work quickly to mix the glittery glue and fill the cavities in the bracelet links.

To mix the glittery glue, squeeze out a nickel-sized puddle of one of the epoxy parts, then another nickel-sized puddle of the other part of the epoxy right up next to it. Repeat two more times so that you have 3 double puddles. Spoon about 1/8 teaspoon of the Dazzlers glitter on top of each of the three double puddles, one color per puddle. Add a few Citrine Shards to each puddle. Using a separate toothpick for each double puddle, quickly and thoroughly mix the double puddles. You will now have three puddles of mixed epoxy glue with one color of glitter and a few shards embedded in each.

With the toothpicks you used to mix the glittery glue, scoop up large drops of the glittery glue and fill the bracelet link cavities. The glue will flow slightly, but you may need to use the tip of the toothpick to push it into the corners. I used two colors per link and swirled the colors slightly together with a clean toothpick. I wanted distinct areas of individual color, but a little mixing here and there.

If the glue gets too stiff to work with, just mix up more!

Before the glue sets, lightly press the firefly cabochons onto the surface.

Now that that’s done, you can relax a little. Actually, if you don’t want the beaded borders, you’re finished already!

For the beaded borders, cut a piece of beading thread about 10” long. Thread it through a beading needle and thread a sufficient number of beads to reach around the rim of one of the links. Count the number of beads and write it down – this will take the guess-work out of bordering the other links. Pass the needle back through the first bead you threaded, and then through all the others in order. This will make a closed loop. Pull the ends so that you only have about ½” of play in the thread. Squeeze out a bit of ES6000 glue on a small piece of foil and use the side of a toothpick to press the glue all around the rim of one of the link cavities. Lay the beaded loop around the rim onto the glue and pull the ends tight so that the beaded strand fits snugly around the rim. Tie a double knot with the ends of the thread. Using your fingers, press the beaded strand in place to even it out and get good contact with the glue. Repeat for the rest of the links.

When the glue is set, trim away the ends of the thread.

Enjoy!

You can also get these metal findings for pendants or earrings, so you may want to make a matching set.

Tuesday, July 5, 2011

A Pretty Little Thank You by Laura Drahozal


Need a little something to decorate a bridal shower table? Or maybe as a gift for a neighbor who walked your dog while you were away? For this post, I created a versatile little gift. Initially, I thought of this as part of a wedding centerpiece or a shower decoration, which is why I chose a monochromatic color scheme--all blues. I also wanted to explore and illustrate the differences between three types of beautiful Art Glitter: Ultrafine Transparent, Ultrafine Pearlescent, and Microfine Opaque.


I am truly excited about this experiment with one color, but let me start at the beginning. First, I found a terra cotta pot, which I painted with three quick coats of white acrylic paint. While that dried, I cut some vinyl masks with my Silhouette. The patterns were purchased from the Silhouette Online Store. The one that I used for the base was actually a cupcake liner, that I made a little larger. The pattern for around the top was a border lace pattern. I used a simple label pattern and the font Argos for the sentiment. I cut an additional, blank label of the same size. While I used the words "Thank You", I could just as easily have cut the names of a lucky couple or even "Get Well Soon".

When the vinyl was cut, I removed the parts that I wanted to be glittered from the original sheet and used transfer paper to move my masks from their backing to the pot. Since the cupcake liner wasn't the exact dimensions of my pot, I had to cut a couple of small slits in the bottom to make it fit properly. Then, I smoothed it all down and removed my transfer paper. I selected the location of the label and put that blank vinyl label in place over the other mask.


To start glittering, I put a some Desinger Dries Clear onto a clean sour cream lid and added just a little water. I used a paint brush to brush this mixture onto the pot. Because of the water, the mask resisted the glue a little, pushing it into the empty spaces. I poured the Blue Boy Ultrafine Transparent over the top of the glue and lightly pushed it down with my hand. I chose transparent glitter because I knew that I was going to use a very busy background pattern, but I wanted the overall look to be subtle. Going back to that idea of using this for wedding or shower decor, I imagined the background as a beautiful, glittering lace. I let it dry for a few minutes before brushing off the excess glitter and removing the vinyl.

I then removed the letters from the vinyl backing on the other label. I moved it to the spot I had saved for it. I used the same technique that I did on the "lace" portion, but had more glue in the mix because I wanted to make sure that my coverage was completely solid. I glittered this with the Microfine Opaque Blue Diadem, pushing it well into the crevices. The Microfine glitter really gets in against the edges of the mask, creating a crispness to the letters. I used the opaque because I wanted the color to be strong and vibrant for the message.

Before I even removed the vinyl mask for the letters, I replaced the Ultrafine Metal Tip on the Designer Dries Clear Glue and used it to glue around the edge of the label. Because I wanted this section to be a little more precise than the "lace", I used Noodgers to push any stray glue back into the right area. I glittered it with Pearlescent Varsity Blue. I also glittered around the top, bottom, and between the top edge and the base.


Of course, it wouldn't be a project of mine if I didn't pull out the Art Glitter Designer Dries Clear Fabric. I laid a 18" long piece of wide white organza ribbon on my craft sheet. I then put the Ultrafine Metal Tip on my fabric glue and made some swirl designs on the ribbon. I glittered it with the Microfine Opaque. When it was dry, I ran a needle with embroidery floss about 1/4 " from the edge all the way down the ribbon. I pulled the ends of the floss together and tied them off to create a rosette. I tied a ribbon around the pot and glued the rosette down with fabric glue.


When I was finished, I had a pretty, customized special little gift. I also had some fun glittering with masks and experimenting with a monochromatic color scheme. Think of something like this the next time you need a few inexpensive centerpieces for a party. You will have a good time before the party even starts!

Supplies Used:

145 Ultrafine Transparent Blue Boy

185 Ultrafine Pearlescent Varstiy Blue
504 Microfine Opaque Blue Diadem
Art Glitter Designer Dries Clear
Art Glitter Designer Dries Clear Fabric

Ultrafine Metal Tip
Noodgers

Terra Cotta Pot
White Acrylic Paint
Paintbrush
Silhouette Machine
Silhouette Vinyl
White Organza Ribbon
Needle
White Embroidery Thread

Saturday, July 2, 2011

Glittered New 4th of July Pinwheels by Emily M. Miller


Oh the joys of 4th of July! I live on the busiest corner of small town U.S.A. And on the 4th of July there are all kinds of activities going on at the park next door. We’ve been there almost 20 years now, everyone knows that I put my pinwheels out every year and well…they’ve seen better days!


So my answer to all sprucing up problems? Art Glitter of course!

Materials:

Pinwheels

Scotch Tape

Art Glitter Ultrafine Opaque Glitter: #291 Fire Engine, #140 Canadian Blue

Art Glitter Ultrafine Pearlescent Glitter #189 Pearl

Art Glitter Designer Dries Clear Adhesive (DDC)

Art Glitter Designer Dries White Adhesive (DDW)

Art Glitter Ultrafine Metal Tip

Paint Brush


Start by bending over the top pinwheel tips into the center and tape them into submission. Then paint glue (DDC) onto the 4 bottom ‘wings’ and glitter with Fire Engine Red. Let dry, take tape off.

Remove the circle disk at the end of the horizontal post and glitter it your choice of color. Set aside to dry.

Carefully glue (DDC) and glitter center of top pinwheel Canadian Blue. Let dry 10 min. or so and finished off ‘wings’ with Canadian Blue. Let dry.

The thing you want to be careful about is making sure you don't get glue on your center post. You want to make sure your pinwheel will still spin easily.

Do some brushing off of excess glitter at this point. That is if you don't want to pollute your pearl glitter with blue glitter like I did!

Then you can start drawing on designs with Designer Dries White adhesive, using the Ultrafine Metal Tip on your adhesive spout and fill in with Pearl glitter for a perfect sparkly white effect.

Now my only problem is I have to get 10 more of these done...now! Oh well, it will be worth it!


Just wanted to share an updated photo of my poor wagon I glittered 4 years ago. See it in our gallery when it was beautiful...http://www.artglitter.com/gallery/galEmilyMMillerGlitteredWagon.html So why am I showing this photo? Because this thing has been out in the Arizona sun, wind and elements for 4 years with virtually no shelter in the last two years and it still sparkles!

I promise to take better care of my pinwheels. Have a wonderful 4th!

Tuesday, June 28, 2011

Hummingbird Necklace and Earrings by Kaaren Poole

Hummingbirds are such enchanting creatures. They’re both cute and beautiful with the striking iridescence of their feathers that flashes in the sunshine – perfect images for jewelry. So I decided to make a set of hummingbird earrings and a necklace. Art Glitter is the perfect product to add gorgeous sheen to the birds. And crystals add even more sparkle! Here’s how I made them and what I used.


Make the polymer clay Hummingbirds
Condition the clay according to the manufacturer’s instructions.

From the green clay, form a snake shape about 3/8” thick and trim it evenly on both ends so that it is 1” long. Form a second snake shape 1/2” thick and trim it to 1 ¼” long. With the tissue blade, slice each snake shape in half lengthwise. You will be using the two smaller pieces for the smaller earring hummingbirds and one of the larger pieces for the larger pendant hummingbird. You will not be using the second larger piece.

Repeat the previous step with the black clay.

Press one green piece and a same-size black piece together on the long sliced edges. Repeat for the other pieces. You will have three snake shapes, two smaller ones and one larger one, each half green and half black lengthwise. These are the bodies. The green sides are the bellies and the black sides are the backs.

Lay all three body shapes on the work surface green side up. Use the edge of the tissue blade to make a mark across the green side at about 1/3 the length. This line divides the belly (the 2/3 part) from the tail (the 1/3 part). Now cut away the green part to form the tail: starting at the mark, and using the tissue blade, slice at an angle horizontally through the body to the end.

Shape the tail gently with your fingers.

Form a ball of the gold clay a little larger than 3/8” and another a little larger than ½”. With the tissue blade, cut each ball in half. These are the heads. Press a half of the small ball to the head end of each of the small bodies, and half of the large ball to the head end of the large body.

Roll thin snakes of black clay for the beaks. Cut three sections about ½” long (longer than the beaks will be) and roll to taper one end of each. Trim the wide ends so the beaks are the right lengths and press them in place. Cut three lengths of craft wire about 1” long. Carefully press a length of the craft wire from the tip of the beak through the length of the beak and into the head, and repeat with each hummingbird. These wires will strengthen the joints between the beaks and the heads. Leave any excess wire in place – you will trim it later when the clay is cured.

To make the hummingbird’s feet, cut six short lengths of the black craft wire and use the round nose pliers to make a double loop on one end. Press the other end of the wire into the bird until the loop is snug against the body. Repeat with each piece of wire.

With an end of the sterling silver wire dipped in baby powder, poke a hole in the top of each hummingbird’s head. These holes will later accommodate the wire loop to hang the hummingbirds by.

Cure the clay according to the manufacturer’s directions. When the hummingbirds are cool, carefully use the wire clippers to clip away any excess wire from the tips of the beaks.

Coat the Hummingbirds with Glitter
Coat the hummingbirds’ beaks with a coat of Designer Dries Clear Adhesive, using the round brush. Be sure that the beaks are completely but lightly covered –be sure you don’t use so much adhesive that it drips. Carefully dip each beak in the open container of Black Wing glitter to coat the beaks. Let dry.

Lay the hummingbirds on your work surface, bellies up. Coat the entire front side of the hummingbird with Designer Dries Clear Adhesive, once again using the soft brush. Carefully apply the glitter over the adhesive. Pick up a bit of glitter by pinching it between your thumb and middle finger, then sprinkle it over the adhesive. Use the same motion you would use to sprinkle salt, but use small movements to better control where the glitter is falling. Hold your finger tips about 3 inches over your hummingbirds. Coat the head Cayman, the throat Ruby Red, the tips of the tail and wings Black Wing, the remainder of the tail and wings Terra Blue, the lower part of the Terra Blue, and the remainder of the belly Reed. Let the adhesive dry.

In a similar fashion, apply glitter to the back of the birds using Cayman on the head, Terra Blue on the tips of the wings and tail, and Bavarian Forest over the rest. Let the adhesive dry.

Reapply Designer Dries Clear Adhesive and glitter to fill in empty spots as necessary and let the adhesive dry. Be sure you have coated the top of the head (Cayman).

Apply a coat of Diamond Glaze over the entire hummingbirds – front, back, and beak – to seal the glitter in place. Let the glaze dry.

Re-open the holes in the tops of the head with the end of the sterling silver wire if necessary.

Cut the eyepins about 3/16” inch from their eyes. Glue the shortened eyepins into the holes in the tops of the hummingbirds’ heads with the 2-part epoxy glue. Be sure you have used enough glue for a good bond, but also ensure that you haven’t closed the holes in the eyepins.

Make the Earrings with the two Small Hummingbirds
Cut two pieces of sterling silver wire about 1” long. With the chain nose pliers, make a loop in one end of each of the pieces of wire. Thread an 8mm crystal on the straight end of the wire. Trim the straight end to about 3/8” then make a loop on that end also. Repeat with the other piece of wire and a second 8mm crystal.

Cut two pieces of chain each 5/8” long.

Open one of the oval jump rings, thread one end of a chain piece and the loop on the head of one of the hummingbirds onto the jump ring, and re-close the jump ring. Repeat with the other small oval jump ring, chain piece, and hummingbird.

Open the loop on one of the ear wires and slip it through the other end of one of the chain pieces. Re-close the loop. Repeat with the other ear wire.

Make the Pendant and Necklace
Cut a piece of chain 4 1/2” shorter than the finished length of your necklace.

Cut a piece of sterling wire about 1 ¼” long. With the round nose pliers make a small loop in one end. Thread the oval crystal on the other end of the wire and press it snug against the loop. Trim the straight end to about 3/8” and make a loop on that end. Before you close the loop, thread it through the loop on the large hummingbird’s head, then close it.

Locate the chain link that is in the center of your necklace chain. Open the free loop above the oval crystal, thread it through the center link of the chain, and re-close it.

Cut 6 lengths of sterling wire each 1 ¼” long. With the round nose pliers make a small loop in one end of one of the pieces of wire. Thread an 8mm crystal onto the wire, trim the straight end to 3/8”, and make another loop. Repeat with the other five lengths of wire and five 8mm crystals.

Working on one side of the necklace, count five chain links from the center link where the pendant is attached and cut the chain in the sixth link. Open a loop at one end of a crystal/wire assembly and slip it through one of the ends of the chain you just cut and re-close the loop. Open the loop at the other end of the crystal/wire assembly, slip it through the other cut end of the cut chain, and re-close the loop. You now have inserted a crystal into the necklace chain.

Continuing to work outwards, repeat the previous process twice so that there are a total of three crystals on one side of the necklace.

Repeat on the other side.

To attach the clasp, open a large oval jump ring and slip it through one end of the necklace chain and the loop on the lobster claw clasp. Open the second large oval jump ring and slip it through the other end of the necklace chain and the large round closed jump ring.

Now for the branch in the hummingbird’s feet. Cut three pieces of sterling wire 1 ½” long. Set one aside.

For each of the remaining two, use the round nose pliers to make a large loop in one end of the wire. Before you close it, thread three glass leaf-shaped beads onto the loop, then close it. Bend the straight end of the wire perpendicular to the loop. Thread a 6mm crystal on the straight end, trim it to 3/8”, and make a loop from the straight end.


Cut a piece of chain ¾” long and a second piece 3/8” long. For each piece of chain, open the small loop on a wire/glass leaf assembly, slip if through one end of the chain, and re-close the loop.

Working with the final of the three pieces of wire, make a small loop in one end. Before you close it, thread it through the other end of one of the pieces of chain, then close it.


Thread the straight end of the wire through the hummingbird’s feet. Trim the straight end to 3/8” and make a small loop. Before you close the loop, string the free end of the other wire/glass leaf assembly onto the loop then close it.

Enjoy your necklace and earrings! When you wear them, be sure to toss your head often for maximum bling effect!


Materials:
For Hummingbirds:
• Fimo Soft polymer clay in Metallic Gold, Black, Spring Green

• three pairs 3mm glass eyes (glasseyesonline.com)

• 24 gauge craft wire, any type of metal

• 24 gauge black coated craft wire

• Art Glitter’s Microfine Opaque Glitter: Ruby Red (MFO-500), Cayman (MFO-521), Terra Blue (MFO-510), Bavarian Forest (MFO-514), Black Wing (MFO-507), Reed (MFO-519)

For Jewelry:
• three thin gauge sterling silver eye pins 1” long
• about 2’ (for a necklace up to 20” – you will need more chain if you want a longer necklace) of fine gauge sterling silver chain (4mm links)
.
• about 18” 22 gauge half hard sterling silver round wire

• six small glass top-drilled leaf beads
• 
sterling silver lobster claw clasp

• two 7mm sterling silver oval open jump rings
• 
pair of sterling silver ear wires

• eight 8mm Siam round faceted Swarovski crystals
• 
two 6mm Siam round faceted Swarovski crystals
• 
one 12mm polygon Siam Swarovski bead

• four small sterling silver oval open jump rings (about 4x6mm)
• 
one 8mm closed round jump ring

Additional Supplies:
• Tissue blade for polymer clay

Art Glitter’s Designer Dries Clear Adhesive
• Diamond Glaze

• two part epoxy glue

• needle nose pliers

• round nose pliers

• wire cutters

• soft round brush, size 8

• baby powder
• 
pointed round toothpick

Saturday, June 25, 2011

My Red, White and Blue Glitter Shoes by Laura Drahozal

Every year, the women in my family go to the Salute to America Concert and Fireworks at The Henry Ford in Michigan. It is a great family event. Everyone packs a succulent picnic, which we eat on the lawn as we listen to the Detroit Symphony Orchestra. As twilight slips into evening, we can hear The 1812 Overture begin. At the appropriate moment, the cannons are shot and the fireworks start. Part of the fun of this event is all of the attendees trying to out-red, white and blue each other. This year, I am convinced that I have it nailed--Art Glitter will help put me over the top with my glittering patriotic shoes. The best part? They were really fun to create. They took just a little patience, but weren't difficult. Let me explain.


First, I washed an old pair of denim colored canvas shoes. As they dried, I collected my supplies: Art Glitter Dries Clear Fabric Adhesive, the Ultrafine Metal Tip, Number 500 Ruby Red Microfine Opaque Glitter, Number 508 Silver Moon Microfine Opaque Glitter, Number 189 Pearl Ultrafine Pearlescent Glitter and Number 140 Canadian Blue (ironic, right?) Ultrafine Opaque Glitter.

When the shoes were dry, I packed them with old newspapers to keep the sides upright. I then attached the fine tip to my Art Glitter Fabric Glue and began with the red stripes. These stripes stretch across the sides of the shoes from the seam by the tongue, along the seam that attached the front to the side and then next to the rubber near the sole. They stop at the seam that connects the heel to the side. I NEVER crossed over a seam. The stripes look difficult, but were actually quite easy, since I just followed along the seams and rubber edges. With the fine tip attachment (a necessity), the fine lines were easy to do, and the glue came out somewhat sparingly--exactly the amount I needed to prevent drips. The stripes didn't need to be straight lines, since they were supposed to represent the stripes on a flag in motion. I did the bottom red stripe first, so that I could follow the pattern. As far as the distance went, I knew that I wanted those white eyelets for the laces to be entirely in the white stripe. Therefore, I put the edges of the red stripes just outside the edges of the eyelets. Of course, I poured the red glitter on these stripes as soon as they were on the shoe. I did all the red stripes first--bottom to top on one side of a shoe, bottom to top on one side of the other shoe and then CAREFULLY bottom to top on the opposite side of the first shoe, and then the second shoe. Then, I had to wait for a little while for the glue to set well.


Once the red stripes were set, I needed to add the white stripes and stars. The problem that I faced was that there was no completely opaque white glitter to use. I needed the opacity because I was using those denim colored shoes. If I had been working on anything but fabric, I could have used Designer Dries White Glue, but I needed that clear fabric glue this time. I solved this problem by using silver as a first layer for my white components. I chose the Microfine Glitter because I knew that it would cover very well and create a nice base for that white. I drew the stars freehand with glue, the same way I learned to make stars in elementary school. Once again, I wasn't worried about perfection, as this project was more fun than precise. I made the stripes by filling the space between the red ones. The first layer was all filled in with the silver. Then, I had to wait for it to dry before I put a layer of white on the top. (Honestly that silver microfine was so gorgeous that I was sorely tempted to just leave it, but it wouldn't fit my color theme.)

When the white was dry, the fine tip was invaluable, as I used it to make blue outlines around the stars. This was a great way to touch up my crazy stars just a little. When the whole thing had dried for several hours, I followed the package instructions on the Dries Clear Fabric Glue to set it. I preheated the oven to 300 and turned it off. Then, I added the shoes on a foil lined cookie sheet and baked for 30 minutes. I washed them in cold water so they would be all ready for me to dazzle my fellow fireworks fans. So, as the picnic is eaten and the music begins, I'll be thinking, "Let the patriotic clothing contest begin!" I know I am ready for the Fourth of July (thanks to Art Glitter) are you?

SUPPLIES:

Art Glitter Dries Clear Fabric Adhesive
Ultrafine Metal Tip
No. 500 Ruby Red Microfine Opaque Glitter
No. 508 Silver Moon Microfine Opaque Glitter
No. 189 Pearl Ultrafine Pearlescent Glitter
No. 140 Canadian Blue Ultrafine Opaque Glitter.