Showing posts with label Northwoods Rubber Stamps. Show all posts

Friday, November 1, 2013

Tombow & Northwoods & Glitter OH MY

A Little Sparkle Page 

Supply List

K & Company  Patterned Paper
Cricut Disney Tinker Bell Cartridge (fairy and title)
Small Water Color Brush
Karen Foster Sparkle Burst Brads
Want2Scrap Red bling
Red Card Stock
White Card Stock
Cricut CTMH Artist Cartridge (ornament)
Fiskars paper crimper (top of ornament)
Microtip black marker
Gold Card Stock

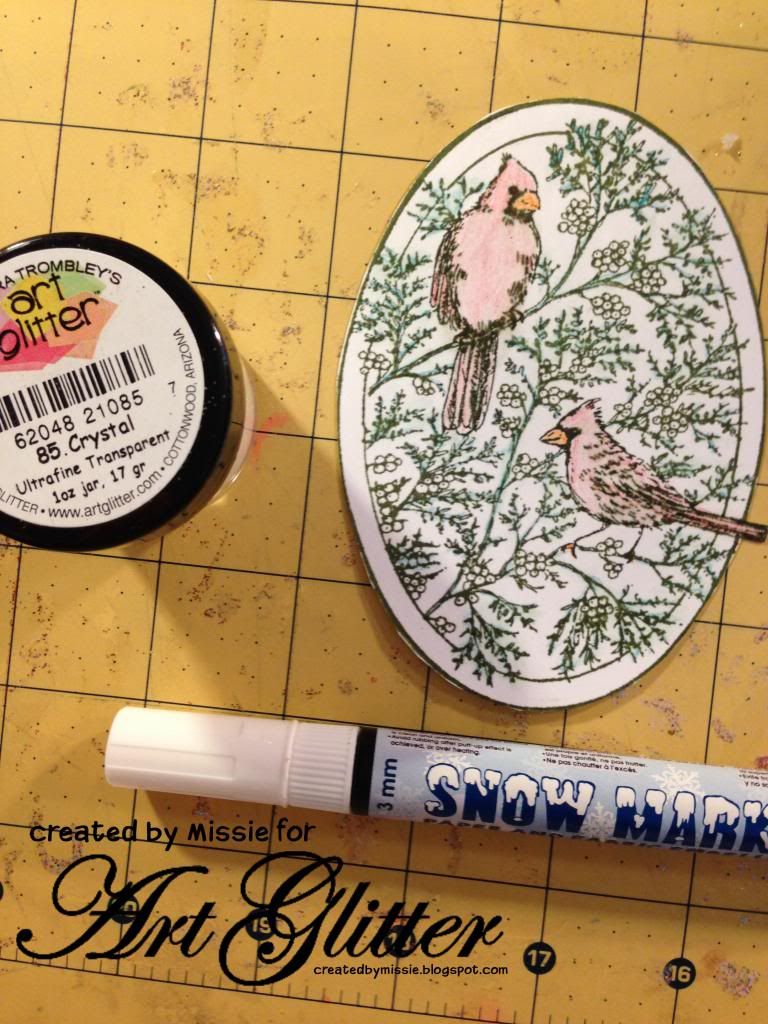
For this project, Clare wanted to try using the Tombow marker to color Tinkerbell.  Clare loves how vibrant these markers can be and that they can also be as soft as a water color paint!  If you have every tried to cut a Tinkerbell and all of her little parts (eyes, fillagree wings, lips, etc) you may understand that Clare find cutting these tiny pieces, lifting them from the mat and gluing them too frustrating!  So she loaded the Chomas creations pen holder in her Cricut and drew the detail Tinkerbell to use as a coloring guide.  She replaced the pen holder with the blade and cut a separate Tinkerbell black out in white card stock.  She placed the pen drawn Tinker bell behind the blackout Tinkerbell on a light box and colored it with the Tombow markers.  

For the skin color, Clare blended Tombow 933, 743, 055.  For the Wings, Tink's Eyes and the large Christmas ornament, Clare used Tombow 452.  Clare is so excited to play with these markers again, because of all the water color posibilities with the control of a marker!  To keep the water content low, Clare sprayed as she worked onto a scrap piece of clear plastic and added more water as needed.  You can find lots of videos on using these markers on Youtube.  Just search for Tombow marker tutorials.  
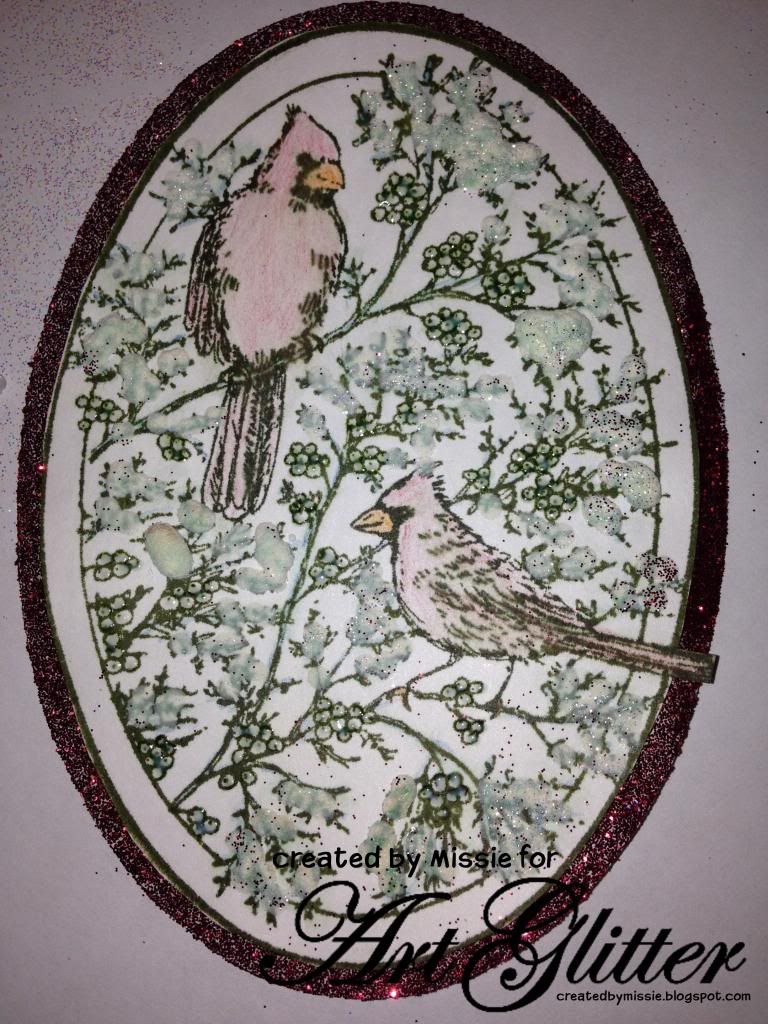
Clare also used the Chomas pen holder for the title outline and then colored it in with Tombow 452.  She then applied Art Glitter Blue Angel to the title and Tinkerbell's wings using the Ultrafine tip.  She added a few rhinestones and a Sparkle burst brad and a Christmas Card Photo.  The top of the ornament was crimped with Fiskars paper crimper to look like a real ornament in gold card stock.  

Joy Card


Supply List
White Card Stock
Red Card Stock
K & Company patterned paper
K & Company Rub on
Martha Stewart Snowflake Border Punch
Teal Marker
Red Swiss Dot Card Stock
Red Ink
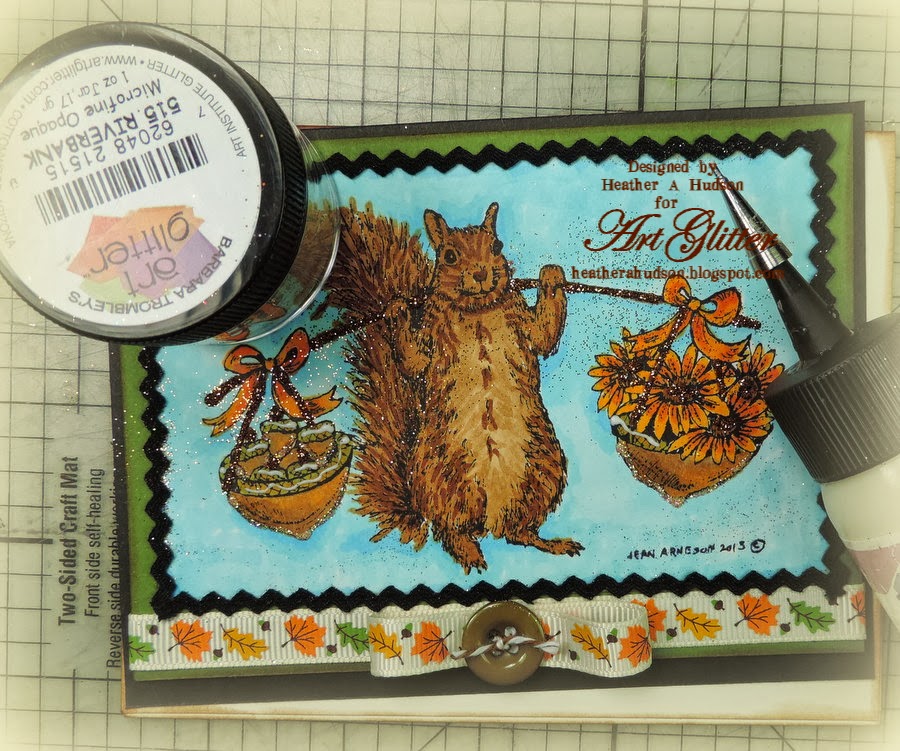
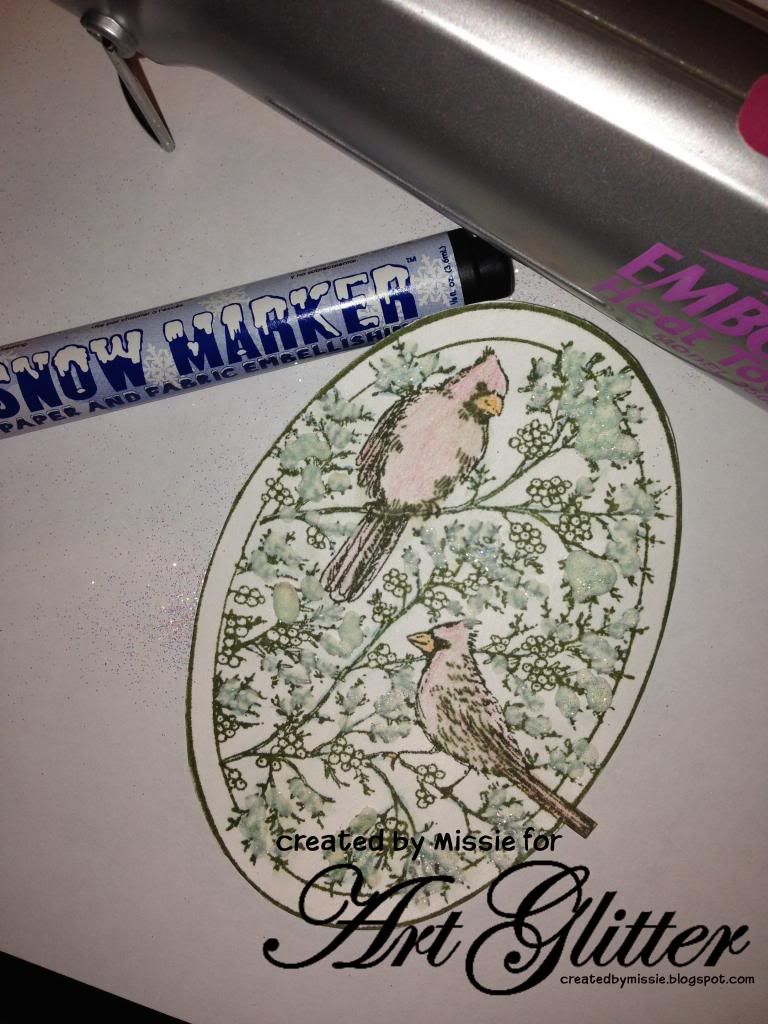
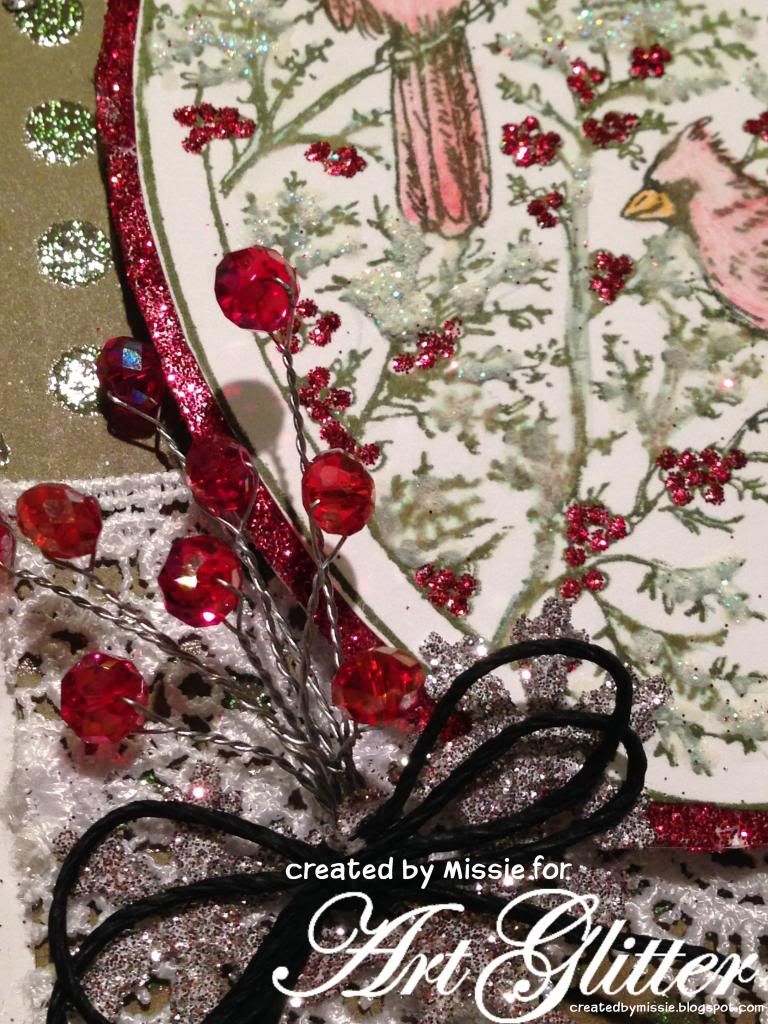
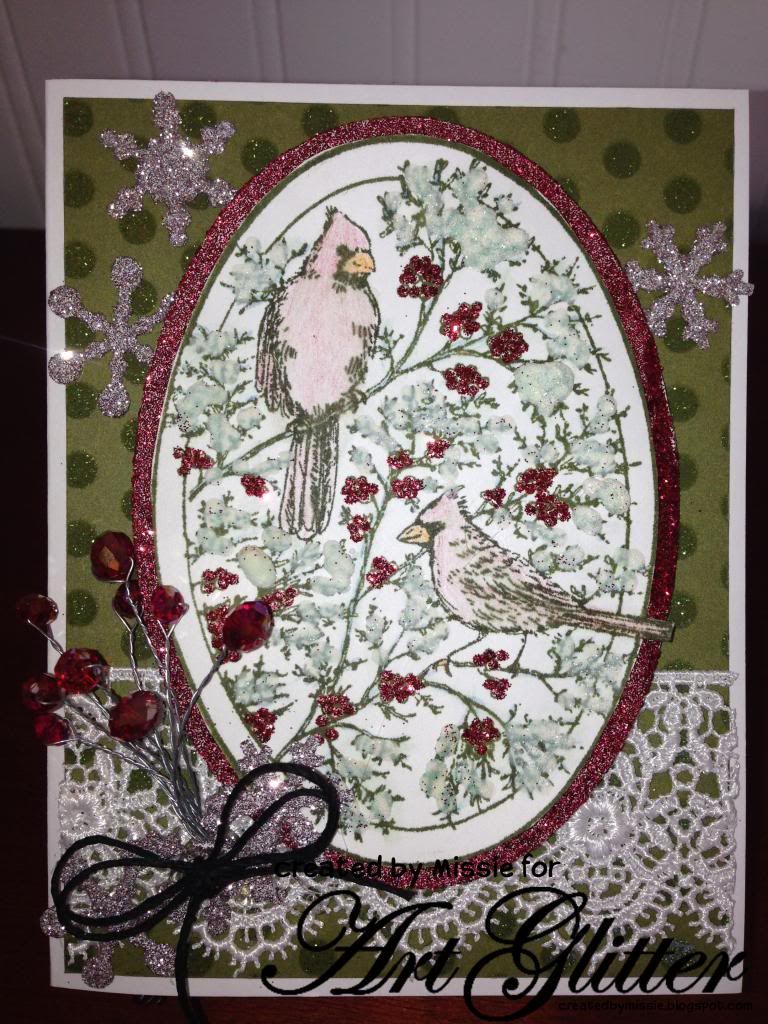
To create this card, Clare stamped and cut a Christmas tree using Northwoods Berry and Leaves Tree Stamp.  Clare applied Art Glitter dries clear glue using the Ultrafine tip to the ribbon only on the tree stamp.  She added Art Glitter 332 Red Rocket  Chunky Opaque Hologram Glitter and allowed it to dry.  She then matted it on red card stock and cut around it.  She cut a white mat and faux stitched it with a teal marker.  She matted that on some red Swiss dot card stock.  She punched the Martha Stewart snowflake border along the edge of the white card stock and adhered  the border to the back of the K & Company patterned paper.  She used a K and Company Rub on for the Joy to the World Sentiment.  She then assembled all the mats and borders.  
Christmas Tree Star Page


Supply List
October Afternoon Good Cheer:  Falling Snow Paper
Cream Card Stock
Red Card Stock
Red Ink
Forever in Time Gem Swirls

Silhouette America Merry Christmas Title
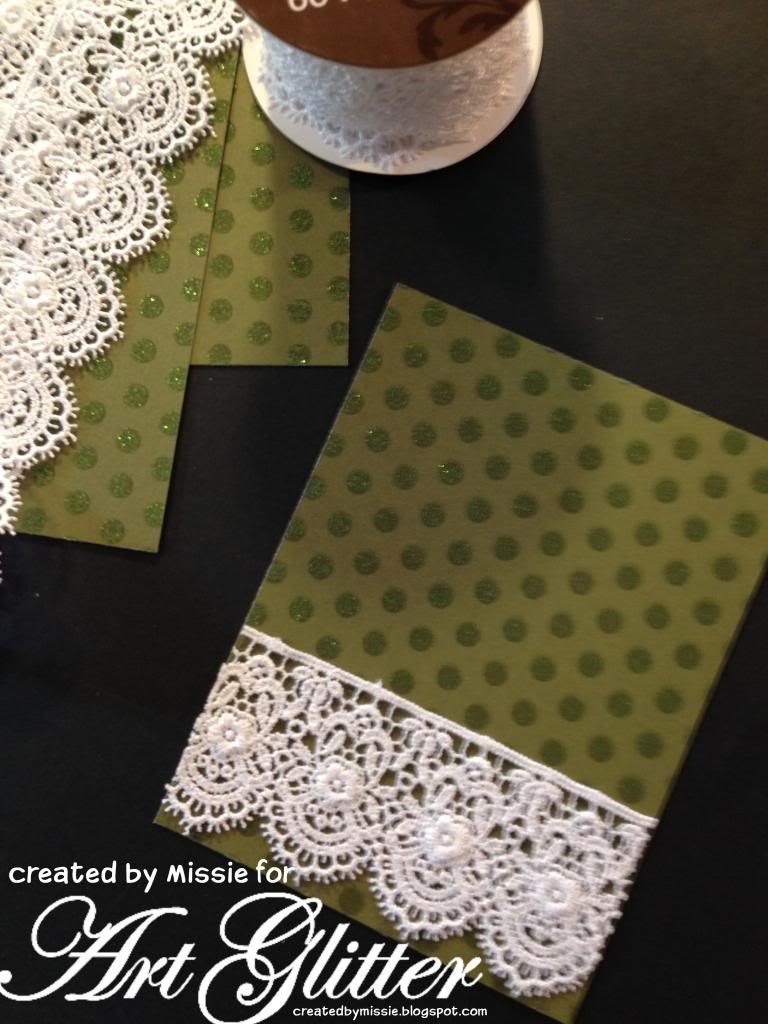
Clare loves to stretch her stamps to make multiple images with one stamp.  For this project she used the tree stamp to create a star.  To create the star, she stamped and cut 12 Christmas trees using Northwoods Berry and Leaves Tree Stamp.  Clare cut out all 12 trees.  Using Art Glitter Ultra fine tip and Designer dries clear glue; Clare applied glue to the ribbon only on all 12 trees.  She added Art Glitter 332 Red Rocket  Chunky Opaque Hologram Glitter.  She allowed the glue to dry and using 6 trees placed them in a circle to form a snow flake, matching ribbon ends.  She adhered the trees to red card stock and cut around snowflake to form a red mat.  
Using the next six trees overlapping ribbons, she created a smaller snowflake on red card stock.  She adhered the trees and cut out the smaller snowflake.  She adhered the larger snowflake to page, and adhered smaller snowflake inside larger snowflake, alternating tree points.  Clare cut her photo in circle and placed in center of the snowflake, fussy cutting the baby’s hand and feet because they were just so sweet she could not crop them out! 
Clare created the title using a Silhouette file and the Cameo to print and cut the title.   She added the Red Rocket to the title using the Ultra fine tip as well.  She added bling in the lower right hand corner.


If you would like to see more of Clare's work you can find her blog at www.cricutcraftyclare.blogspot.com


Monday, October 28, 2013

Wheeeeeeee

 
Winter Fun
 
 Even the woodland creatures like to have fun in the snow and these cute little tobogganing squirrels are no exception.  This wonderful stamps from Northwoods Rubber Stamps makes an awesome card for the holiday season.  This month, the Art Glitter design team has teamed up with Northwoods Rubber Stamps to bring some sparkle to your holiday season.

Add even more sparkle this month by using the PROMO CODE:  NW15 for 15% off the retail prices when making a $25 or more purchase. 

Supplies Needed:

     From Art Glitter: http://www.artglitter.com/%3Cbr /> Glitter:http://www.artglitter.com/retail/Rartglitter.html
     Lime Rind Ultrafine Opaque Glitter
     Varsity Blue Ultrafine Pearlescent
     Garnet Ultrafine Opaque Glitter
     White Satin Ultrafine Pearlescent Glitter
     Designer Dries Clear Glue:http://www.artglitter.com/retail/Radhesives.htm
     Spoon Man! Spoons:http://www.artglitter.com/retail/rtools.htm
     Metal Tip:http://www.artglitter.com/retail/rtools.htm

     From Northwoods Rubber Stamps:
       Nora's Tobogganing Squirrels:  http://www.northwoodsrubberstampsstore.com/p9248.html%3Cbr />
Also Needed:  Ink for stamping, card stock to make card base, white card stock, 1 sheet of patterned paper for layering onto card base, markers, dark blue/grey ink pad for inking sky line and a piece of ribbon

Begin by creating the card base and trimming a piece of patterned paper to fit onto the base.  Add the ribbon across the card.  Lay all of this aside.

Stamp the image onto the white card stock and color.  Trim it to fit the card.  Use the blue/grey ink pad upside down and beginning off the paper move in small circles gradually moving it onto the paper and into the areas needed to be shaded. 
 
 
Place the metal tip onto the bottle of Designer Dries Clear Glue and place small balls of glue onto the tassels of the squirrels hats.  Sprinkle each with glitter and allow it to sit for just a minute to get a good adherence.  Shake off the excess.  You can do this one at a time and put the colors back into their original containers or do them all at once and shake the excess into a separate container to have a glitter mix for other projects.  It's a fun way to create a mixture of colors.  

 Now, add small dots of glue onto the dotted areas of the stamped image.  Work in small sections and add the glitter to them while the glue is still wet.  Continue to cover all of them with glue and glitter.  Allow it to set and shake off the excess. 

 Still using the glue with the tip on it, add some glue to the ends of the branches and trace the lines under the toboggan.  Sprinkle glitter onto those areas and shake off the excess. 

Allow the image to dry and adhere it to the card base. 

Join these fun loving squirrels and have some sparkling fun this season.  Share the fun with someone in your thoughts and send one to him or her, too.  Everyone needs to have a little fun once in a while.


To see more of Peg's work join her on her blog at http://www.pegscraftingcorner.blogspot.com/


Thursday, October 24, 2013

Ornamental Fun


This month at Art Glitter we got to work with the Northwoods Rubber Stamp Company.
I have never used their stamps before but was pretty impressed with such detail. The ink went on very smooth and the image turned out perfect.


 Supplies:
 
Patterned Paper
Copic Markers
Twine
 
 
After stamping the image onto my cardstock I colored with copic markers then added glitter.
 
Be sure to check out Art Glitter and if you purchase $ 25.00 of AG product
and use NW20 coupon code you can save 20%.

My Blog: zippity-do-dah-tabitha.blogspot.com


Tuesday, October 22, 2013

Squirreling Around

 
Ingredients

This month we are happy to be teaming up with Northwoods!

To celebrate, Art Glitter is having a 20% off retail sale of any $25 purchase.  Just use code NW20 at Check out!


Directions
Step 1
Heather started out by using the Northwoods Nora's Bountiful Squirrel Stamp and the Art Glitter Black ink pad to stamp her image onto white card stock.  Heather LOVES Squirrels, so she loved playing with this adorable image!
She used Copics to color her image. #BO2  #BO1 were used for the background.  The Squirrel, was colored with E35, E55, and E37, bows and flowers were colored with Y38 and YR14, Same with bows with touches of YO4 and Y68,  Acorns and acron baskets with E35 and touches of Y38.  Stick handle was done with E18.  
  Step 2
Heather used the 1/2 perfect layer ruler to cut a 1/2" mat for the bottom.
Step 3
Heather used her perfect layers ruler to create a mat out of green card stock.  Sides were cut with 3/16 ruler..
Step 4
Heather used the 3/16 perfect layer ruler edge for the bottom of the next cardstock layer (black).

Step 5
Heather used the Perfect Layers Ruler to cut the sides of the black cardstock to a 5/16th" mat.  This time she measured off the stamped image piece instead of the green layer.
Step 6
Heather put a strip of the red sticky tape across the bottom edge of card.
Step 7
 Heather applied her Fall Leaves ribbon to the red sticky tape. The Ultra fine tip applicator and Designer dries clear glue were used to add some glue to the edges of the stamped image, and black mini ric rac was attached.
Step 8
Then she used another piece of the ribbon to create a loop, and then glued it down to the ribbon base to create a bow on the front of the card.  A button tied with Brown Sugar Baker's Twine was added to form the center of the bow.
Heather added glue to the acorns and  basket bottoms and used Lion's Mane Glitter.
Step 9
Heather added more glue to her image, and applied Camel Glitter.
Step 10
Glue was applied to the acorn tops and rims of acorn baskets then Riverbank Glitter was added.

Step 11
Heather continued to use the DDCG and UFTA to apply glue to the bows and then applied Butterscotch Glitter.  

Step 12
Glue was applied to the squirrel, and Goldenrod glitter was used.
Step 13
Swirls of glue were added to the background and Blue Angel Glitter was applied.
Step 14
Heather used the red sticky tape and placed on her ivory card stock base which was inked with Ranger's Vintage photo.  This will hold down her matted focal image.  Dot of DDCG were added to the edges of the green card stock and Cavalado Glitter was added.
Step 15
Heather attached her matted image to her cardstock base.
How about a close up of the Cute 
Northwoods' Nora's Bountiful Squirrel Image!
Adorable!!
Some more Close ups.
Left side of card.

Right Side of Card.
Thank you for stopping by and hope you enjoyed Heather's Tutorial using
Art Glitter and the fabulous
 "Northwoods Nora's Bountiful SquirrelStamp!"

Feel free to stop by and see Heather's other projects using Art Glitter on her blog.

heatherahudson.blogspot.com

Sunday, October 20, 2013

Snow Birds with Art Glitter and Northwoods Stamps


Supplies:
Art Glitter #85 crystal Glitter
Art Glitter #2 Christmas Red Glitter
Art Glitter #83 Silver Glitter
Northwoods Stamps (cardinals)
Cardstock, ink, pens, colored pencils, lace, black string, and snow pen
Connie Crystal red crystals and wire


To begin stamp the image on white cardstock.

A great trip for stamping a background stamp:  Use a colored ink all over the stamp (Green seen here) the use a marker to color small areas.  For this stamp the birds were colored with maker in black, then the all over green ink was added.  That way the birds don't look green.

Color the stamped image using colored pencils then use a snow writer to add snow to the scene.  While the "snow" is still wet sprinkle on some crystal glitter. 

After the "snow" dries apply heat using a heat gun to puff up the snow.

Add a glittered mat to below the stamped image, then add glitter to the berries on the stamp using Christmas Red Glitter (to match the mat)

Prepare the card base with an A2 card (white) and the add lace to the cardstock. 

Create an embellishement using wire and red crystals to mimic the berries in the stampped scene.

Finally add snowflakes covered in silver glitter as a final accent to the card. 

IN OCTOBER USE PROMO CODE NW15 FOR 15% OFF THE RETAIL PRICES WITH A $25 PURCHASE! 
Thanks for stopping by to see my creations.
Missie Todd
createdbymissie.blogspot.com