Showing posts with label microfine opaque glitter. Show all posts

Saturday, February 1, 2014

"Dreamy" Valentine

Would you like to know how to make a simple Valentine card that is still full of luscious glitter?  I have the SIMPLE secret.
Adhesive paper.  That is the secret.  Well, that and the Microfine Glitter.

MATERIALS:
Sticky Backed Paper
Microfine Opaque Glitter 528 Crimson
Ultrafine Transparent Glitter 85 Crystal
Dreamweaver Stencil LJ928 Swirly Hearts
Soap
Stencil Brush
Adhesive
Card Stock
May Arts Ribbon

DIRECTIONS:
1)  Soap up the back of the stencil.  Make sure to get a fine layer of soap on the back.  This is the releasing agent so that you can remove the stencil from the paper later.
2)  Brush off any excess soap with a stencil brush.
3)  Place the stencil, soap side down, on the sticky side of the Sticky Paper.
4)  Cover it with Microfine Opaque Glitter in 528 Crimson.  The Microfine glitter really gets into the grooves of the stencil and makes the image crisp and clean.  Rub it in a little, because the fine texture can some times fly around.
5) Brush the extra glitter off using the stencil brush.
6)  Place the project face down on a table and carefully remove the sticky paper.
7)  Cover the now exposed background with 85 Crystal Ultrafine Transparent Glitter.
8)  Assemble the card using adhesive, card stock and  ribbon.

Done--simple and sparkly!  Thanks for stopping by today.  Come by and visit my blog at www.rememberinglifesmoments.blogspot.com any time!

Saturday, December 7, 2013

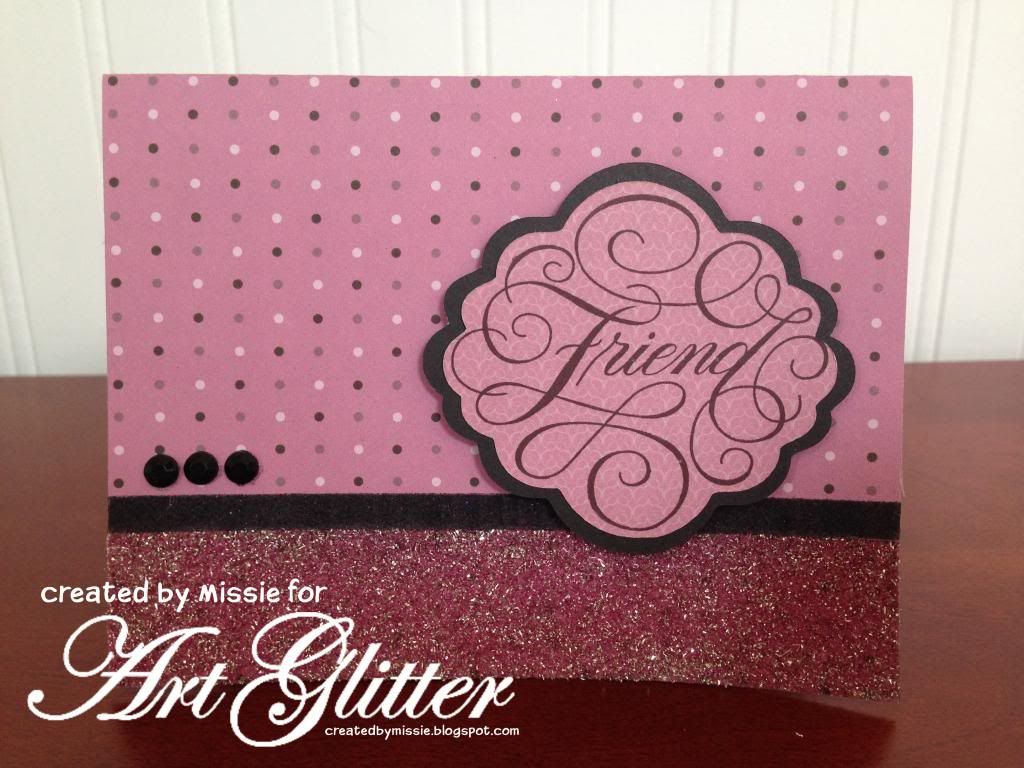
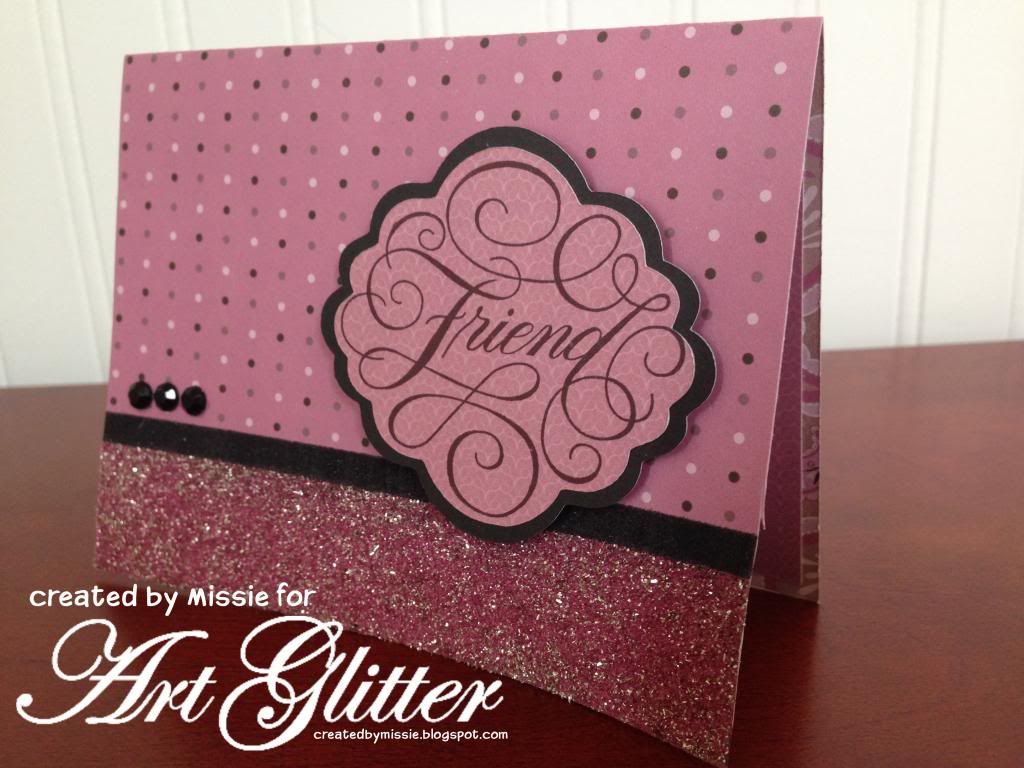
Friendship That Sparkles

Supplies:
Assorted card stock
Friend Stamp (CTMH A1142)
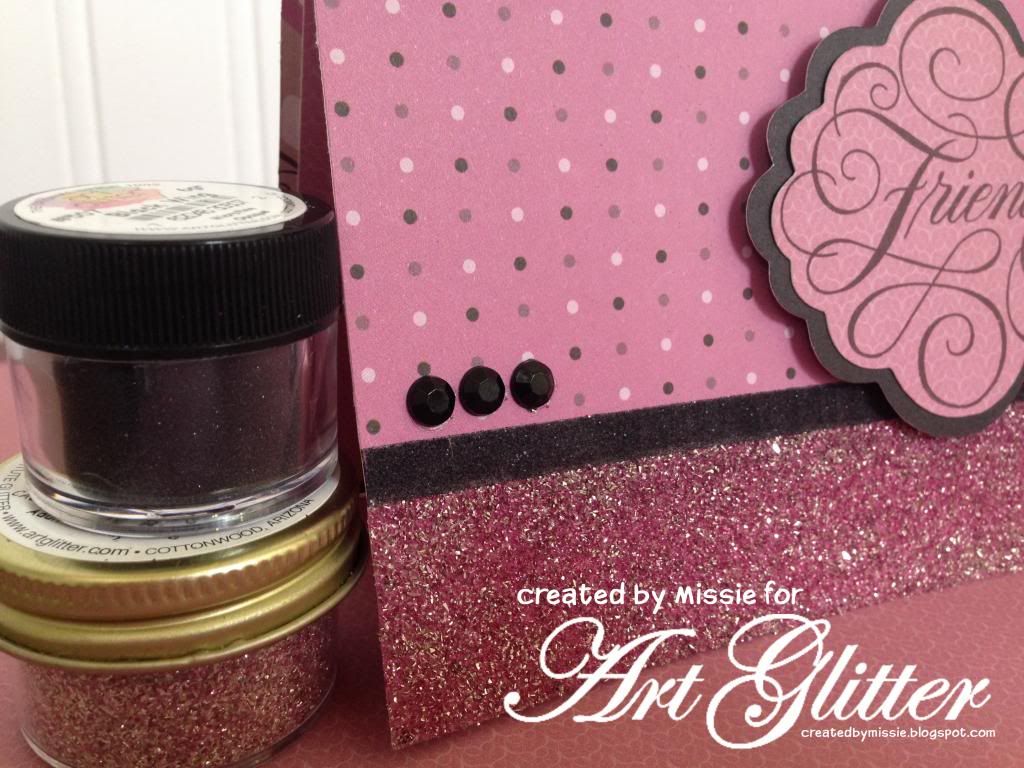
Art Glitter Vintage Glass Glitter - #623 Rose Bud
Art Glitter Microfine Opaque #507 Black wing
Double sided adhesive in two widths
Black gems
Die Cut shapes

December is traditionally a time to spend with family and friends.  Like so many others many of my dear friends live far away.  So this month I am making a point to send cards (not just my family holiday cards) to some of those friends.  In that spirit I want to share a lovely card that I created last week while I enjoyed a crafting day with a dear friend!

 Begin by stamping on die cut shapes and then layering on a slightly larger black die cut.  Using double sided tape in two different widths place adhesive in two stripes at the bottom of the card front.  Remove the backing of the bottom adhesive and apply Vintage Glass Glitter- Rosebud, then remove the backing from the thinner tape and apply Black wing glitter.  Add a few gems to finish off the card for an elegant look, yet easy to create card.


Thanks for stopping by to see my creations.
Missie Todd
createdbymissie.blogspot.com


Thursday, December 5, 2013

Ornament Fun With Laura

For this post, I created a cute little ornament.  I used a couple of different clear and white glitters to create the "snowy" look.  I used a variegated, Microfine Glitter to create a vintage look on the frame. Here it is:

MATERIALS:
Art Glitter Designer Dries Clear Adhesive
Ultrafine Metal Tip
Art Glitter Fantasy Fiber in Snowflake
Art Glitter Microfine Pearlescent #533 Mini Pearl
Art Glitter Ultrafine Hologram #389 Leia
Art Glitter Microfine Opaque #518 Oak
Globecraft Memories Make Your Own Ornament
Figurine (I got a package of 3 at the Dollar Store)
Cotton Ball
Tim Holtz Distress Paint in Tarnished Brass
Manual Die Cut Machine
Tim Holtz Snowflake Embossing Folder
Big Bite
Brad (I used a white star shaped brad)
Jump Rings
Connie Crystal
May Arts Ribbon
Craft Knife

DIRECTIONS:
1)  Use the fine metal tip on the Designer Dries Clear Glue to add "snow" edging on the figurine with Pearlescent Glitter.  The pearlescent is the most opaque white, which is important for the snow to show up.
2)  Pull cotton ball apart a little and adhere to the bottom of the globe with glue.  Adhere figurine on the top.
3)  Place some of the Fantasy Fiber around the figurine to look like snow that has been kicked up.


4)  Paint all three of the ornament frames with the Distress Paint.  Let dry.
5)  Run the two outside frames through the die cut machine with the embossing folder.
6)  Glue the edge of the globe (with the figure in it) to the interior frame.  (The one with the loop).  Let dry a little.
7)  Add some of the Leia glitter in the dome.  Initially, this was supposed to act as a snow globe, but with the static, some of the glitter stuck to the sides of the dome, while the rest found its way down the side of the cotton ball.  After some consideration, I decided that I liked it this way.  The glitter in the cotton ball makes the "snow" appear prettier.  The glitter on the sides of the dome look like a cross between snow and frost.  Although I used holographic glitter, I think it lent the project a vintage look.

8)  Glue the other side of the globe onto the other side of the center piece.  Let dry.
9)  Meanwhile, put a little Designer Dries Clear on your finger and rub lightly over the top of the frame.  Make sure to use the side that has the snowflakes indented.  Work in a very small section at a time.
10)  Pour the Oak Glitter over the top of the glue and tap off the excess.  Let dry.
11)  Repeat steps 9 and 10 with the other frame.
12)  Glue the frames to the outside of the domes.  Let dry.


13)  Use the Big Bite to attach a brad to the bottom of the ornament.
14)  Attach the crystal using jump rings.
15)  Attach a jump ring to the top.
16)  Tie a ribbon around the top to create the hanger.
17)  Tie a ribbon around the bottom.


Thanks for stopping by today.  I hope you enjoyed my project.  Stop by to visit my blog any time at www.rememberinglifesmoments.blogspot.com


Thursday, October 24, 2013

Ornamental Fun


This month at Art Glitter we got to work with the Northwoods Rubber Stamp Company.
I have never used their stamps before but was pretty impressed with such detail. The ink went on very smooth and the image turned out perfect.


 Supplies:
 
Patterned Paper
Copic Markers
Twine
 
 
After stamping the image onto my cardstock I colored with copic markers then added glitter.
 
Be sure to check out Art Glitter and if you purchase $ 25.00 of AG product
and use NW20 coupon code you can save 20%.

My Blog: zippity-do-dah-tabitha.blogspot.com


Friday, October 18, 2013

Wreath For Winter

 
MATERIALS
Stayzon in Jet Black
Card Stock
Patterned Paper
Scissors

Once again, I have chosen to "color" with Art Glitter on this beautiful Northwoods image.  This time, I used Stayzon to stamp the image onto a transparency sheet.  I used the Desinger Dries Clear on the back of the film to color the image.  That way, I could go slightly over the edges of the stamp and still maintain the intricate detail.  I colored one area at a time--the ivy, the holly, the pine cones, the bow and the greenery.  The biggest differences:  the transparent had to go on first and the glue needs to dry before you can see the true color.  Give yourself plenty of time.
After the glue completely dried, I sent the project through the Xyron and adhered it to white card stock.  I "fancy cut" it close to the wreath.  The white card stock showed a little around the edges.  Then, I made a gate fold card and adhered the wreath to it.  
I listed the colors that I used, but you can use any colors you like.  To get you started, use the code NW15 at the Art Glitter site to get 15% off your order this month.
Thank you for stopping by today.  I hope you enjoy this project.  Stop by and see my blog at www.rememberinglifesmoments.blogspot.com any time.  I hope to see you soon!


Saturday, October 12, 2013

Now We're Cooking...Turkey?


 This turkey is already busy working on his Thanksgiving meal.  It's hard to believe next month will be the official kick off to the holidays, isn't it? Now is the time to start planning and that includes planning for your holiday decorating.  In October the Art Glitter design team has joined up with Northwoods Rubber Stamps to bring you some fun stamped designs to help you with your holiday plans. 

During the month of October if you spend $25 or more and use the PROMO CODE: NW15 you will receive 15% off the retail prices. 

Supplies Needed:
     From Art Glitter:http: //www.artglitter.com/retail/Rartglitter.html
       Black Wing Microfine Opaque Glitter
       Monarch Microfine Opaque Glitter
       Nutmeg Ultrafine Opaque Glitter
       Crystal Ultrafine Transparent Glitter
       Saddlebag Ultrafine Opaque Glitter
       Designer Dries Clear Glue:http://www.artglitter.com/retail/Radhesives.htm
       Spoon Man! Spoons:http://www.artglitter.com/retail/rtools.htm
       Metal Tip:http://www.artglitter.com/retail/rtools.htm
 
     From Northwoods Rubber Stamps:
        The Cookin' Turkey-http://www.northwoodsrubberstampsstore.com/p9209.html 
    
     Also Needed:  Ink for stamping, 1 piece of white card stock, card stock for card base, 1 piece of patterned paper for layering on card base, various colors of ink pads for background, markers for coloring image, ribbon

Begin by creating the card base and layering the patterned paper onto it.  Next, place the ribbon across the center of the card and lay it all aside. 

Stamp the turkey onto a piece of white card stock and trim to fit the card base.  Add the ink to the background.  Start off of the paper and move the ink pad in small circles onto the edges of the paper.   Build the colors by starting with the lightest color and working outward using the darkest colors on the edges. 

Color the turkey image with your markers. 
 
 Begin glittering parts of the turkey.  Build the feathers to give them a more defined look by adding strips of glue to the areas using the metal tip on the bottle of Designer Dries Clear Glue.  Sprinkle them lightly with glitter and allow to dry.   Add more glue over the top and sprinkle with more glitter.  Continue doing this until you have it built up the way you like it and allow it to completely dry. 

Fill in the center of the flowers using the Black Wing Microfine Opaque glitter and add detail to the apron using the Crystal Ultrafine Transparent glitter.  Allow the areas to dry completely. 

Attach the image to the card base.

Your turkey is now ready for some holiday fun.  Send it to a friend or family member who you are thinking of for the holiday or send it as your Thanksgiving invitations.  No matter what you do he will be sure to bring fun to your day! 


To see more of Peg's work join her on her blog: http://www.pegscraftingcorner.blogspot.com/


Wednesday, October 9, 2013

Be-witching Card

Witch Crash

This little witch seems to have lost her way and has crashed into this pole or maybe her broom went a little haywire. This month at Art Glitter we are collaborating with Northwoods Rubber Stamps. Northwoods rubber stamps are great to work with and are some of my favorite stamps. These stamps are great for using with Copic Markers and Art Glitter two of my favorite products for using on my cards.

Supplies

* Stamp: Northwoods Rubber Stamps

ART GLITTER
#519 Reed Microfine Opaque
#507 Black Wing Microfine Opaque
#115 Heather Ultrafine Opaque
#177 Florida Ultrafine Pearlescent
Dries Clear Adhesive
Art Glitter Ultrafine metal tip
Red Line Tape
Copic Markers
Decorative Papers and Embellishments (Doodlebug Design)

Be sure to check out the Art Glitter website and if you purchase
$25.00 in product and use the coupon code
NW15
you will save 15%.

Take some time this week to be creative, check out Art Glitter and Northwoods Rubber Stamps for some great ideas for the Holidays.
Check out my blog for more ideas and see a schedule of my classes.


Thursday, September 12, 2013

Oak Leaf In Glitter

Art Glitter and Dreamweaver Collaboration

Wow this is the best collaboration ever, Dreamweaver stencils are so much fun to use with 
Art Glitter. While I know a lot of the team members will be doing the double glitter technique which I love I decided to use a different technique: 

Materials Used
509-Wood Nymph Microfine Opaque
519-Reed Microfine Opaque
524-Tree bark Microfine Opaque
716-Simba Microfine Transparent
Spoon Man

LG754 - Acorn and Oak Leaves Stencil
Dreamweaver Gold Metallic Paste
Palette Knife
LM2010 - Paste Spreader

I started my card by taping down my stencil on all 4 sides with removable tape. I then placed Gold Metallic Paste on my Paste spreader using the back side of the palette knife, then paste the image by bring the paste over the stencil at a 45 degree angle from the top to the bottom in a smooth stroke. Remove the tape from the stencil in the reverse order that you put it on leaving the last piece of tape in place as a hinge, then gently lift and remove the stencil. While the paste is still wet, waterfall the glitter over the paste and let dry.
Now don't forget September's promo code DW20 for 20% off the retail prices with your $25.00 purchase from Art Glitter and don't forget to go to the Dream It Up blog for a list of the Dream Team members posting this week.
I will be posting more on my blog in the coming weeks check it out at:


Thursday, August 29, 2013

Scrapbook Boot With Art Glitter and Want 2 Scrap

Order from Art Glitter the entire month of August  in the amount of $25 or over, use the code W2S20, and you will receive 20% off your order total!
And remember, Art Glitter is MADE IN THE USA!!!
 

If you don't have enough time to scrapbook all your children's memories, consider scrap booking important events in a mini album!  Above you can see a mini album Clare Dempsey created with Art Glitter and Want2 Scrap to help her boys remember Vacation Bible School (VBS).  Want2Scrap has great mini albums to choose from for those important events and Art Glitter has all you need to make your finishing touches sparkle and shine!   

Front and Back Cover (see photo above)


Here are some ideas for making magical mini albums:
1)  Focus on the Highlights of the event.
For Clare's children, the highlights were Music, Snack, and Crafts!  For music, Clare allowed two pages and made box for the music CD (see photos above).  She used a free SVG from Penny Duncan Designs to cut her CD box.  She also allowed two pages for crafts and snacks (see photos below).

While Bible Verses weren't Clare's boys highlights, Clare felt it was important to recall these as part of VBS memories.  So she gave them two pages as well.  

2)  Use a paper collection to help support the event theme and unify your album design and color scheme.  Here Clare used Close to My Heart's Giddy Up paper pack for the album and supplemented it with Authentic's Pride paper line and some neutrals.
3)  Add some sparkle with Art Glitter to set your embellishments and finished project apart!  Clare loved using the Art Glitter Earth Elements on this project!  Just the right amount of sparkle and richness.  She describes it as being more rich than glittered flocking!  Pictures just don't do it justice and the smell of cacao is fabulous!  To glitter the edges of a folded rosette, be sure to fold and glue the rosette in place before adding glitter.  If you add them before folding, it won't fold well.  
4)  Plan ahead-before the event plan what photos you want.  You can even purchase a mini album, paper, embellishments and glitter ahead of time.  If you are scrap booking VBS, go on Friday and you can get a summary of each of the day's bible verses on one day.  Volunteer and you won't miss a thing!  
5)  Maximize Space-Use journaling labels and stamps to fill the white space in the mini and document those special memories!  Clare also added a title tag, and put a quote and journaling tag on the back side to maximize space.

Supplies

Close To My Heart Giddy Up Paper Pack
Close To My Heart Giddy Up Sticker Pack
Stickerpotomus Denim Alphabet
Miss Elizabeth Leather Alphabet
Cricut Old West Cartridge (Blue Glittered Bible Verses)
Cricut George Basic Shapes Cartridge (Star)
Spellbinders scalloped rectangle dies
Tim Holtz Rosette die
Cloud 9 Designs Simple Thoughts Boys Stamp Set (Memory Quote)
Fiskars Lil' Davis Designs Sentiments (Journaling block & circles)
K & Company Blue Awning Journal Pad label
K & Company Brenda Walton Peppermint Twist Paper (red and white gingham paper)
Sequins Michaels
Ribbon
Brads
Denim scraps
Metal Concho JoAnn Fabrics
Twine
Assorted Card Stock
CTMH Ink
Timeless Twine
Basic Grey Alphabet Stickers (1-5 on Bible Verses pg)


Sunday, August 25, 2013

Geared Up!

 
It's All About Steampunk


I was thrilled when we teamed up with Want 2 Scrap this month and I received the Sprightly Sprockets Chipboard Album.  I knew right away I wanted to do something with a Steampunk style to it and it had to have a lot of glitter because there's nothing better than a project with a lot of bling. 
 
I chose to use these products:
 From Art Glitter http://www.artglitter.com/
 
     Glitter
        Monarch Microfine Opaque Glitter
        Sunrise Ultrafine Opaque Glitter
        Saddlebag Ultrafine Opaque Glitter
        Challis Ultrafine Opaque Glitter
        Crystal Ultrafine Transparent Glitter
        Razzle Dazzle Glitter Kit
        Spoon Man! Spoons: 
        Ultrafine Metal Tip: 
        Stamp Pad: 
        8 1/2 x 11 Transparency Sheets: 
        
 
Additional Items Needed:
    Black acrylic paint, 2 paint brushes: 1 wide and 2 narrow, metallic paint (Mica Color Metallic Paint Set from UsArtQuest used) 1 piece of patterned paper, various colors of cardstock that match the Steampunk colors to cover chipboard pages, Steampunk themed stamps, acrylic stamp block, feathers, dry and wet adhesives
 
 
      Begin by painting the front cover with the black acrylic paint and allow to dry.  Choose some of the pages to adhere the card stock to and stamp some images onto those.  Dress them up by adding some glitter to the images.  Leave some pages blank and use some of the ideas below to dress them up.   
 
     Once the paint has dried, paint some of the gears using the metallic paint and allow those to dry.  


      Now, spread some Designer Dries Clear Glue onto some of the other gears, working on one at a time and then sprinkle glitter of the glue.  Allow the glitter to sit on the glue for a couple of minutes so that it adheres and then shake the excess back into the bottle.    Once it is dry, adhere the piece of patterned paper to the first solid page of the book and adhere the gears frame to the top.  Place some of the Nestabling circles that come with the album on a few of the glittered gears and cut one of the small ones in half and place it on the half gear on the bottom right. 
 
 
     Working with one feather at a time, run a line of glue down the stem of the feather and add some small dots onto the rest of it and sprinkle glitter over the top of the glue.  Allow it to sit to adhere before shaking off the extra.  Once the feathers are complete, place the feathers between one of the pages and the card stock covering that is covering the chipboard page and adhere it down. 
     Cut pieces  of  the acetate to match the size of the pages.  This will create extra pages to the book, but the page behind it that is covered with card stock can have pictures added to it so they show through for a really great look.  Stamp the image onto the bottom right corner of the transparency and allow to start drying.  While the ink is still a little wet(it will have a beaded look while still wet) sprinkle the glitter over the top (I used the Challis glitter) and allow it to sit for several hours or overnight to dry.  Now, use a clean, dry paintbrush and start vigorously brushing off the glitter. 

      This is what your image will look like after the previous step is complete.  Line the page up with one of the book pages and punch the holes into it and place it in the book.  You can do this with as many pages as you would like. 

     If you like Steampunk, you can't go wrong with this album.  With the addition of the products from Art Glitter it puts it over the top!  Get a start on one now and purchase the supplies you will need by using the promo code August W2S20  for 20% off any $25 order or more at Art Glitter.  Don't forget to head over to Want 2 Scrap and get the album while you are shopping, too. 


Tuesday, July 30, 2013

Penny Black & Art Glitter


 This month at Art Glitter, we have been fortunate enough to play with some absolutely beautiful Penny Black Stamps.  Here is what I did with my favorite Penny Black stamp:


I have listed the directions and materials that I used.  As long as you work from the finest (Microfine) glitter to the coarsest you are planning on using, you can create with any colors.  Also, be sure to use opaque glitters if you want to completely cover the main color. If you plan on changing the base color, you should change the ink color to one that matches, as the bonding powder does not completely cover the area.
MATERIALS:
Penny Black Slapstick/Cling Stamp 40-193 Wistful
Penny Black Simply the Best Clear Stamp Set
Acrylic Block to Fit Stamp
Stampee Crafts Stuck on You Bonding Powder Adhesive
Adirondack Denim Pigment Ink
Heat Gun
Card Stock
Patterned Paper
Adhesive
May Arts Ribbon

DIRECTIONS:
1)  Stamp on white card stock, pour bonding powder on when wet, and heat set.
2)  Pour the Microfine powder on immediately and shake off excess.  This will create a shimmering blue image that will look a lot like the picture below.   
 3)  Use the image of the stamp to add the sparkling details.  Just follow the gorgeous lines with the fine tip on the Designer Dries Clear and cover with the glitter of your choice.  I started with the silver and the gold swirls.
4)  Then, add the small green leaves with the Ultrafine Lime Rind.
5)  Next, color the butterflies with the various colors of Hologram Glitter.
6)  Add the flower colors.  I chose neon pink for this.
7)  Finally, color the larger leaves.  I used the Vintage Glass Glitter.  Let it dry completely.
8)  Assemble the card.

Thanks for stopping by today.  Come check out my blog at www.rememberinglifesmoments.blogspot.com any time! Until the next time that I see you, keep glittering!