Showing posts with label ultrafine transparent glitter. Show all posts

Friday, February 21, 2014

Art Glitter Hair Clip


Supply List
Art Glitter 280 Lime Rind Ultrafine Opaque glitter
Art Glitter 150 Poison Ivy Ultrafine Opaque glitter
Art Glitter 297 Hibiscus Ultrafine Transparent glitter
Art Glitter 304 Petal Pink Ultrafine transparent glitter
Art Glitter Dries Clear Glue
Art Glitter Ultra Fine Tip
Art Glitter Sticky Paper
The Robin's Nest Metallic Red Dew Drops
Darice Barrette
Bridal Ribbon Hobby Lobby
Plastic packaging
Creative Memories Leaf Punch
Hot Glue gun

One of the things Clare loves about Art Glitter is the range of colors!  She knows she can find a color glitter to match any project she is working on!  This will come in handy with wedding season approaching.  Clare used the perfect color Art Glitter to make beautiful barrettes for the flower girl. 
She started by covering a Darcy barrette with ribbon, gluing it in place with a hot glue gun.  Clare likes to use a low temp glue gun to avoid burns!  She then punched some leaves in Art Glitter Sticky paper.  She peeled off the protective layer first.   Clare finds it easy to just dip the leaf in the glitter on the side of the leaf in the light color green. 

Here Clare used 280 Lime Rind Ultrafine Opaque.  She then dipped the same leaf in the darker color green to cover the center of the leaf, this is 150 Poison Ivy. 


Once the leaves were made, she glued them on top of the ribbon on the barrette. 
For the flower, Clare cut a rolled rose using a Sizzix die and some plastic packaging from a embossing folder she bought:  reduce, reuse, recycle!  She has even used the plastic lid to the salad packaging from the grocery store to make flowers!  You can find more photos of the packaging flowers here.   While the rose was still flat, she covered the center of each petal using 297 Hibiscus Ultrafine Transparent glitter and the ultrafine glue tip, and Art Glitter Dries Clear glue. 
She made a second row of color, again using the ultrafine tip and 304 Petal Pink Ultrafine transparent glitter. 

Once these had dried completely, Clare rolled the rose and glued it at the center using a glue gun.  For the flower center she glued a dew drop from The Robin's Nest.  She gently bent the petals once the glue had dried completely.  She then attached the flower to the barrette on top of the leaves.  

To see more of Clare's work you can visit her blog at cricutcraftyclare.blogspot.com.

Saturday, February 1, 2014

"Dreamy" Valentine

Would you like to know how to make a simple Valentine card that is still full of luscious glitter?  I have the SIMPLE secret.
Adhesive paper.  That is the secret.  Well, that and the Microfine Glitter.

MATERIALS:
Sticky Backed Paper
Microfine Opaque Glitter 528 Crimson
Ultrafine Transparent Glitter 85 Crystal
Dreamweaver Stencil LJ928 Swirly Hearts
Soap
Stencil Brush
Adhesive
Card Stock
May Arts Ribbon

DIRECTIONS:
1)  Soap up the back of the stencil.  Make sure to get a fine layer of soap on the back.  This is the releasing agent so that you can remove the stencil from the paper later.
2)  Brush off any excess soap with a stencil brush.
3)  Place the stencil, soap side down, on the sticky side of the Sticky Paper.
4)  Cover it with Microfine Opaque Glitter in 528 Crimson.  The Microfine glitter really gets into the grooves of the stencil and makes the image crisp and clean.  Rub it in a little, because the fine texture can some times fly around.
5) Brush the extra glitter off using the stencil brush.
6)  Place the project face down on a table and carefully remove the sticky paper.
7)  Cover the now exposed background with 85 Crystal Ultrafine Transparent Glitter.
8)  Assemble the card using adhesive, card stock and  ribbon.

Done--simple and sparkly!  Thanks for stopping by today.  Come by and visit my blog at www.rememberinglifesmoments.blogspot.com any time!

Saturday, January 4, 2014

Wonderful Winter White


Supplies 
Art Glitter Small Sticky Paper
Art Glitter Waterfall Fantasy Film
Art Glitter Fantasy Fiber Snowflake
Art Glitter 373 Fairy Dust
Iron
Parchment Paper
Cricut Winter Lace Cartridge (large snowflake)
Creative Memories 'Tis The Season Cricut Cartridge (title)
McGill Snowflake Punch
Martha Stewart Snowflake Punch (medium snowflake with circle frame)
3 Birds Designs Lace paper
White Card Stock
Queen and Co Pearls
Jolee Bling (pearl in setting)
Close To My Heart Flower bling
White Flowers
Zva Creative Blue Swirl Bling

Clare love's to capture the wonder of Mother Nature's  winter's whites with Art Glitter!  She scrap books all her families Christmas Cards and keeps them in a Christmas album that she brings out when the decorations go up. What a great way to see how all the children, nieces and nephews change and grow over the years!
Clare started with a piece of white card stock.  She pressed a thin layer of the Art Glitter Fantasy Fiber in Snowflake between parchment paper on a silk setting for five seconds.  She layered this on top of the white card stock and placed a piece of paper lace on top.

Clare folded a piece of Art Glitter Waterfall Fantasy Fiber in half and pressed it in the same manor as above.  She then cut in a Cricut machine using 'Tis the Season Creative Memories Cricut Cartridge.  Clare says to treat the fused Fantasy Film like a lighter weight card stock (Clare used a pressure of 4).  For the snowflakes, Clare cut the white portion using Art Glitter Sticky paper  and pealed off the protective layer.


She sprinkled on Art Glitter Fairy Dust on top and shook off excess.  She sandwhiched the glittered snowflake between two layers of Art Glitter Waterfall Fantasy Fiber and pressed again.
 Clare found that some of the smaller corners needed a bit more than the standard 3 to 5 seconds to bond.  She then hand trimmed around the snowflake.  She used the same layered technique with two more punched snowflakes in the sticky paper as well.

Clare wishes you could see this page live and in person as the photos don't do it justice!  The snowflake and title are much more light aqua blue in real life and work well with the winter whites to make a faux ice look!

You can find more of Clare's work at her blog:  cricutcraftyclare.blogspot.com.


Sunday, November 17, 2013

Tombow and Art Glitter

Supply List
Small Water Color Brush
Anna Griffin Embossing Folder
Patterned paper
WhiffOFJoy.com Shopping Willow Stamp
K. Andrew Designs Fashionable Friends Stamp Set (sentiment)
Paper Doily


One of Clare's favorite glitter techniques is a simple way to add sparkle strips.  It is made with double sided sticky tape and looks great on a card or a page.  Clare got this look by just cutting the double sided sticky tape and notching one end.  She removed one red side and adhered the tape to the project.  She then removed the final side of the red tape protector and pored on the Art Glitter.  Clare stamped  her shopping girl and colored her with Tombow Markers, using the Blending Mister and a small water color brush.  One of Clare's favorite things to do with the Tombow markers is to distress her paper edges!  It is difficult for to find distressing inks in brighter colors.  So, Clare' often runs the markers along the edge of the paper, using the paint brush side of the Tombow Marker and then blending it with the Blending Mister and a small water color brush.  Clare used this technique to get the yellow edge on the plaid paper stripe behind the doily.  And this is also a great way to repeat the color in your stamped image.

If you would like to see more of Clare Dempsey's work, you can find here blog Here.

Thursday, October 24, 2013

Ornamental Fun


This month at Art Glitter we got to work with the Northwoods Rubber Stamp Company.
I have never used their stamps before but was pretty impressed with such detail. The ink went on very smooth and the image turned out perfect.


 Supplies:
 
Patterned Paper
Copic Markers
Twine
 
 
After stamping the image onto my cardstock I colored with copic markers then added glitter.
 
Be sure to check out Art Glitter and if you purchase $ 25.00 of AG product
and use NW20 coupon code you can save 20%.

My Blog: zippity-do-dah-tabitha.blogspot.com


Sunday, October 20, 2013

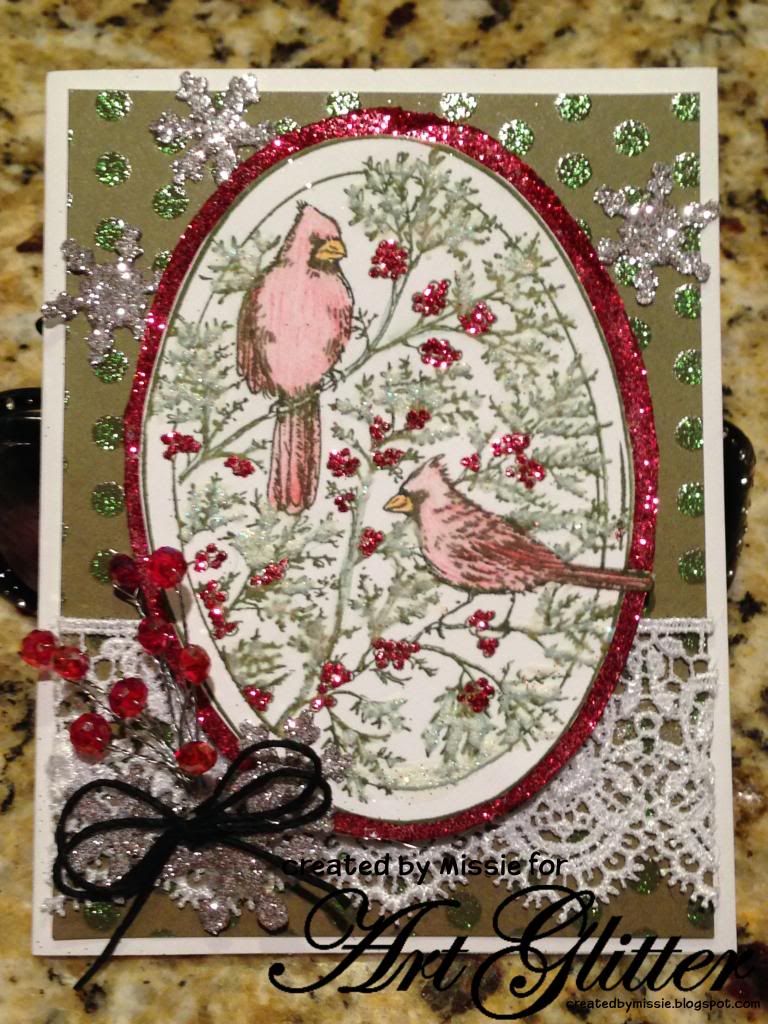
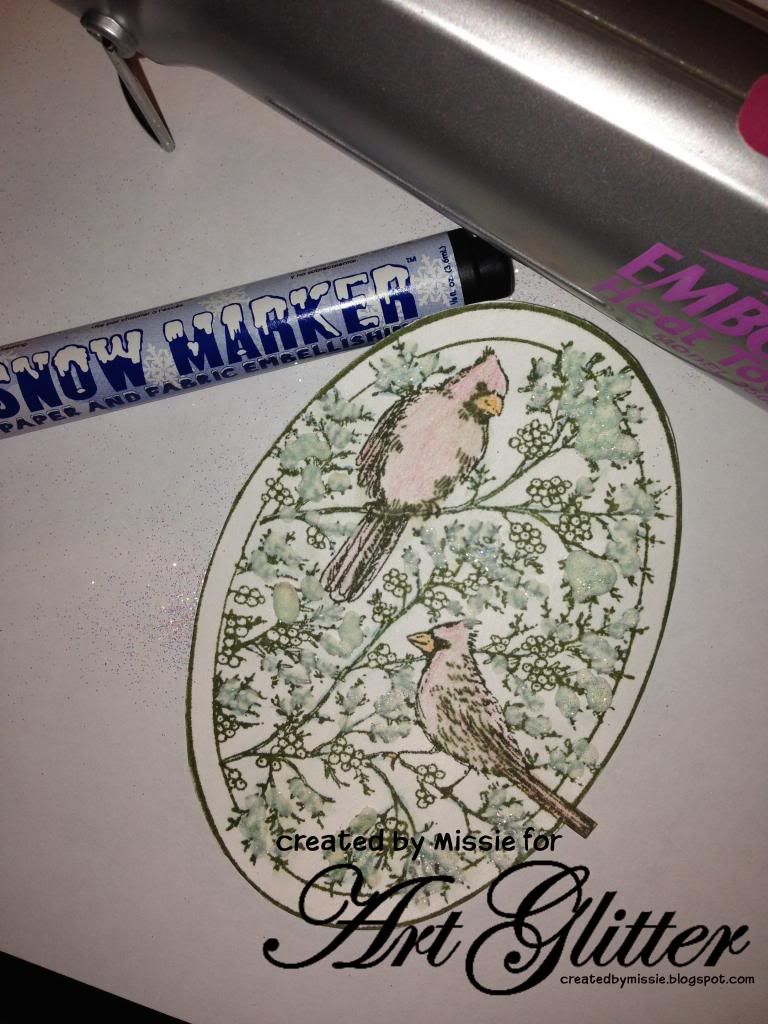
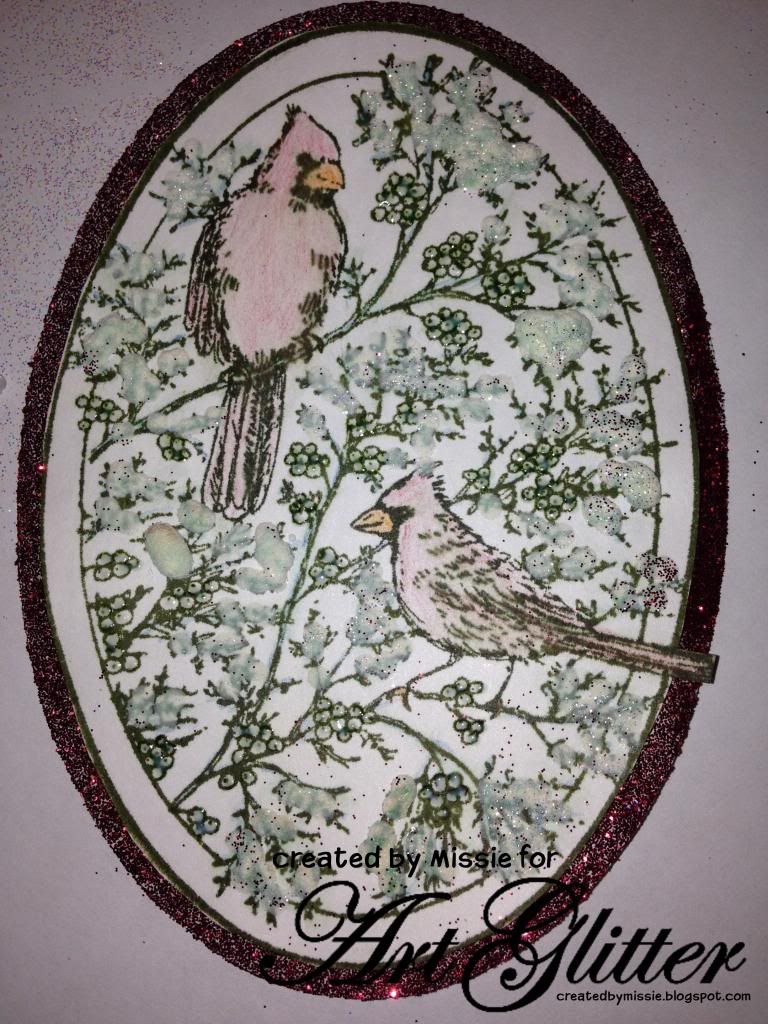
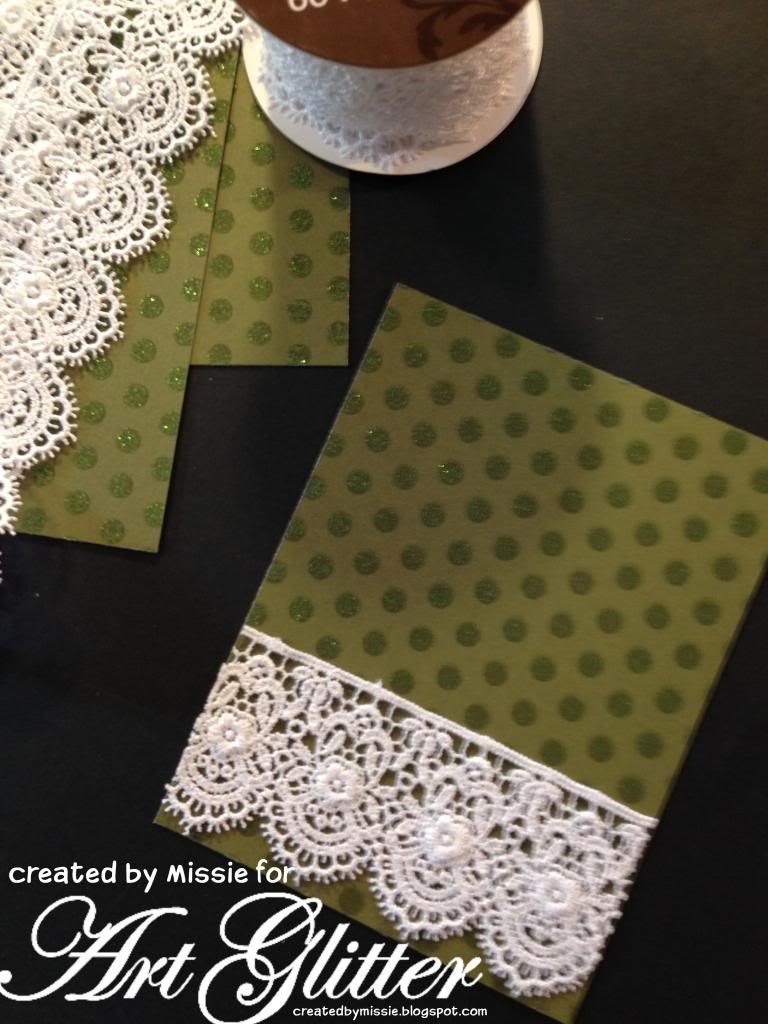
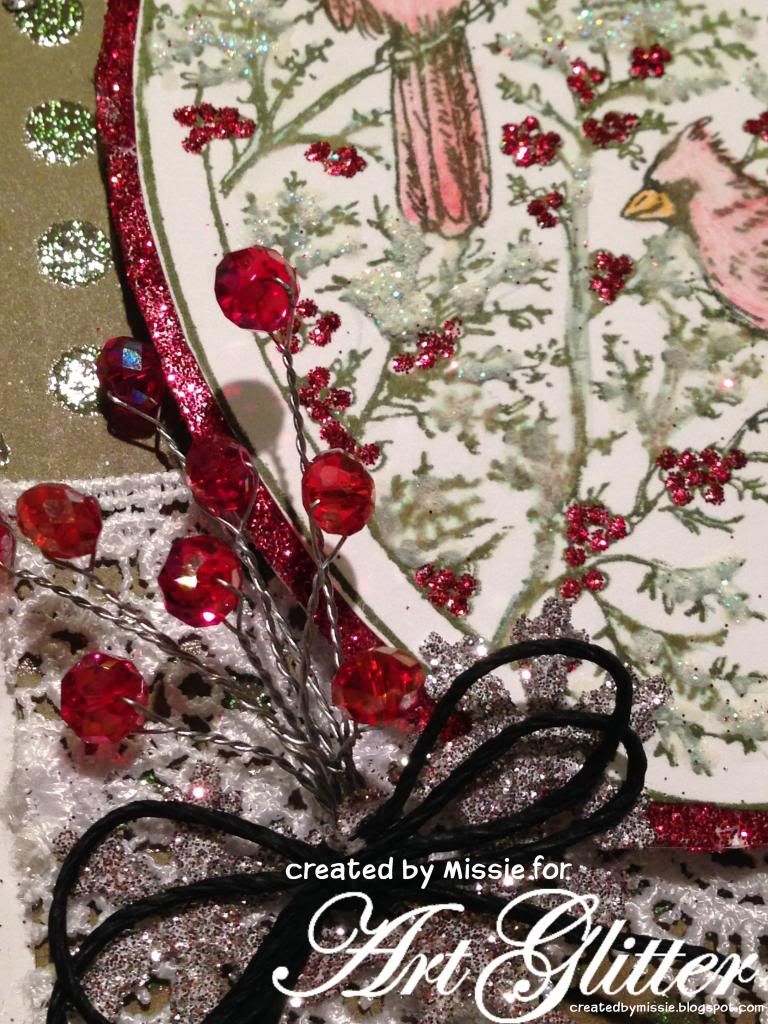
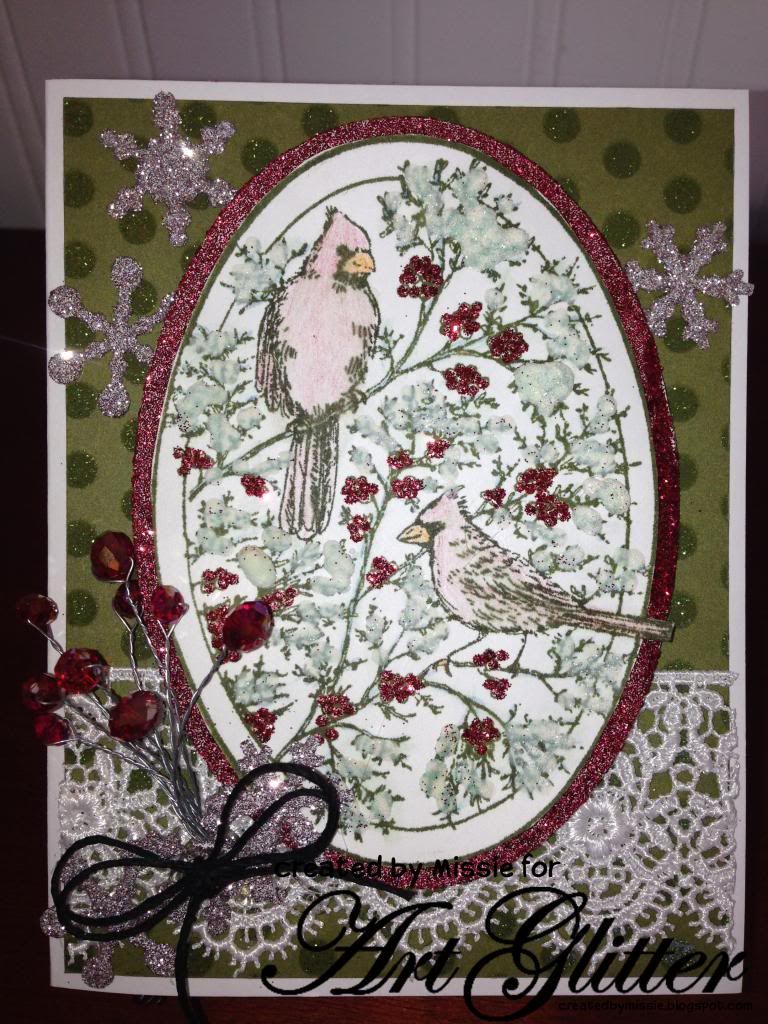
Snow Birds with Art Glitter and Northwoods Stamps


Supplies:
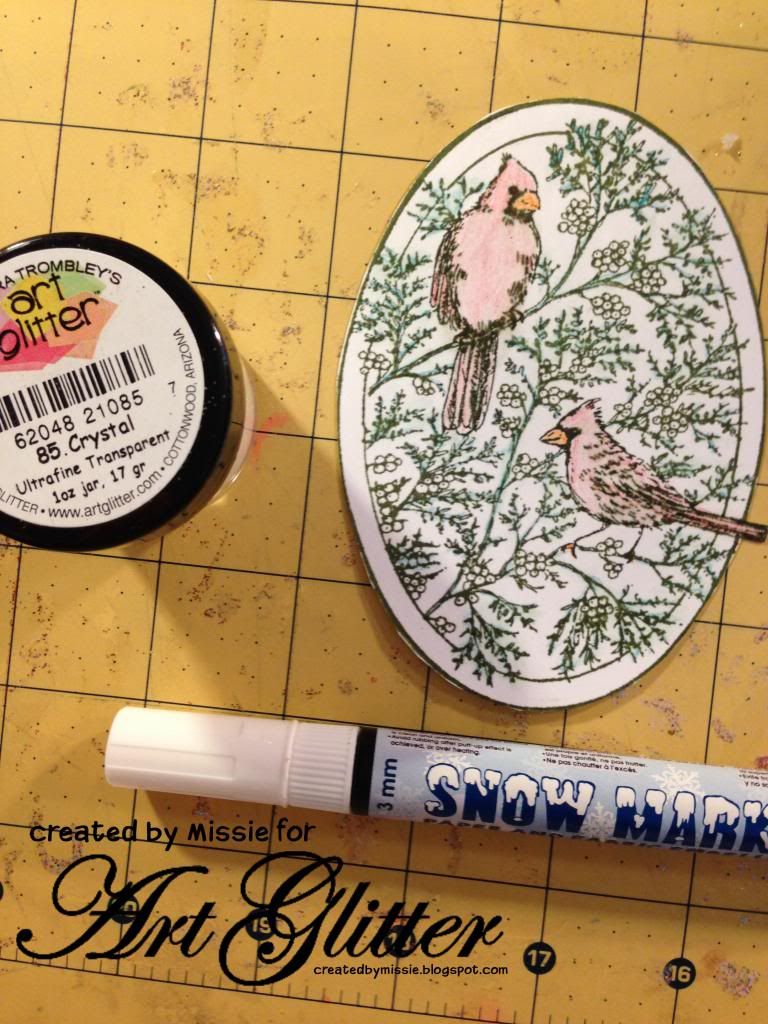
Art Glitter #85 crystal Glitter
Art Glitter #2 Christmas Red Glitter
Art Glitter #83 Silver Glitter
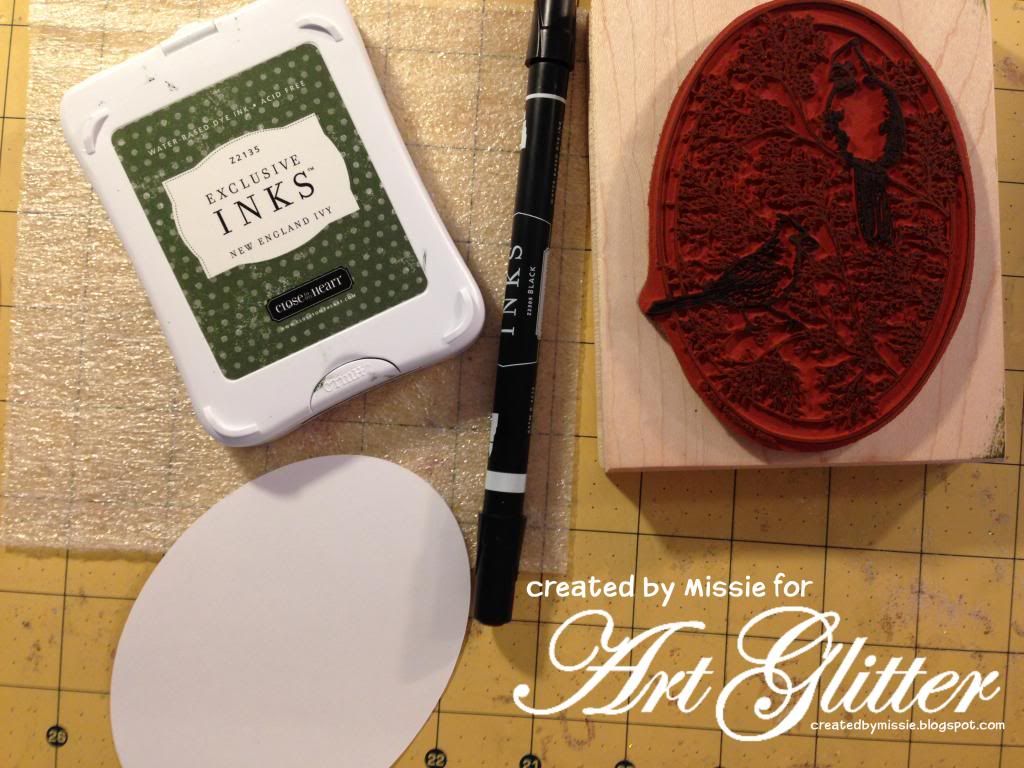
Northwoods Stamps (cardinals)
Cardstock, ink, pens, colored pencils, lace, black string, and snow pen
Connie Crystal red crystals and wire


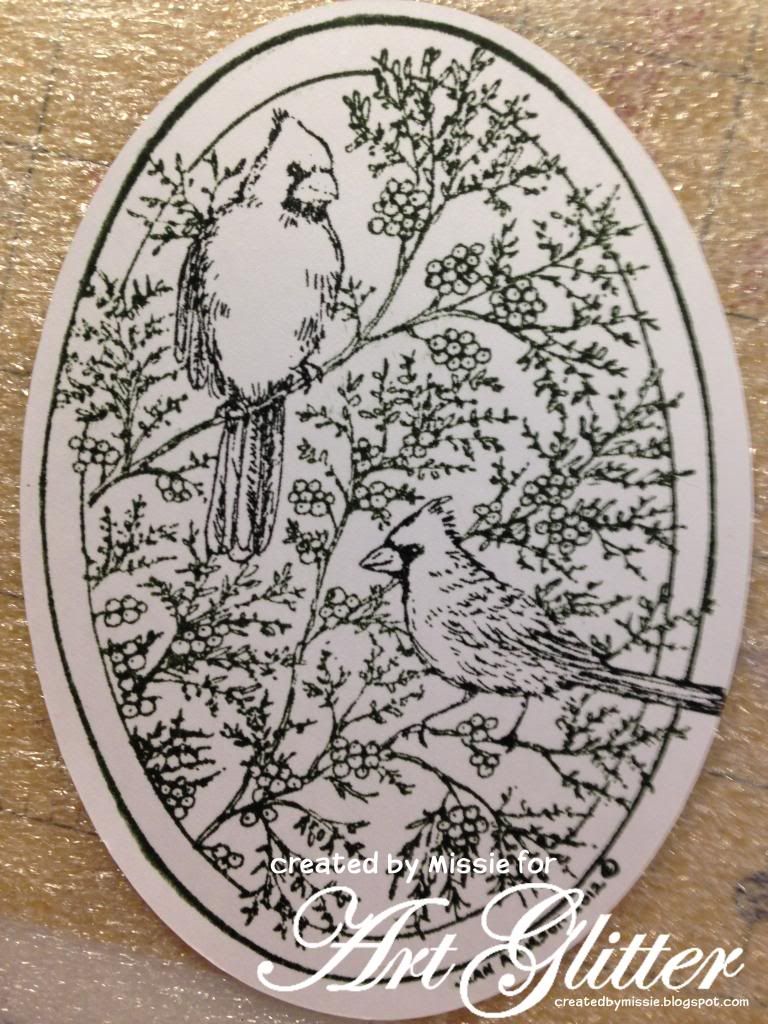
To begin stamp the image on white cardstock.

A great trip for stamping a background stamp:  Use a colored ink all over the stamp (Green seen here) the use a marker to color small areas.  For this stamp the birds were colored with maker in black, then the all over green ink was added.  That way the birds don't look green.

Color the stamped image using colored pencils then use a snow writer to add snow to the scene.  While the "snow" is still wet sprinkle on some crystal glitter. 

After the "snow" dries apply heat using a heat gun to puff up the snow.

Add a glittered mat to below the stamped image, then add glitter to the berries on the stamp using Christmas Red Glitter (to match the mat)

Prepare the card base with an A2 card (white) and the add lace to the cardstock. 

Create an embellishement using wire and red crystals to mimic the berries in the stampped scene.

Finally add snowflakes covered in silver glitter as a final accent to the card. 

IN OCTOBER USE PROMO CODE NW15 FOR 15% OFF THE RETAIL PRICES WITH A $25 PURCHASE! 
Thanks for stopping by to see my creations.
Missie Todd
createdbymissie.blogspot.com


Monday, September 16, 2013

Spooky Sparkling Bats

Art Glitter and Dreamweaver Stencils are working together this month to celebrate "An Awesome Autumn"!  Today, I have a Halloween bat card to share.  It was easy to make and lots of fun.  let me show you how.
MATERIALS:
Art Glitter Sticky Paper
Art Glitter Ultrafine Pearlescent 143 Glow in the Dark
Art Glitter Microfine Pearlescent 533 Mini Pearl
Art Glitter Ultrafine Transparent 168 Black Light
Art Glitter Ultrafine Opaque 157 Purple Lame
Art Glitter Ultrafine Opaque 79 Black
Dreamweaver Double Stick Mounting Paper
Dreamweaver LL525 Bat Stencil
Dreamweaver Palette Knife
Dreamweaver Black Glossy Embossing Paste
Dreamweaver Stencil LM 2010 Paste Spreader
Scotch Removable Tape
K & Company Patterned Halloween Paper
Black Card Stock
White Card Stock
Adhesive
Scissors
A Pen

DIRECTIONS:
1)  Trace any well sized round object onto Art Glitter Sticky Paper. 
2)  Cut out circle.
3)  Remove protective paper and cover circle with Glow in the Dark Glitter.  Be sure to rub it in with your fingers.
4)  Brush off the excess Glow in the Dark Glitter.
5)  Repeat steps 3 and 4 with Microfine Pearlescent Glitter.  When you use the microfine glitter, it should get between the ultrafine specks and make your paper stay a little whiter.
6)  Remove one side of the Dreamweaver mounting paper and place the "moon" you have created inside.
 7)  Pour a little of the Black Light Glitter around the moon and rub in with your fingers.  This will create the "glowing" effect.  Brush off the excess.
 8)  Pour the Purple Lame Glitter around the edges and rub in.
9)  Place the stencil over the top and tape all the way around the edges with the removable tape.
10) Use the Palette Knife to place Black Embossing Paste onto the Paste Spreader.
 11)  Place the edge of the spreader on the stencil and pull across.
 12)  Remove the stencil and cover the paste with the Black Glitter.
13)  Shake off the excess glitter. 
14)  Assemble the card.
I hope you enjoyed today's post.  You have picked a great month to follow the posts.  Art Glitter is featuring a 20% off sale on all regular retail items!  Use the code DW20.  Stencil with Style is ALSO offering a 20% off sale. Their coupon code is SWS20.
Thanks for checking out the blog today.  Stop by my blog at www.rememberinglifesmoments.blogspot.com to find more Dreamweaver projects.  Hope to see you there!

Tuesday, September 10, 2013

A Tag for Fall Seasons


Tags are a fun and exciting way to have smaller pieces of art that can be combined into larger projects.  They are easy to make and share.  This month we have teamed up with Dreamweaver Stencils to combine the fabulous works that can be created using a stencil with the gorgeous beauty of Art Glitter.  Fall is just around the corner and now is a great time to get started on all of your fall creations.  A tag is a great way to create unique smaller pieces that can be a focal point of a larger project and with these wonderful fall leaves and colors who can't look forward to the season? 


IN SEPTEMBER USE PROMO CODE DW20 FOR 20% OFF THE RETAIL PRICES WITH A $25 PURCHASE


Supplies Needed:
Art Glitter:
   Glitter: http://www.artglitter.com/retail/Rartglitter.html%3C/div>
     Sunrise Ultrafine Opaque Glitter
     Nutmeg Ultrafine Opaque Glitter
     Florida Orange Ultrafine Pearlescent Glitter
     Bananan Ultrafine Transparent Glitter
     Saddlebag Ultrafine Opaque Glitter
     Lime Rind Ultrafine Opaque Glitter
     Crystal Ultrafine Transparent Glitter
     Spoon Man! Spoons:  http://www.artglitter.com/retail/Raccessories.htm%3Cbr />

Dreamweaver Stencils-  http://www.dreamweaverstencils.com/ :
     "Autumn"-LM 295:  http://www.dreamweaverstencils.com/lm_stencils/index8.html%3C/div>
     " Leaf Icons"-LL471:  http://www.dreamweaverstencils.com/ll_stencils/index6.html%3C/div>
     Dreamweaver Large Stencil Brush:  http://www.dreamweaverstencils.com/brushes.html%3C/div>
     Double-sided Mounting Paper:  http://www.dreamweaverstencils.com/paper.html%3C/div>
 
Extra Supplies Needed:  A natural or soft bar of soap, card stock, patterned paper, ribbon

 
 Begin by rubbing the soap onto the back of the stencil so that it will be easier to remove the double sided paper later on. 
 If there are any small soap pieces caught in the open areas of the stencils, use the brush to remove them. 
Remove one side of the protective coating from the double sided paper and adhere it to a piece of cardstock. The card stock can be cut to the size of the stencil or it can be larger to form a frame around the finished piece.   Next, remove the second protective coating and adhere the stencil to it.
 

Using the Spoon Man! spoon lightly sprinkle several of the glitter colors over the stencil in small areas.  Do not cover large areas or it will be only the one color. 
                            
 
 Lightly rub it with your finger to adhere it to the paper and get the glitter into the crevices of the stencil. 
 
Gently tap off the excess glitter and put into a separate container for later use.  It makes a great mixed of glitters.  Use the brush to help remove the glitter. 
 
Turn the project over so that the paper is to the top and remove the paper from the stencil.  Do not remove the stencil from the paper or you will risk bending the stencil. 
 
You will now have an area of exposed adhesive left.  Lightly cover the entire piece with another color of glitter.  If you use a dark glitter inside the stencil, use a light color of glitter for this step.  If you use a light color inside the stencil, use a dark color on the outside. 
 
Now, create a 3" x 6" tag from the card stock and adhere a smaller piece of patterned paper to it.  Add the ribbon in behind the pieces you just created for a finished look.  Place the glittered stenciled pieces on top and adhere them to the tag. 
 
You now have a great tag to celebrate the fall season.  Be sure to watch for my next post as I continue to turn this tag into an even bigger project.  It's one you won't want to miss.  Now go and get a start on your tag for fall so you're ready to join me on the next part! 


http://www.pegscraftingcorner.blogspot.com/