Showing posts with label Autumn. Show all posts

Monday, September 30, 2013

Stunning Wedding Page


This month Art Glitter is teaming up with Dreamweaver Stencils.   Art Glitter is offering 20% off retail for $25 purchase is good with the code DW20 at their online store.  

Supply List

Art Glitter 343 Chestnut Ultrafine Opaque Glitter
Art Glitter 110 Taupe Ultrafine Opaque Glitter
Art Glitter 56 Pumpkin Ultrafine Opaque Glitter
Art Glitter 92 Bananan Ultrafine Tranparent Glitter
Art Glitter 280 Lime Rind Ultrafine Opaque Glitter
Art Glitter 79 Black Ultrafine Opaque Glitter
Art Glitter 85 Crystal ULltrafine Transparent Glitter
Art Glitter Designer Dries Clear Glue
Dreamweaver Metallic Gold Embossing Paste (leaves)
Dreamweaver LG 616 Leaf Texture Stencil
Dreamweaver Palette Knife
Dreamweaver LM2010 Paste Spreader
Dreamweaver Homemade Hawaiian Soap
Dreamweaver Stencils-  "Autumn"-LM 295
Dreamweaver Double-sided Mounting Paper
Dreamweaver Metallic Fix 11 Ivy Garden
Dreamweaver Metallic Fix  02 Amber Glow
Dreamweaver Metallic Fix 15  Kimono Red
Basic Grey Take Note Journaling Card with Transparencies
Basic Grey Origins Authentic paper
Basic Grey Origins Revitalize paper
Cricut George Basic Shapes Cartridge
Cricut Art Nouveau Cartridge
Cricut CTMH Artist Cartridge
Cricut Craft Room Software
Flower bling
Yellow Card Stock
Black Card Stock
White Card Stock
Brown Card Stock

Clare Dempsey made this fabulous page to celebrate a niece's wedding using Art Glitter and Dreamweaver products to capture the beauty of Autumn!  Clare started by using the Dreamweaver Leaf Texture template with Dreamweaver Embossing paste.  To get the ombre look she mixed the Gold embossing past with the Amber Glow Metallic Fix and spread it over roughly half of the leaf stencil. She then mixed the Gold embossing paste with the Kimono Red Metallic fix and spread this over the half of the stencil not yet filled.  Once the stencil was filled she sprinkled the Ivy Garden powder ONLY on the right half of the stencil (Clare says to be sure to do this while paste is still wet!) and allowed this to dry overnight.  In the morning, Clare used a Swiffer cloth to buff off the excess green metallic paste.  Clare then trimmed the card stock and cut the piece in half to make a border strip.  By slipping the border strip under the circular die cut, no one can see that Clare had some missing leaves on the border strip and that it has a seam!


Clare created the oak leaf and acorn circle die cut using the Cricut Craft Room software to weld a circle from George, Basic Shapes and Art Nouveau.  She hand cut the white mat. Clare used the Dreamweaver template and some ink with a sponge dauber.

For the Autumn title Clare used the Dreamweaver double sided mounting paper and cut the frame with the Cricut.  To make the application of the Art Glitter neat and accurate, Clare set the blade depth to a 3 and cut ONLY the inside line of the ribbon frame.  She then set the blade depth back to a 6 and cut the outside layer of the frame all the way through the double sided mounting tape.  Clare carefully pealed up the outside top layer ONLY and applied the Art Glitter with a fine tipped dry brush (see photo below).  Maybe it is the painter in Clare, but she likes the control a brush gives her when applying the glitter.  She says to use a dry brush and to clean the brush off between colors on some scrap fabric. See how Clare also soaped up the back of the Dreamweaver template and taped it in place before removing the center portion? 

 Clare flipped down the template and painted the word Autumn in Art Glitter.  She carefully cleaned off excess glitter on the template, her hands and her work station and then flipped up the template to apply the white glitter.  For the bottom portion of the title "Wedding", Clare cut the title using the Dreamweaver double sided mounting paper, a heavy duty blade, and the Cricut CTMH Artiste Cartridge.  She used the dry paint brush technique for applying the different colors again.  She then matted it on white paper and hand cut the offset white area.  


You can find more of Clare'e work at her blog:  Cricutcraftyclare.blogspot.com. 


Wednesday, September 18, 2013

Perfect Pumpkin

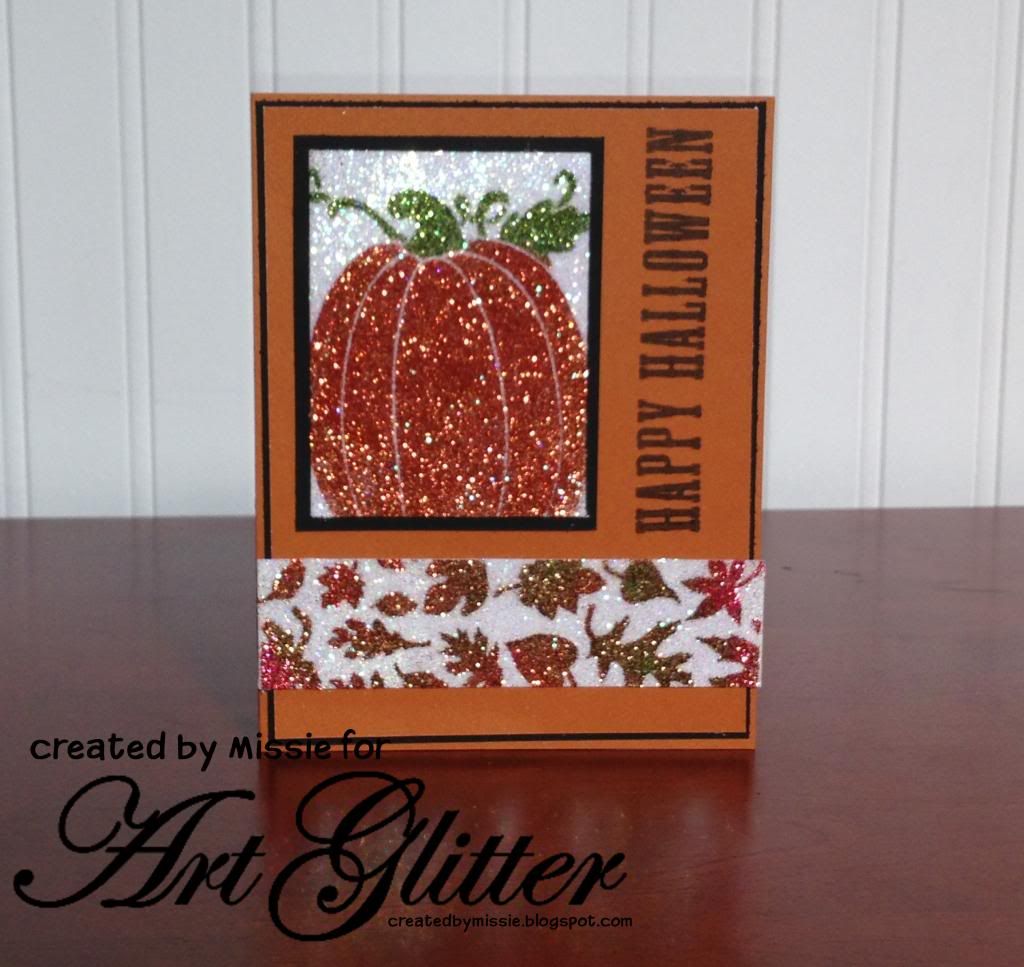
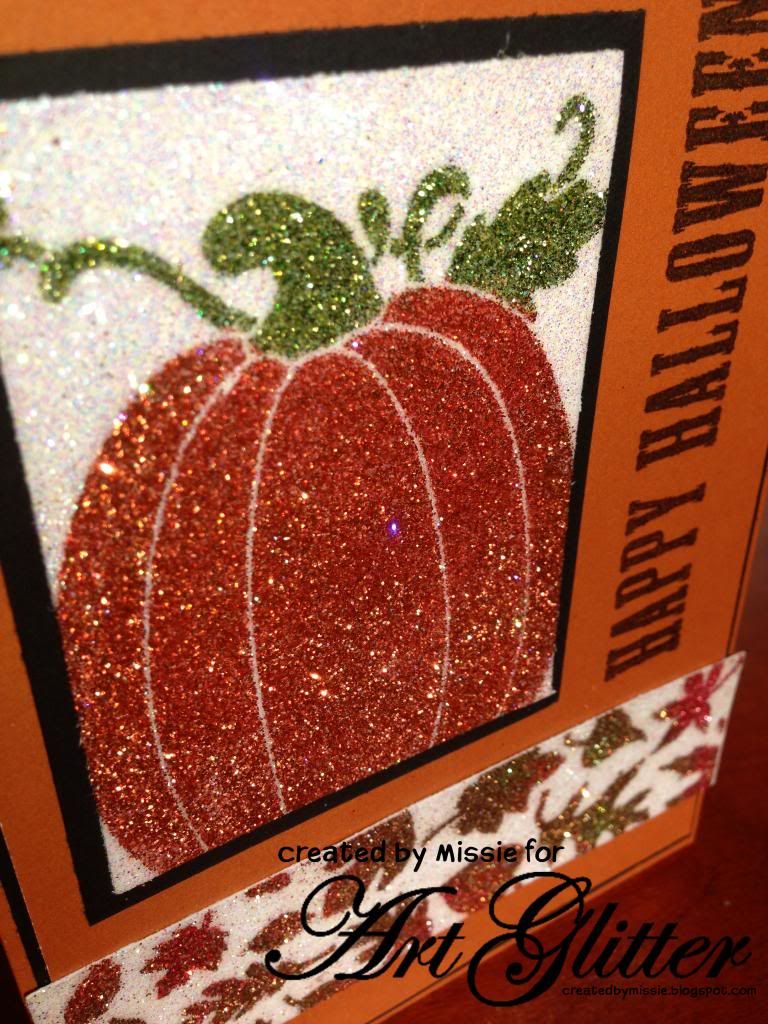
Pumpkin Perfect with Art Glitter
 
Supplies: 
Art Glitter #300 Camel
Art Glitter # 85 Crystal
Art Glitter #56 Pumpkin
Art Glitter #349 Garnet
Art Glitter #301 Amazon 
Dream Weaver stencils (pumpkin and fall leaves)
Black Card stock
White Card stock
Halloween Stamp and Black Ink
Double sided adhesive
 
 
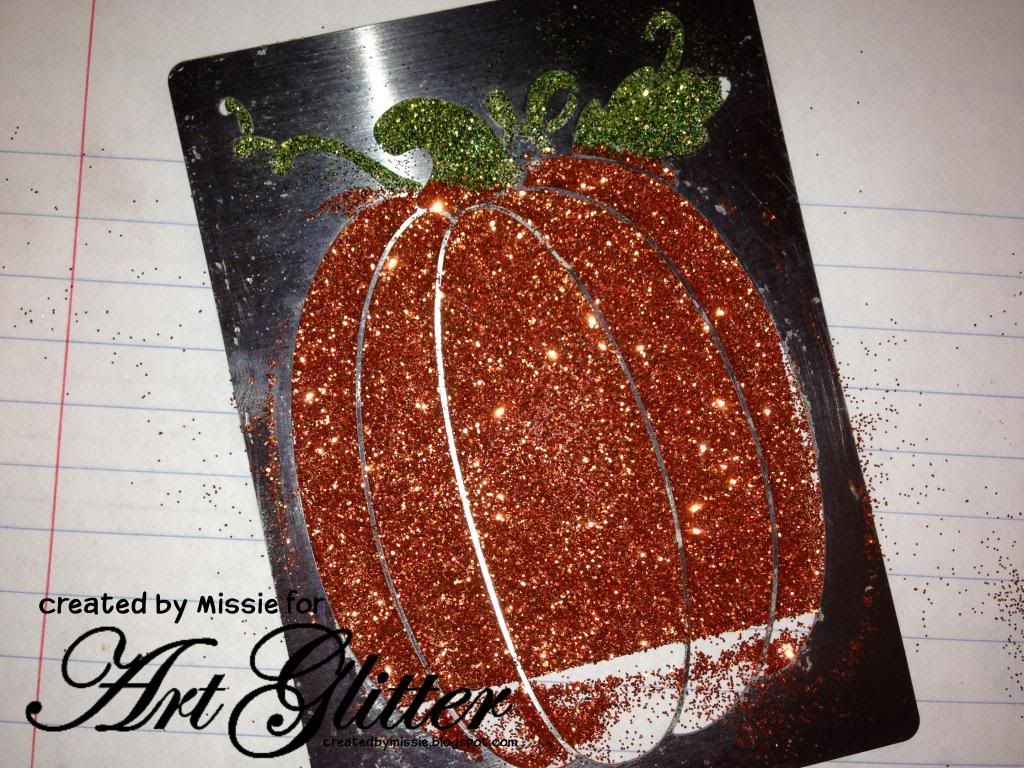
Before beginning to work with the stencils apply soap to the back of the stencil.  Dream Weaver recommends using an all natural soap as they are softer.  If you do not have an all natural soap you can use a regular bar soap, just be sure to wipe off any excess flakes before using the stencil. 
 
Apply double sided adhesive to your card stock then place the stencil directly onto the tape.  The soap will allow for the stencil to be removed later.  Then begin carefully applying glitter.  For the stem and leaves of the pumpkin use Amazon green glitter.
 
Then apply the pumpkin glitter. 


Carefully remove the stencil and apply crystal glitter to the remaining exposed adhesive.  I used the same process to create the leaf boarder as well- just using a rainbow of colors (Camel, Pumpkin, Amazon, Crystal and Garnet).
 
 
Layer The glitter pumpkin onto black card stock then apply to the front of an A2 card along with the leaf boarder.  One simple stamp and the card is complete. 
 
This month we are happy to be teaming up with Dreamweaver!
To celebrate, Art Glitter is having a 20% off retail sale of any $25 purchase. Just use code DW20 at Check out!


Thanks for stopping by to see my creations.
Missie Todd
createdbymissie.blogspot.com

Saturday, November 24, 2012

Fall Wreath with Tombow and Art Glitter

Art Glitter is having an exciting cross promotion with Tombow.  I knew as soon as I heard we were going to do something with them that I would be using one of my favorite products, Tombow Dual Brush Pens.  So, here is how I made this wreath:
MATERIALS:
Art Glitter Dries Clear Fabric Adhesive
Art Glitter Ultrafine Opaque 62 Copper Canyon
Art Glitter Ultrafine Transparent 197 Flax
Art Glitter Ultrafine Transparent 295 Ensalada
Art Glitter Ultrafine Transparent 90 Melone
Tombow Dual Brush Pens in various fall colors
Tombow Mono Multi Liquid Glue
Tombow Power Adhesive Tabs
Inkssentials Craft Sheet
Tim Holtz Alterations Tattered Leaves Die
Manual Die Cut Machine (I used Cuttlebug)
1/4 yard Muslin
1/4 yard Brown Duck Cloth
Brown Wrapped Florist Wire
Green Wrapped Florist Wire
18" Grapevine Wreath
Burlap Ribbon
Small Styrofoam or Carvable Pumpkin (I bought mine at the Dollar Store)
Wire Cutters
Mister
Paper Towels
Small Paint Brush (optional)

DIRECTIONS:
1)  Use Die Cut Machine and Tattered Leaves Die to cut leaves from muslin and duck cloth.  There is no magic number, although I had at least 16 of each leaf.  You should judge it based on your own thoughts of how full the wreath should look.  Also, I found that the muslin cut best with 6 layers and the duck cloth with 3.
2)  Use the brush side of the Dual Brush Pens to color in the muslin.  There is no wrong way to color these.  I wanted tons of color, so I used many pens, but an almost monochromatic look is good, too.  I focused on a different set of colors in each type of leaf.  You don't have to do a great job on coloring these, as the next step erases many errors. Just make sure you saturate them. It might be a good thing to let kids help you with!

3)  Set leaves on the craft sheet and mist with water.  Because the colors are water based, they will move and blend.

4)  Remove the leaves from the craft sheet and set on paper towels to dry.  Allow to dry completely.

5)  Cut the wire into pieces about 4" long.
6)  For each leaf, match the colored top of the leaf with a duck cloth bottom leaf.  Remove the top leaf and set aside.
7)  Use Fabric Dries Clear on duck cloth leaf and smear with either your finger or craft brush.  You want to completely cover the upside of the duck cloth leaf with a light coating of glue.  You don't want to make the glue too saturated so that it removes the color.
8)  Set wire on duck cloth leaf about 1" on the leaf and 3" beneath it.
9)  Match up the colored leaf and press down.  Hold for a few moments and set aside to thoroughly dry.
10)  Make a small puddle of fabric glue on the craft sheet. Use your finger or brush to put a light coating of glue on the leaves where you want them to look "frosted" with glitter.  Don't put over the whole leaf, because you want it to be a lovely accent, but still see the coloring.
11)  Glitter the leaves.  I used the Flax for the leaves with yellow, the Melone for the primarily red leaves, and Ensalada for the green leaves.  You do not want to use the opaque glitter for the leaves because it would obliterate the colors underneath.

12)  Cut styrofoam pumpkin in half.  I used a styrofoam knife.
13)  Cover the pumpkin with Tombo Mono Adhesive.  You can use the wide applicator end, your finger or a brush.  Don 't apply glue to the bottom.
14)  Glitter with Copper Canyon (one of my absolute favorite colors).  Because it is opaque, it can cover an ugly color or even an unattractive seam (Dollar Store pumpkins are not pretty).  Let dry.

15)   Wrap the burlap ribbon around the wreath.  Don't tie yet. 
16)  Attach the pumpkin with Power Adhesive Tabs on the bottom.  You can enhance the adhesion with a little of the Mono Adhesive squeezed into the cracks with the fine applicator.
17)  Use wire to wrap leaves around the vines.
18)  After your placement is correct, use the Mono Adhesive with the fine applicator to glue the backs of some of the leaves to the wreath and make more secure.

You're finished!  Don't want to make a fall wreath this late in the season?  Just imagine how great this wreath would look with frosted Sizzix holly leaves and sparkling mini houses in the center!!!  I feel another project coming on!   Happy Holidays, everyone!
 
Laura
 

Thursday, November 8, 2012

Imitating Fall Splendor

For the month of November the Art Glitter Design Team is working with Tombow products and I wanted to share a project I created with both these products. I was fortunate to receive a set of Tombow markers with my favorite color range - earth tones! The theme I chose to create my project around is Fall. It's been so beautiful here in Michigan this year. The colors are so bright and vibrant - they just pop and really make you take notice, especially when the sun shines. I just wanted to imitate those colors and bring that fresh, colorful feeling into my home. I started with a 10-inch-by-10-inch primed canvas. To add a background color I scribbled Tombow Markers no. 969, 837, N57 and N35 onto the canvas then spritzed with plain water. I held the canvas up and twisted and turned it to control where the colors ran and how. Then I spritzed it with a homemade mix of Heirloom Gold Perfect Pearls and water to add a golden Fall shimmer.
The Tombow markers are water base so they'll react nicely with the water. When you achieve the look you like turn a heat gun on the canvas to stop the reacting.
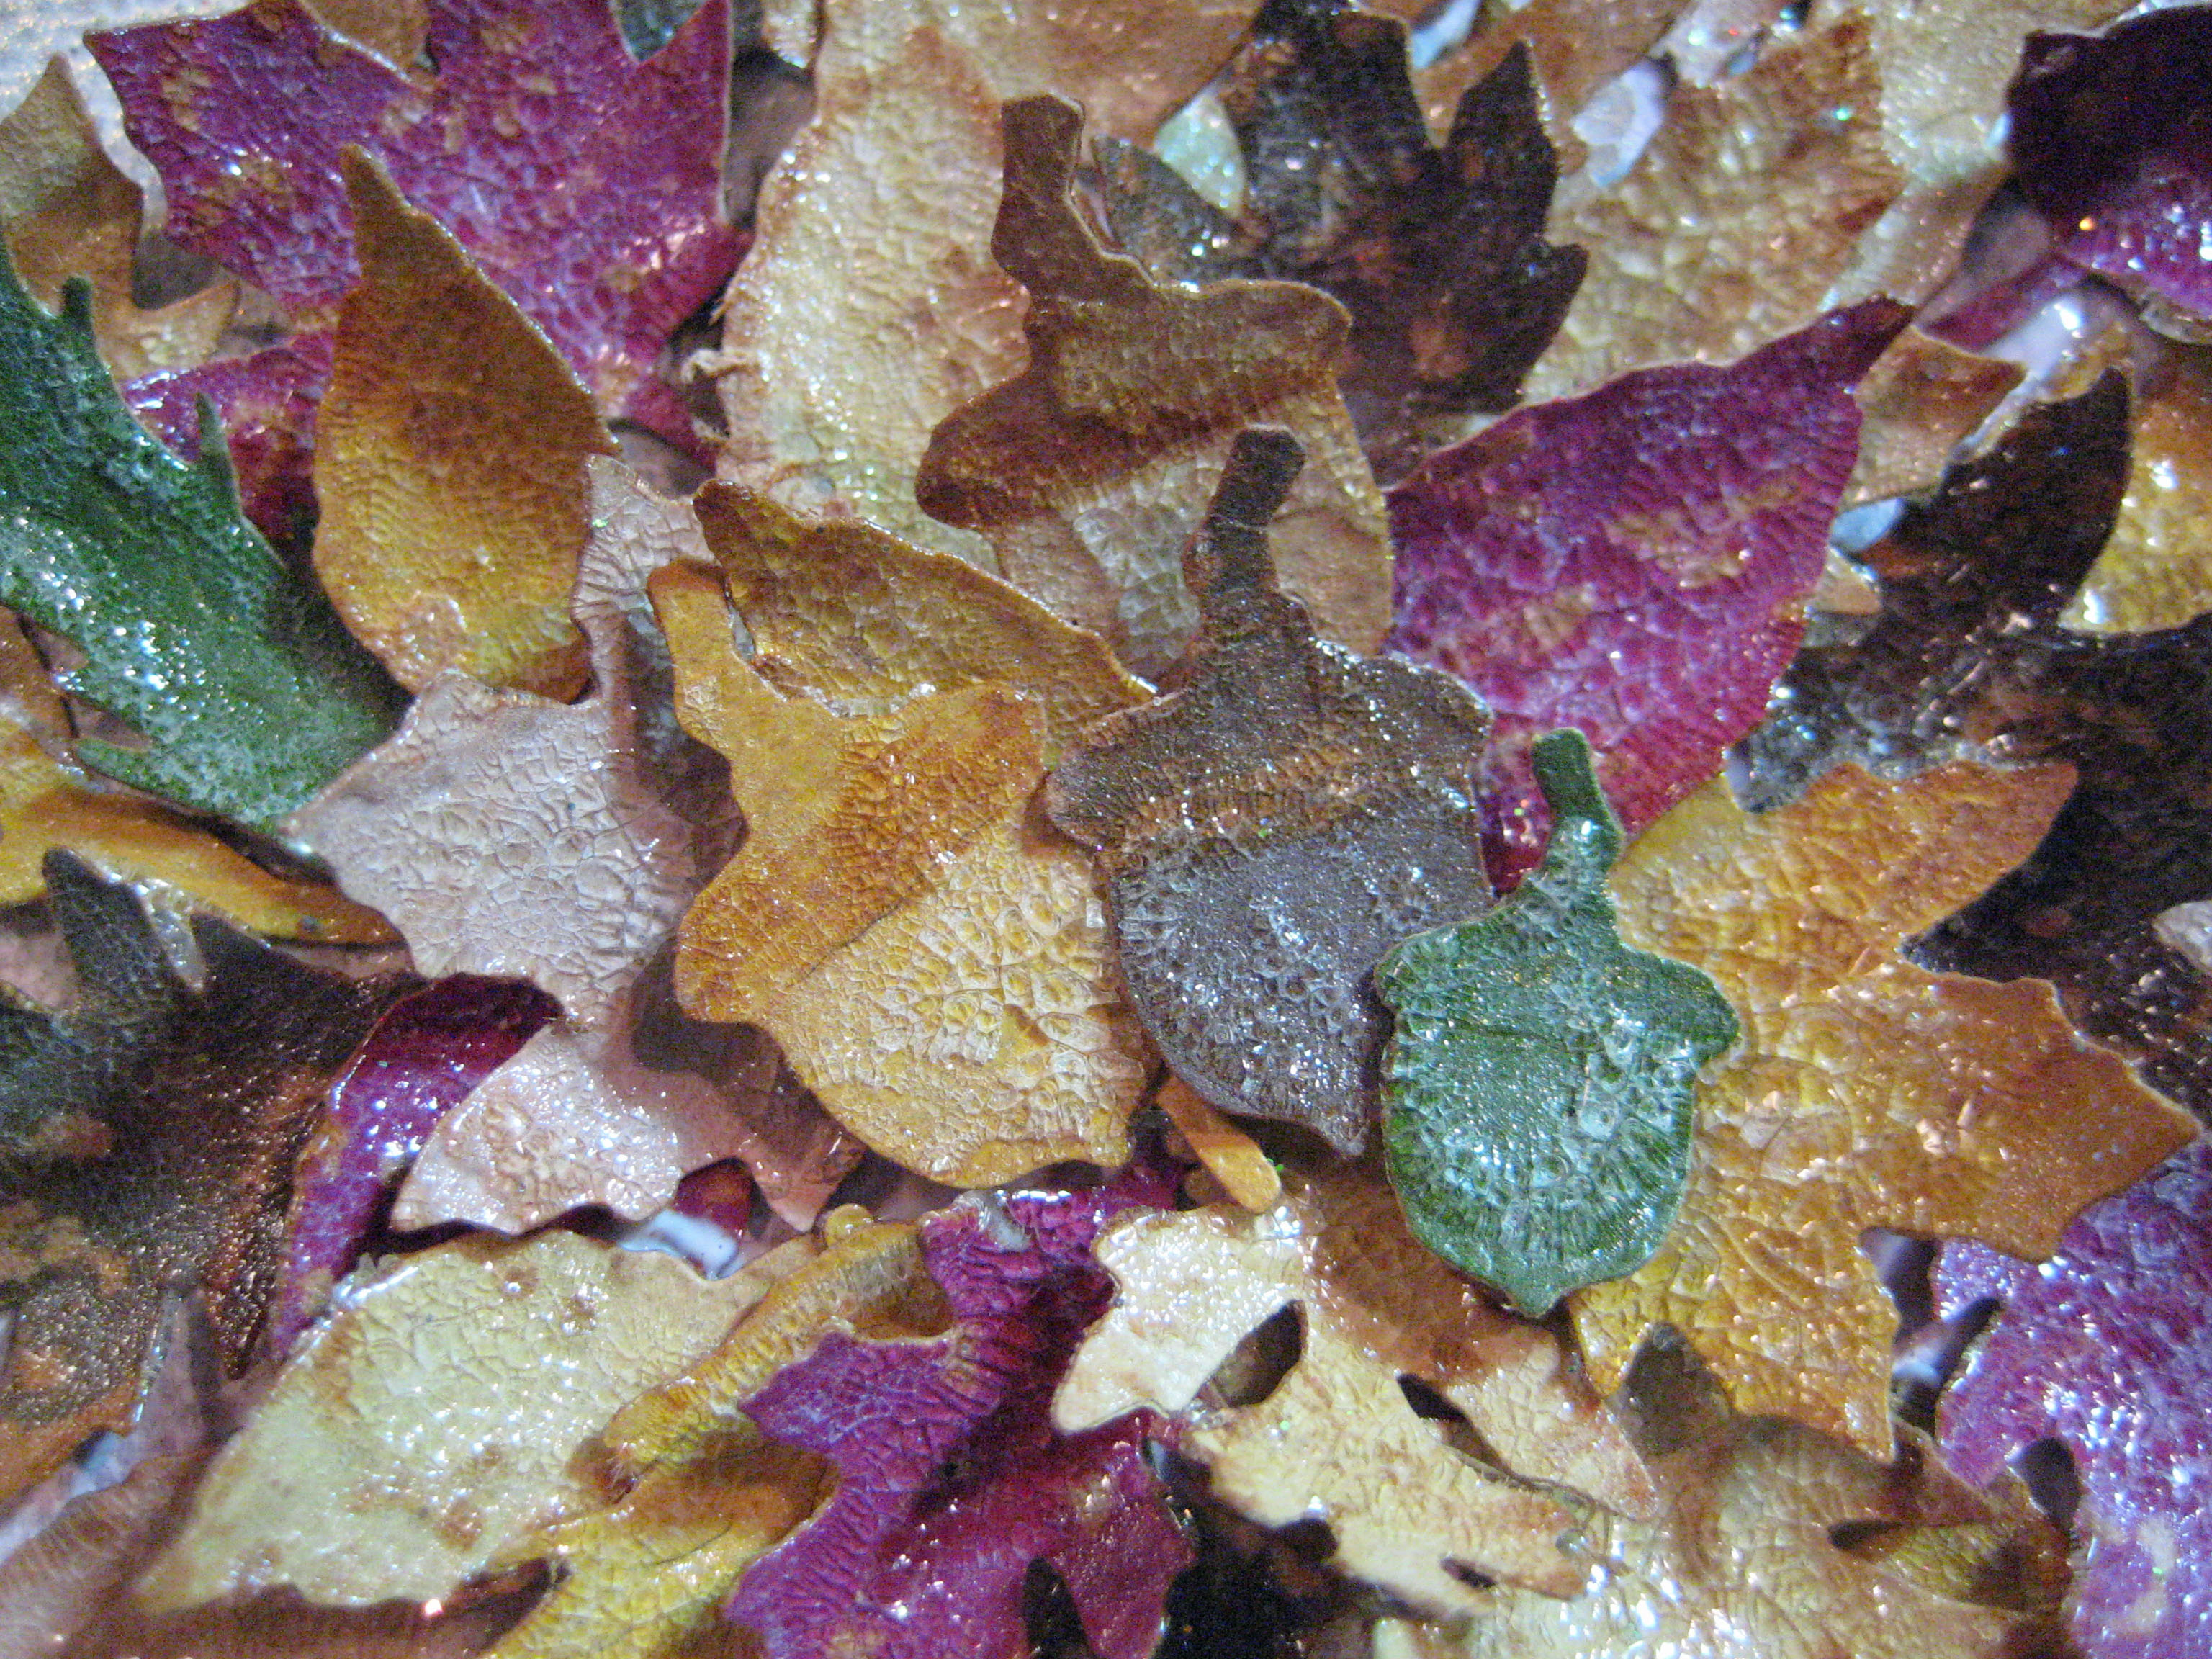
I needed Fall leaves so die cut them in a variety of colors, dry embossed, inked the edges and coated them in Clear Rock Candy Crackle Paint and left them to dry for several hours. They crinkle and curl and actually look like a bunch of fallen leaves when done!
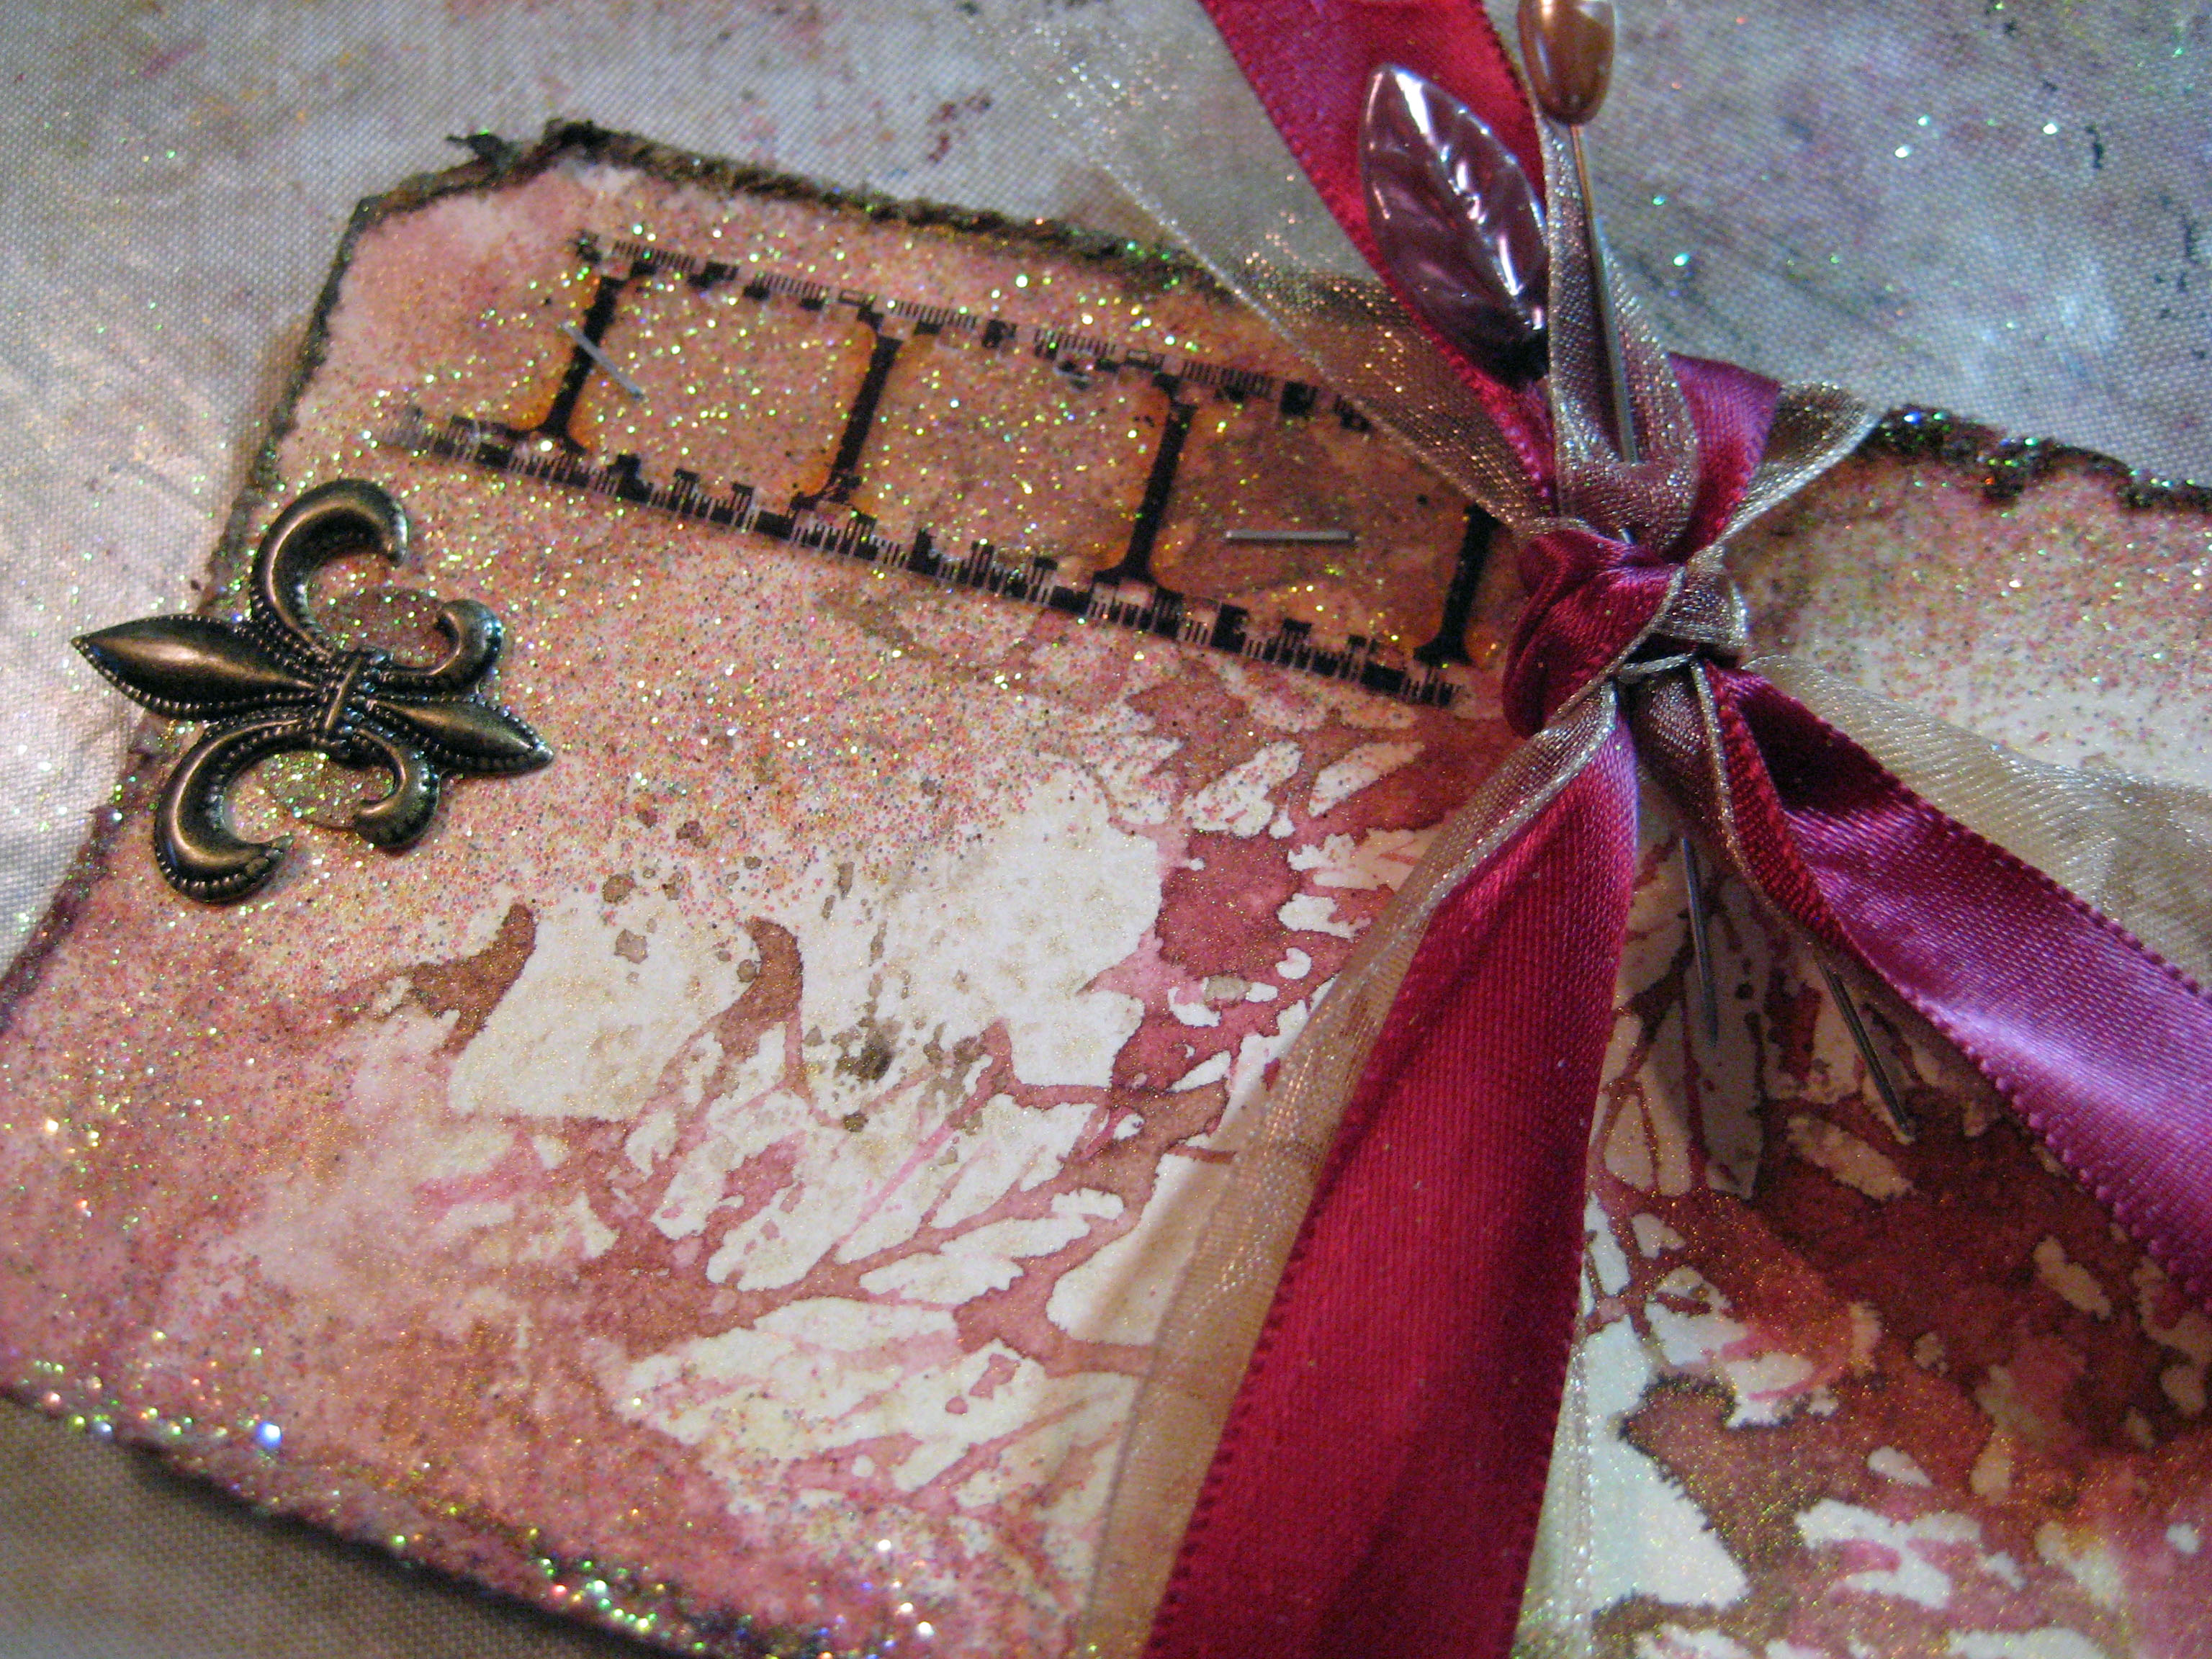
I wanted to use a tag on the canvas so I used the same Tombow markers to color a Fred Mullet leaf stamp. Then I spritzed the stamp with plain water till I could see little color beads on the rubber then stamped onto the tag. I love the look this makes. It's creates a watercolor effect and the colors are very vibrant. I heat set the tag then spritzed it lightly with the homemade shimmer mix to add a touch of shimmer to the tag. I distressed the edges of the tag and ran the Tombow markers around the edges, mixing the colors and making sure to set some color in the cracks and tears. Then I held the tag over the non-stick craft sheet and spritzed just the edges with water. This makes the colors run and absorb into the tag edges to create a wonderful distressed look.
I wanted to add some glitter to the tag as well but didn't want a straight solid line. After checking my tools I decided to try a stipple brush. I squeezed some Tombow MONO Liquid Glue onto my craft sheet using its Broad Tip, dipped my stipple brush into it then stippled the craft sheet till I was left with just a light coating of the glue on my stipple brush. Then, I stippled around the edges of the tag, sprinkled on the glitter and used a clean brush to brush most of it off. It turned out great - just a thin coating of the glitter was left on the tag.I added a brad charm to the top, some Filmstrip Ribbon with staples and tied some pretty ribbons around the tag and added some decorative pins to the knot.
For the title I used die-cut chipboard letters and coated them in the same glitter used throughout the project, Art Glitter Gingerbread No. 243. It's the perfect color for Fall, with its mix of golds and reds. It blended it perfectly with the Tombow markers used for this project. After coating the chipboard letter in glitter I glued them in place on the canvas using the Tombow MONO Liquid Glue. This glue has duo tips, which came in handy. I used the Pen Tip to glue the letters to the canvas so I wouldn't get too much glue on the letters. This prevents it from squishing out from under and making a mess. I also used the Pen Tip on the glue to adhere all the leaves and acorns to the canvas. I put just a tad bit of glue on the high point of the leaf, spread it a bit with the glue tip and pressed the leaves and acorns in place, one at a time. By adding the glue only to the high points it allows the curled leaves to remain curled and add dimension to the project.
I also added a few leaves and an acorn to the corner of the tag and a metal corner tip to one corner of the canvas.
The tag is glued on last and I used just a squiggle of the Tombow glue down the center back of the tag and pressed it in place. By using the glue only in the center the edges retain their slightly curled dimension. A variety of the techniques I used on this project are ones I've done before, but, the stippling of the glue to add a light, random coat of glitter was a new one for me. Have you stippled glue before to add glitter?

Thanks for letting me share!
Linda


Thursday, September 13, 2012

Amazing Autumn Banner with Linda!

Hi folks! Linda here and I'm sharing the steps I took to create this Autumn banner using Art Glitter. Autumn is my absolute most favorite time of the year. I just love all its glorious colors of red, gold, browns and yellows. Notice how the banner sparkles and shines - just like the pretty Autumn-colored leaves glistening in the sun after a light mist of rain. I achieved that look by adding Art Glitter's No. 305 Goldenrod Ultrafine Transparent glitter to the edges of all the pennants, the edges of the rosettes, the chipboard letters and a light sprinkling on the leaf die cuts. Begin Here's how, by cutting your pennant pieces, either free-hand or with a die. I used Spellbinder's Nested Lacy Pennants. The rosettes are cut using Sizzix Sizzlits Mini Paper Rosettes die and were cut from one strip of double-sided paper (Cherry Truffles by Quick Quotes) so it easily gives you two color palettes to work with. I wanted to add glitter only to the edges so I squirted a dime-size pool of Designer Dries Clear (DDC) onto my non-stick craft sheet and used a 1/2-inch paint brush to carefully go around all the edges. DDC dries quickly when painting it on so make sure to work quickly and in small segments. Have all supplies ready to go before painting. I pour my container of Art Glitter into a JudiKins Snappy Tray but a small sandwich container would work just as well. You'll also need a water bucket for the paint brush. The glue dries quickly and the brush will need periodic cleaning. So, I paint one edge of the pennant with DDC, dip it into the glitter and tap off the excess. Repeat all the way around.
I use the same painting technique on the rosettes - just lightly brushing the edges with DDC, then dipping into the glitter. The center pennant is then processed through my Xyron 2.5" Create-a-Sticker for complete coverage; place it on the background pennant. Assemble the rosettes, stack them together (using DDC) and adhere them to the pennant as well.
Cut or purchase chipboard letters. I painted mine gold because I'm using a transparent glitter and the background will show through. Place them face-down into a Xyron 1.5" Create-a-Sticker. This puts solid adhesive coverage on the top of the letters. Peel the protective cellophane covering off the letters and dip them into the Goldenrod Ultrafine Transparent Glitter; tap off excess. Adhere these to the center of the stacked rosettes to spell out Autumn.

Look at that glorious sparkle! The chipboard leaves are from Quick Quotes Bag of Chips. They were inked with Aged Mahogany and Brushed Corduroy Distress Inks, randomly tapped with Piccolo Enamel Powder Adhesive, sprinkled lightly with ultra thick embossing enamel (UTEE) and heat set. While the enamel is still warm, lightly pinch the Goldenrod glitter over the top and heat again to set it in the enamel. This step really makes these leaves glisten!


My intention for my altered vintage window frame was to have several interchangeable banners for the different seasons and holidays - I'm well on my way!
Visit my blog for more Art Glitter inspiration!