Showing posts with label Winter Project. Show all posts

Thursday, December 19, 2013

Sleigh Ride

Supplies
Art Glitter 346 Chunky Transparent Winter White Glitter
Art Glitter D63 Nuts Slices
Art Glitter Dries Clear Glue
Floral Picks Michaels
Steel Heart Sled or sled with runners
Scarf
Skates
Ribbon
Basket
Plastic Ornaments Walmart
This year Clare really wanted a touch of nostalgia for her holiday curb appeal and she added some sparkle and shine with Art Glitter.  Clare thinks that Art Glitter is a great way to add sparkle and shine to outdoor decorations that have limited light on a dark winters night!   She started with an old pair of skates, picked up for cheap shopping garage sales over the summer.
To add some sparkle to the skate blades, Clare used Art Glitter D63 Nuts Slices.  Clare thinks the Slices are a perfect way to mimic the way ice forms on the window panes (see image below found here).

 The sled was found at a local craft sale, but you could use an old sled with runners!  Clare then embellished some plain pine and berry floral picks from Michaels.   She used Art Glitter 346 Chunky Transparent Warm White Glitter on the pine cones and the berries.  

To fill in the sled, Clare filled an old basket with shatter proof plastic ornaments, an old scarf and a Christmas garland wrapped around the bottom of the floral picks.  A bow on the front and Clare finished the sled.  A quick and beautiful project.  

Clare loves to use a  project like this is to cover her cords from the view from the street.  

You can find more of Clare's work at her blog Cricutcraftyclare.blogspot.com.


Thursday, December 5, 2013

Glitter Fun With Resin

I have been having the best time using the bezels from Spellbinders with the matching dies!  I also am loving all things resin.  I have used Enviro Tex for years and now we also have ICE Resin!  To be honest...I LOVE THEM BOTH.   What I REALLY love is the way the VINTAGE GLASS GLITTER looks under the resin!

I start with any bezel and then cut sticky paper with my Mixed Media machine and put in the base of the Bezel.  I then cover it with Glass Glitter.  I shake of the excess and put in whatever I want and finish off with resin! 

I will finish off the pieces when I get time but wow this is fun!


Happy Creating!
Kristi For Art Glitter
Stop by my blog for more fun with all things that sparkle!

Tuesday, December 3, 2013

Fantasy Fiber Snowflake


Supplies
Art Glitter Fantasy Fiber
Dimensions Needle Felting Kit (Clare found this at Michael's for $3.99 retail before coupon)
Old wool garment or scrap fabric
Pillow form
Sewing Machine
Iron
Snowflake template (Clare used Home Accents Cricut Cartridge)
Tailors chalk or white fabric marking pen

If you know Clare, you may know she is always trying to work in some fabric or textiles crafts with Art Glitter products.  This years she was so excited to try an old technique with a new product:  Needle felting with Art Glitter Fantasy Fiber.  And Clare found a way to try this technique on the cheap too!
Clare started by taking apart an older wool dress.  She used a garment that was at least 80 % Wool tomake felted wool.   She washed and dried it at the hottest temperature and then ironed it.  She cut it to fit her pillow form, leaving an opening in the back so that she could swap out the pillow cover after the winter season.

Clare cut a snowflake template using the Cricut Home Accents cartridge.  She then traced it onto the right side of the pillow front using tailors chalk.  Using the Dimensions needle felting kit and the Art Glitter Fantasy Fiber, Clare filled in the snowflake design.  And the Fantasy fiber worked wonderful for this!  It did NOT break!   Clare is sharing a video HERE she made on how to needle felt with Art Glitter Fantasy film here.  Here is how the pillow looks half way done.
Once the design was filled, Clare used an iron to heat set the snow flake design.  Place a piece of parchment paper on top of the design and then, set using a medium setting for 3 to 10 seconds.  Or just leave it without ironing for a faux fur look!

Find more of Clare's work at her blog:  http://www.cricutcraftyclare.blogspot.com/


Thursday, December 13, 2012

Light Your Way - Beautiful Lantern

Art_Glitter_Linda_Neff_Victorian_Lamp_photo_7
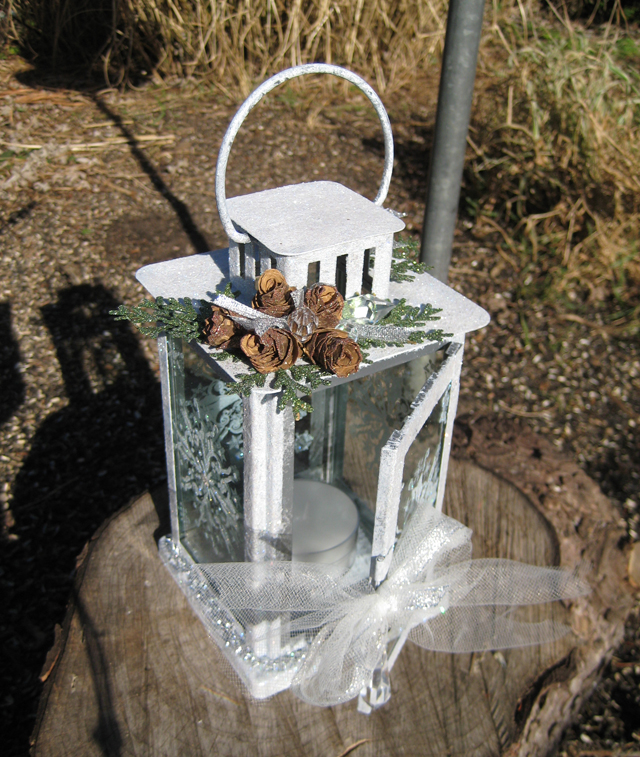
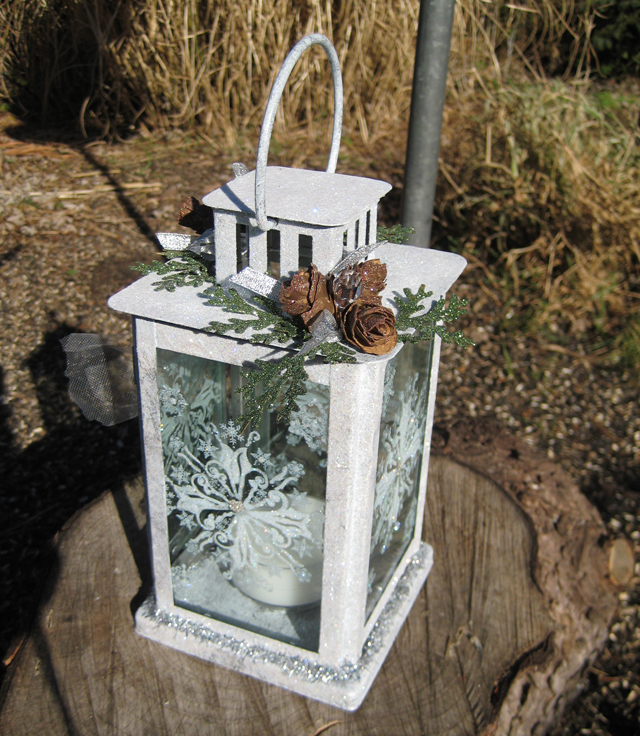
I picked up this Victorian-style lantern at a local resale shop for $1.40. There were two and after finishing this one I'm really wishing I would have bought them both. The original piece is a simple thin metal with a silver finish. I had no intention of coating the entire lantern in glitter; I liked the silver finish and felt it appropriate for Christmas. But, as you can see I sort of got a little carried away. Glitter does that to me. I start using it in small increments here-and-there and the next thing you know - I've totally covered the piece in glitter!

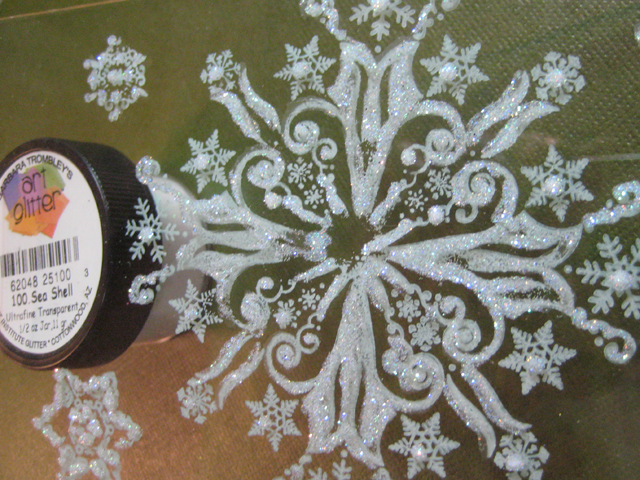
Here's how I created this project. I started by removing all the glass from the wall segments and door. I stamped them with a large clear stamp I've had for a few years and never used from BoBunny. I stamped in Butter Cream Staz-on ink on one side of the glass. Set the glass pieces aside and allow to dry completely so it doesn't smudge. After the ink is dry and working on the opposite side, I use my Designer Dries Clear glue, with Fine Metal Tip, to outline the snowflake designs and sprinkle them with Art Glitter Sea Shell Ultrafine Transparent, working in small areas so the glue doesn't skin over. Work this way till all the snowflakes sparkle with beautiful, glistening glitter; set aside to dry thoroughly. Art_Glitter_Linda_Neff_Victorian_Lamp_photo_1
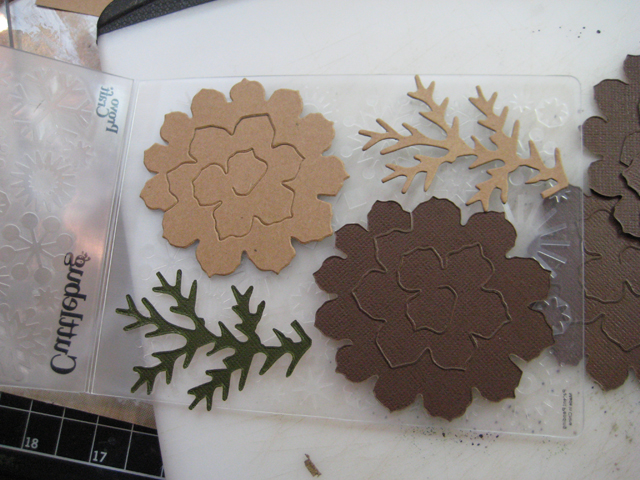
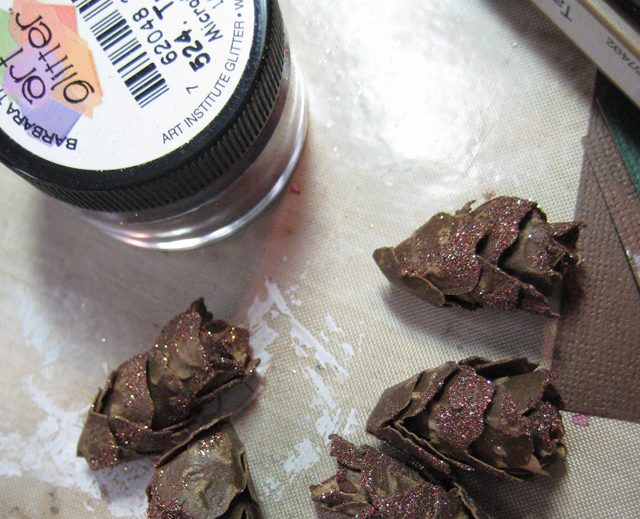
  While the glitter is drying on the glass (it's done when the glue is clear, not white) I cut and emboss several pine cones and pine boughs with Tim Holtz Tattered Pine Cones. I like to cut the pine cones from a color-core cardstock so after it is embossed and sanded it looks a little more realistic. I assembled the pine cones, painted the tips with Designer Dries Clear then rolled them in Art Glitter Tree Bark Microfine Opaque. This helps to add a little bling for the holidays. Art_Glitter_Linda_Neff_Victorian_Lamp_photo_3 The pine boughs are brushed with DDC and dipped in a container full of Art Glitter Leaf Ultrafine Opaque. The boughs are coated on both sides. Art_Glitter_Linda_Neff_Victorian_Lamp_photo_4
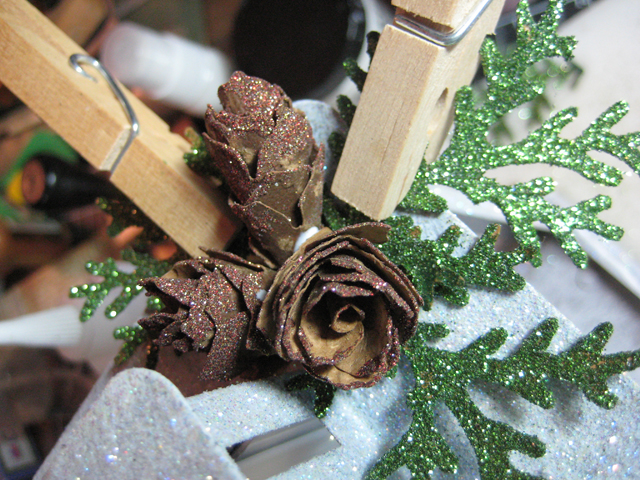
  This is where my troubles began. The pine cones and boughs are so pretty and the glass is drying beautifully, so now the dull, plain silver looks way too plain! So, I realize the lantern needs to be glitzed up as well. I grab a stipple brush and my Snow Cap Adirondack Paint Dabber and begin to stipple white paint over the entire thing. It's pretty easy to do because I still have the glass out so it's not necessary to be overly careful. I like the way the white coat is looking and decide to glitter it as well. After the paint is dry I squeezed some DDC onto a non-stick surface and stippled it onto the white paint (working in small areas) and sprinkled it with Art Glitter Crystal Ultrafine Opaque. The entire piece just sparkles! After the glass is put back in, I add the glittered pine cones and boughs using DDC and clip clothespins to secure them until dry. Art_Glitter_Linda_Neff_Victorian_Lamp_photo_2
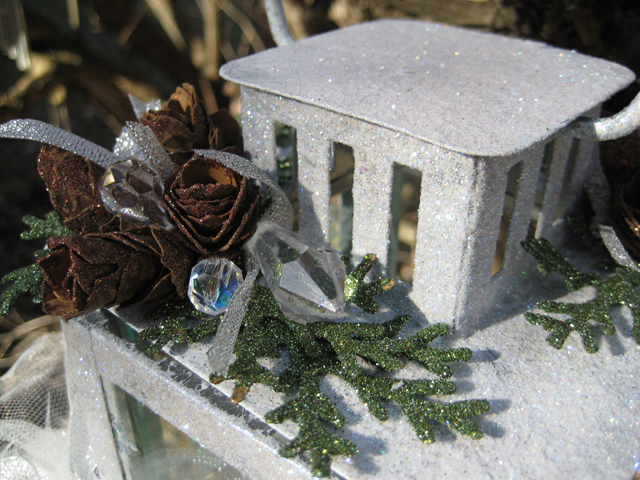
  To add a bit more bling to the piece, some Connie Crystals and snippets of silver ribbon pieces get tucked into place and held with DDC. Art_Glitter_Linda_Neff_Victorian_Lamp_photo_5
This Vintage-looking lantern turned out so much better than what I anticipated. It holds a little votive candle and looks stunning while burning in the dark. Art_Glitter_Linda_Neff_Victorian_Lamp_photo_6
Skip on over to my blog for a look at another Art Glitter project I worked on recently. -- Linda Neff