Thursday, August 30, 2012

Graphic 45 and Art Glitter

This was the project I did for the Art Glitter and Graphic 45 blog hop.  I had it "done" but not really done like I like!  So here is the before and after!

How many differences can you find??  Leave a comment on this post with your guess and the winner will get a little candy! ( this tray)  We will pick a winner at random on Monday...Labor Day!

Sparkle on
Kristi

Tuesday, August 28, 2012

Glittered Shoes


I have wanted some glittered shoes for a very long time, but I didn’t know where to find any that fit my taste. Nor, did I want to ruin a pair of shoes that I already had. But I found a happy medium.  I glittered the heel and platform only.


Today I will show you how to make your own fabulous pair of heels!
 
Supply List
-          A pair of heels (any kind will do, I used my go to black heels)
-          Art Glitter Ultrafine Opaque in whatever color you want! (I used #79 Black)
-          Designer Dries Clear Adhesive or Fabric Dries Clear Adhesive (I tried both on the shoes, especially on the leather part. They both works, but the fabric definitely works better on the leather)
-          Painters tape
-          Paintbrush
-          Clear Acrylic Spray Paint
 
I first started out my taping off the shoe. I covered all the edges with the tape so that if I slipped with the paint brush I wouldn’t get glue on the shoe.


I brushed  glue on the shoe is small batches using a paintbrush, then sprinkled on the glitter. I tapped it off the excess and continued to fill in all the spaces until all of the heel and platform were covered in the black glitter.
 
I contemplated doing a fun color. I really wanted to, but I also wanted to be able to wear these heels often, since they are my go to black heels.  So I kept them black. But knowing how great they turned out, I want to do another pair, and have them be my fun pair! I can imagine using the holographic glitter on these, I am sure they would knock everyone’s socks off!
 
I let the glitter and glue dry. Once they dried completely, I took them outside where I sprayed the heel and platform ONLY with the spray acrylic. Be sure not the get the spray on any other part of your shoe, otherwise they could be ruined! This is another reason why you should tape off the shoe.

Once that dried completely, I took off the tape (carefully). The outcome was amazing!!

Now it’s time to go out and show off these awesome shoes!! Be sure to stop by my blog, http://oneheartscrapper.blogspot.com for another glitter project!
 

Saturday, August 25, 2012

Glittered Paper Flowers

I started out thinking I would make a glittered paper flower garland... using only blues and greens... so I set out my supplies...
and got to work assembling the flowers. I've made these flowers before and did an in-depth tutorial here, in case you are interested in making your own. Instead of putting these flowers on pipe cleaners, I glued this grouping to simple 24 gauge wire. Of course 20 minutes in I decided that I needed a broader color palette, that I should watercolor some white crepe paper to get different shades of blue with an ombre color fade... then added pink and then... the whole project got away from me. It's typical.
I set out to make about 16 flowers and ended up making more like 30.
And tons and tons of little solid green glittered leaves... Aren't they beautiful!
Each flower had a rhinestone or bead in the center and each flower was covered in glitter. I really like how the dark blue and dark pink glitter added some contrast and a bit of drama in the center of the lighter-colored flowers. So pretty. (And each flower has a personality of its own, too!)

Close up of the watercolor pink color fade effect and the clear glitter.


Then I started adding the glittered leaves to the arrangement...
And it started looking more and more like a bouquet...
I'm sure I'll find 101 uses for these flowers (Garland, swag, around a sign or frame, around a Chinese lantern, a wreath, a table centerpiece, gift wrap adornment etc etc), but for now, I'm going to enjoy them as a simple bouquet. Here are the glitter colors I used, all from Art Institute Glitter:
Thanks for checking out my post
Carrie


Thursday, August 23, 2012

Playing with Fatasy Fiber

I tried my hand this week at playing with Art Glitters Fantasy Fibers. I've not used them before so I started off very simply.
I started by pulling out a few hairs of Cameo Rose Fantasy Fiber and spread them out on a non-stick craft sheet. I wanted to see what Fantasy Film would do so I ripped off a strip and randomly cut it into tiny bits with my scissors then sprinkled the tiny bits onto the Fantasy Fiber. I spread the Bellflower Fantasy Fiber on top of this to make a sandwich and covered with another non-stick craft
sheet.

I followed the package instructions and ironed for 3-5 seconds. Peeled up the top non-stick craft sheet to reveal the beautiful flattened and fused fiber concoction! This can be die cut or punched or used as is. I chose to die cut a primitive heart. I also die cut the same primitive heart from white cardstock to use as a backing for the fiber heart.
Once cut, I placed the heart on my non-stick craft sheet and ran some Designer Dries Clear (DDC) around the edges then dipped it in a bead tray of Pink Cameo Vintage Glass Glitter. This creates a sparkly rim around the entire heart!
While that was drying I created another sandwich of Fantasy Fibers and sprinkled in Art Glitters Dreamsicle Dazzlers and Dragonfly Dazzlers in between and ironed them together to create a background piece. I stamped the Stampscapes' sentiment in Black Archival Ink and edged it with Black Archival Ink as well because it dries quickly. I punched the scallop border edge with EK's Scalloped Scallop Edger Punch and layered on top of a burgundy cardstock. I used DDC to adhere the fiber sandwich to the card face then added the sentiment then the fiber heart. Three small gems (Want2Scrap Sleek Strips Rhinestones - Silver) were added to the sentiment. The Fantasy Fibers and Film are fun to play with and die cut very easily. Visit my blog for other ideas using Art Glitter products.

Linda

Wednesday, August 22, 2012

Glitter and Glow!

Okay, I am going to be honest on this one.  This project idea first came to mind with a pin from my newest addiction, Pinterest.  It was a cute lantern made with a cheap solar light and a canning jar.  I thought to myself, "Well, that is pretty, but it needs GLITTER!"  Because everything is better with glitter, you know.

Here were the supplies for this easy project:
A glass jar and a plastic jar.  The plastic lid should fit the glass jar.  I used a Kraft mayo jar and a Vlasic pickle jar.
One Outdoor Solar Light
Clear Marbles
Twine
12 clear plastic Pony Beads
Art Glitter Fantasy Fiber in Briarwood
Art Glitter Fantasy Film in Dandelion
Art Glitter Ultrafine Opaque Blue Moon 75
Art Glitter Ultrafine Transparent Crystal 85
Art Glitter Ultrafine Pearlescent Glow in the Dark 143
Art Glitter Designer Dries Clear with metal tip
Spray Adhesive
Craft Knife
Scissors
Self Healing Mat
Large Stencil Brush
Distress Ink in any dark color
Skewers for Shish Kebob (6 to 12)
Nail File

Okay, so here is how to create this project:
1)  Remove top of solar light from the pick that goes into the ground
2)  Rub Distress Ink around the edge of the solar light and place into the inside of the plastic lid.  This will mark the edges of the area you need to cut.
3)  Using your craft knife and the self healing mat,  cut out the circle you have created.  This is how I did it:  I made a gentle score in parallel lines in one direction and then again in a 90 degree offset.  Then, I scored a diagonal across them  I ran over these scores several times until I could remove the triangle.  I continued in this manner until I almost covered the area.  Then, a used the knife to shave off the extra until I created my circle.  Here is a picture of this in process.
4)  Fit the solar light into the lid and let just about an eighth of an inch over the top.  Run a line of Designer Dries Clear around the circle to seal it into place and let it dry.

5) Place a pony bead onto the edge of the skewer.  File down any seams and knock off a little of the shine. 

6)  Put Designer Dries Clear all around the pony bead.  Dip into the Glow in the Dark Glitter.  Let dry by placing the skewer upright into the plastic jar bottom.  Make 12 of these.
7)  Use your Designer Dries Clear to create stars inside the glass jar up near the top.  Pour Blue Moon Opaque into the jar.  Let dry.
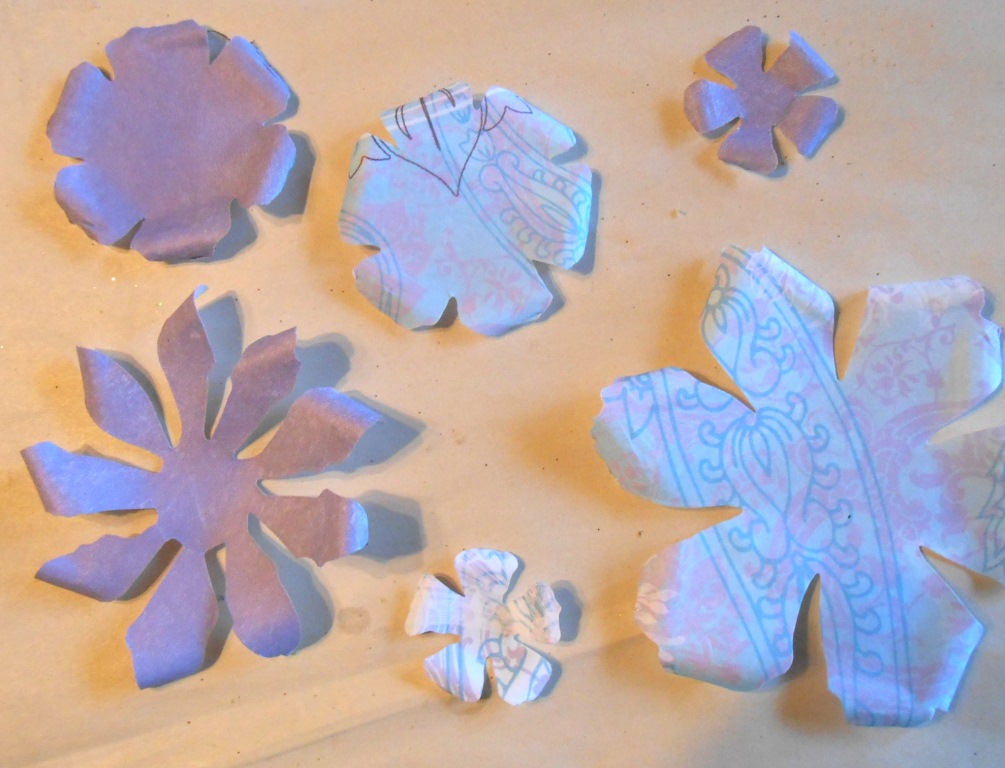
8)  Fold some of the Fantasy Film in half and cut out pairs of wings on the fold.  These do NOT need to be perfect.  Just make them freehand in different sizes.
9)  Crinkle and fold up the wing pieces.  Pass half of each wing set through the hole in the DRIED beads.  You are creating little fireflies.  The wing pieces and the fireflies look like the picture below.
10)  Put a bead of glue all the way around the top of the lid.  Leaving a few inch long tail, wrap the twine around the lid and make a tie.  Let dry.

10)  Make sure that the stars are dry.  You can tell that they are dry if the stars look silvery without any white.  When they are, use the stencil brush to brush out all of the excess Blue Moon glitter.
11)  Use the spray glue to coat the inside of the jar. 
12)  Pour Crystal Glitter into the jar and dump out.  Let dry.
13)  When the glue is dry (give it an hour or so to be sure), brush out the excess glitter with the stencil brush.
14)  Put a little of the Fantasy Fiber on the bottom of the jar.
15)  Pour clear marbles into the jar.  As you do, alternate with some of the fireflies.
16)  Flip the lid over and click the switch ON for the light.  Leave in the sun to charge and use in the evening to light your way.
The glitter added some real sparkle to the project.  I love the way that the Glow in the Dark glitter creates the look of captured fireflies.  I can honestly tell you that this project looks so much more beautiful both in person and at night.  Give it a try yourself and see how you can add a little sparkle to your evening!  Glitter On!

Check out more from Laura!

Tuesday, August 21, 2012

Fun Butterfly

Hello, Kristi here to share a fun and simple project with you.  I love butterflies and love glitter so it is a natural combo for me.    I started with a simple wooden cut out of a butterfly, glitter and Designer Dries Clear adhesive (DDCA).
 I am using Slate, Leaf, Kelly, Red Rose, Grape, Teal, Bananan
 I like to apply the glue with a paint brush.  I did my outline first with the slate glitter.  I apply a bit of glue then glitter.  I repeat the process until the full outline of the butterfly is done.  I also am working from dark to light so I don't get dark flecks of glitter on my final yellow color.

This is the butterfly with all the outline applied.
 I have added the two greens and some blue and the first purple flower.  I love how it shines already!
 More color added!
And this is the finished butterfly.  I did cover the back all in Slate glitter as well.  I just need to find a fun place to hang this up and let it "fly"!  Hope you enjoyed this quick and simple, yet sparkling project!

Go to the Art Glitter web page to order your glitter and glue today! YES...we sale retail!

Check out my blog for more project ideas using glitter and stencils!
Sparkle On!
Kristi

Saturday, August 18, 2012

Christmas In August with KC

Hello, KC here....I'm continuing with my Christmas theme for August and sharing an acrylic snowflake ornament.  For this project I used:

Clear Scraps Acrylic Snowflake from the Gingerbread Banner set,  Sizzix Embossing folder and Big Shot, Art Glitter Designer Dries Clear Adhesive (DDCA), Art Glitter Ultra Fine Opaque - #268 - Horizon,  mix of coordinating papers, Sizzix Bigz Die - Tattered Flowers, Connie Crystal - Octagon Crystal AB, Want2Scrap Beautiful Bling Borders - Fancy Waves

Begin be tracing the snowflake onto your background paper and cut paper to fit.  This paper is from Kaisercraft.  Set the paper aside for a bit.

Place the snowflake in embossing folder and run through the embossing machine,

On the backside of the acrylic, fill the recessed areas of the design with DDCA and cover with Art Glitter.  Shake off the excess.

Once the adhesive has dried, turn the snowflake back over and use DDCA to glue the cut paper to the back of the acrylic.  You only need a little glue - I put a drop at the end of each arm of the snowflake and a little bit behind the embossed area.

Run coordinating papers through the die cutter using the Tattered Flowers die cut.

Spritz the paper flowers with a little bit of water.  Use a toothpick to round the ends of the petals.  Let dry.

Assemble the flower by layering alternating papers and gluing each in place with DDCA.  


Use DDCA to glue Connie Crystal octagon bead to the center of the flower,


Finish by gluing adding Want2Scrap bling to each of the tips of the snowflake.  Glue the flower in place.  Punch a hole in the paper at the top (there is already a hole in the acrylic) and add an eyelet.  Tie silver ribbon in place for hanging.

Please visit my Blog for more glittering fun!  http://kc-distractedbyshiny.blogspot.com/
;