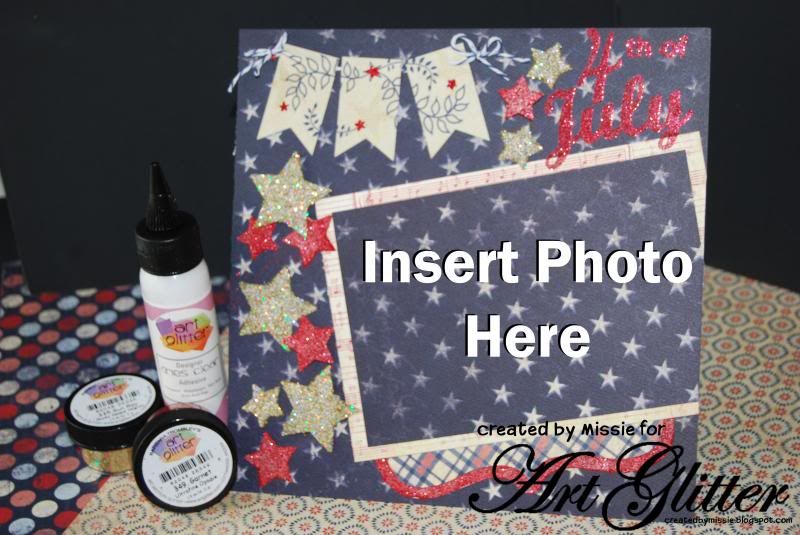
Ingredients
- Art Glitter Designer dries clear Glue
- Ultra fine Metal Tip
- Art Glitters: #337 Challis, #23 Midnight, #107 Red Oak
- Authentique Pride Collection papers
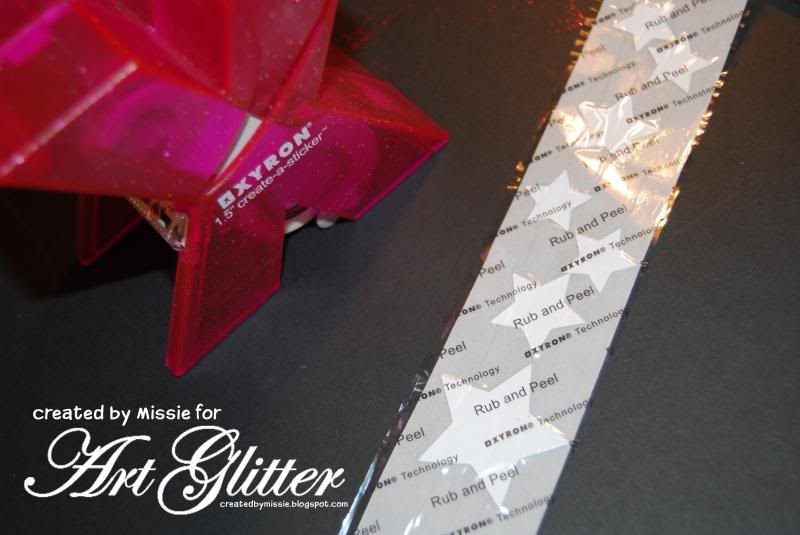
- Sticky tape
- Penny Black Dahlia's Stamp
- Penny Black "Better Early" Rubber Stamp
- Baker's twine
- Button
- Martha Steward lace punch
- Ranger's Vintage Photo Distress Ink
- Americana Collage Sheet
- dimensional dots
- Ivory 5 by 7 inch card stock base
- Ivory card stock
Directions
Step One
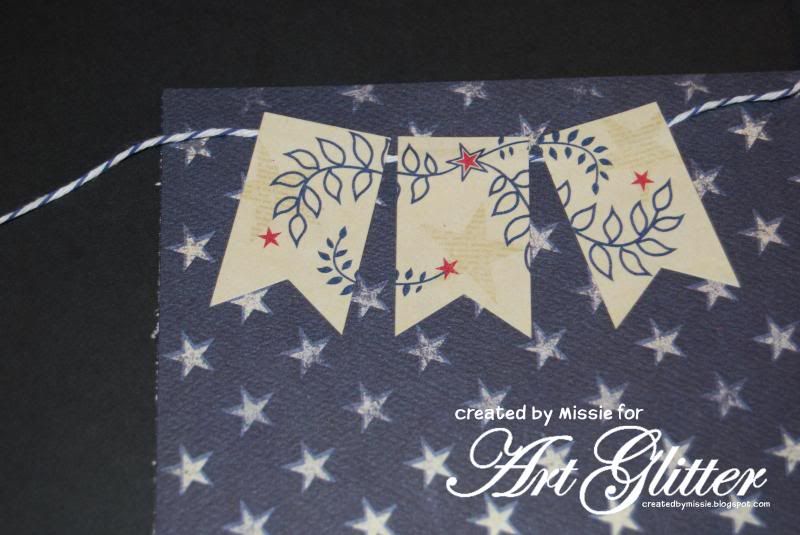
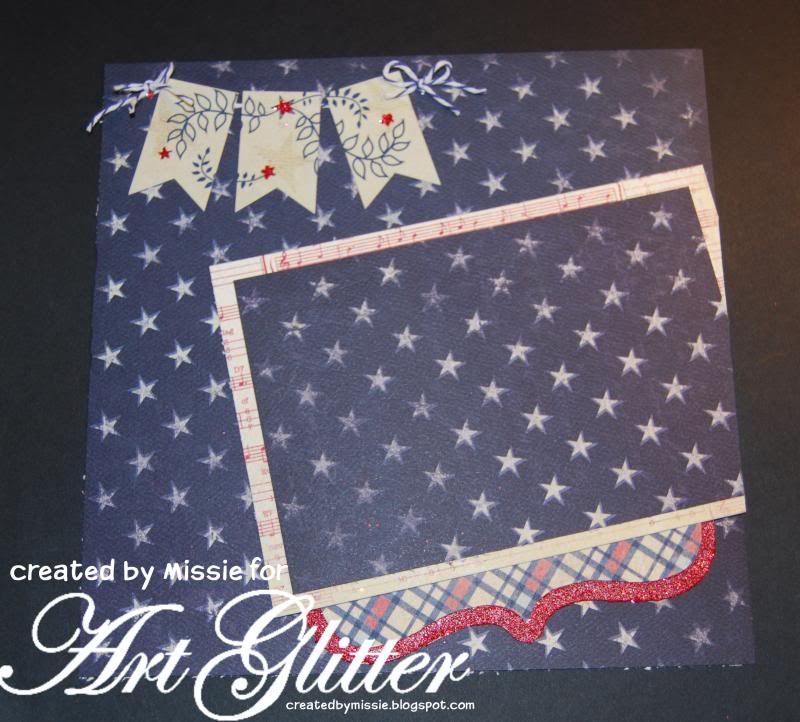
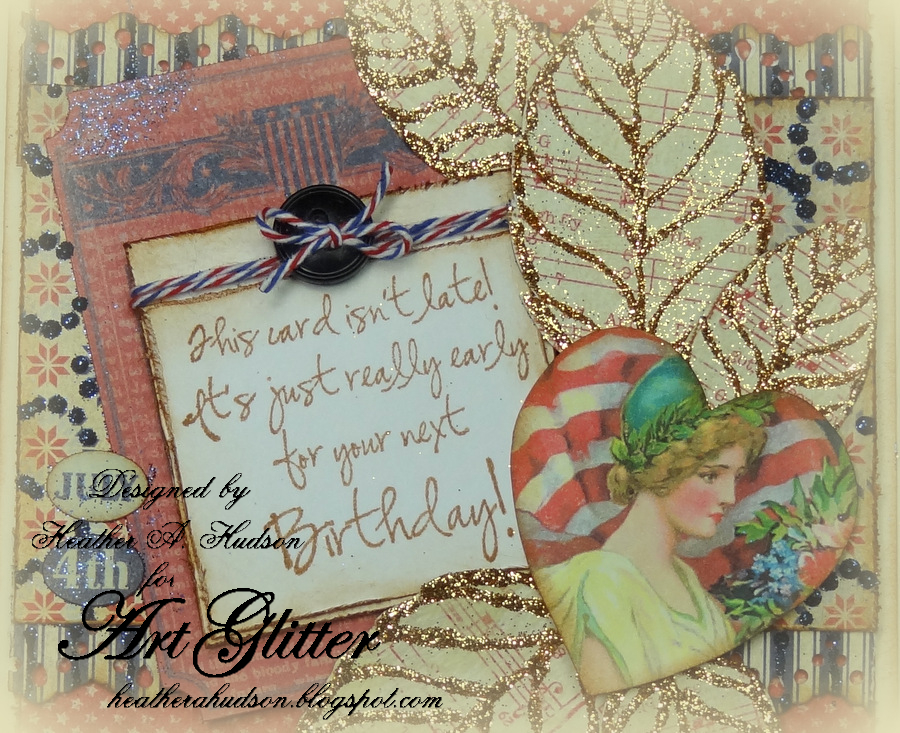
Heather started out with an ivory card stock base. She cut out the pieces of Authentique Pride papers for her card. She used Ranger's Vintage photo distress ink to stamp the Penny Black Dahlia leaves onto the Authentique paper, and the "Better Early" sentiment onto ivory card stock paper. Baker's Twine was wrapped around the sentiment, and a vintage button with Baker's twine bow was added to the top using Art Glitter Designer Dries Clear Glue. She used scissors to distress the edges of her pieces then inked them with Ranger's Vintage photo. She used pop dots to elevate the sentiment on one of the Authentique stickers. She used a Martha Stewart lace punch to punch some of the Authentique paper.

Step Two
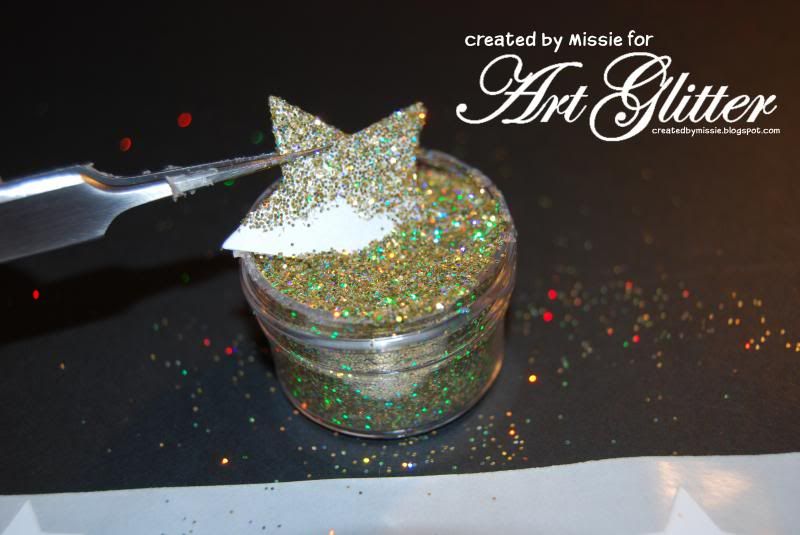
Heather cut out the leaves, then used the Ultra Fine Tip and Designer's Dry Clear glue to outline the leaves.

Step Three
Heather applied #337 Challis glitter to the leaves.

Step Four
She removed excess glitter and placed it back in it's container.

Step Five
Heather arranged the Authentique Pride papers and stickers on her card base. She used dimensional dots to elevate some of the leaves, sentiment and Lady Liberty image. Penny Black leaves were arranged on the card. All layers were placed on the card base using the Sticky tape.

Step 6
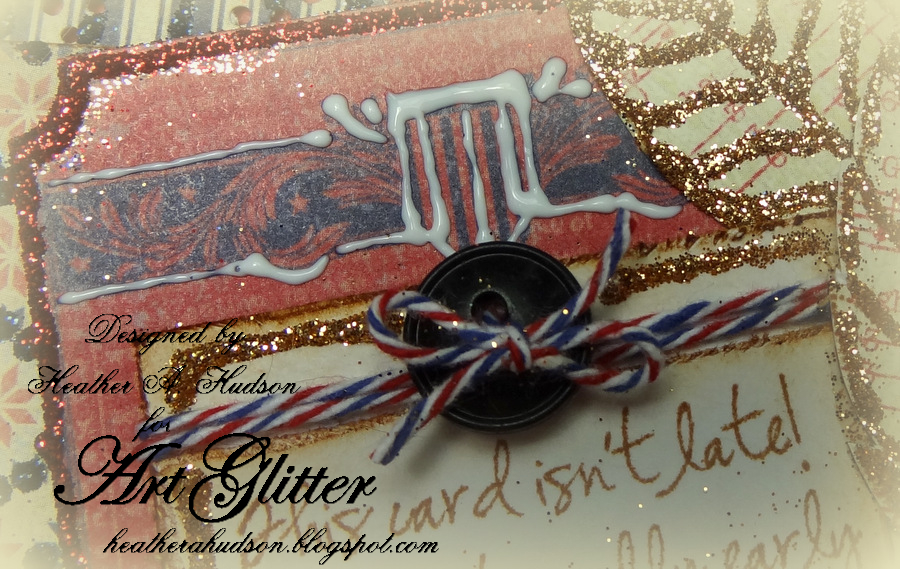
Next she used the Ultra Fine tip applicator and applied the Dries Clear Designer Glue to the Authentique Paper. Please refer to photo below for placement.

Step 7
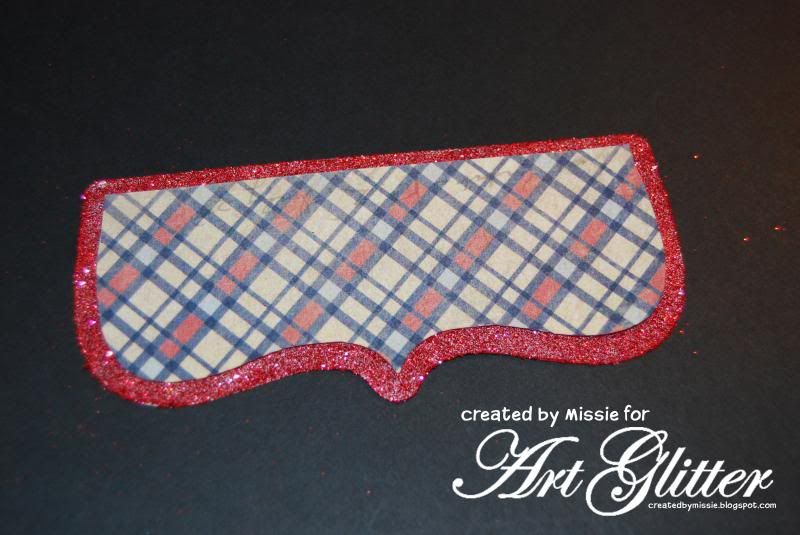
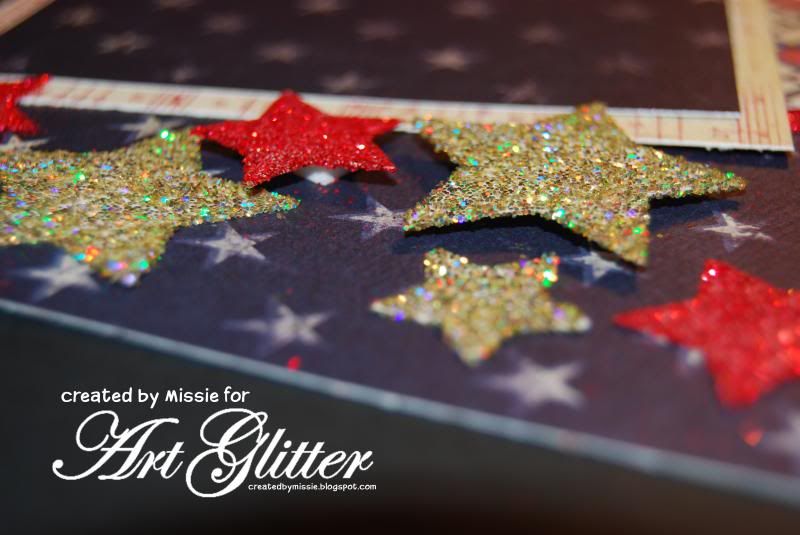
Midnight #23 Glitter was applied to the stripes of the punched pieces and Other areas of the Authentique paper. Please refer to photo below for placement.
Step 8
Heather added Designer Dries clear glue in the same manner to the edges of the Authentique Sticker. Please refer to photo below for placement.

Step 9
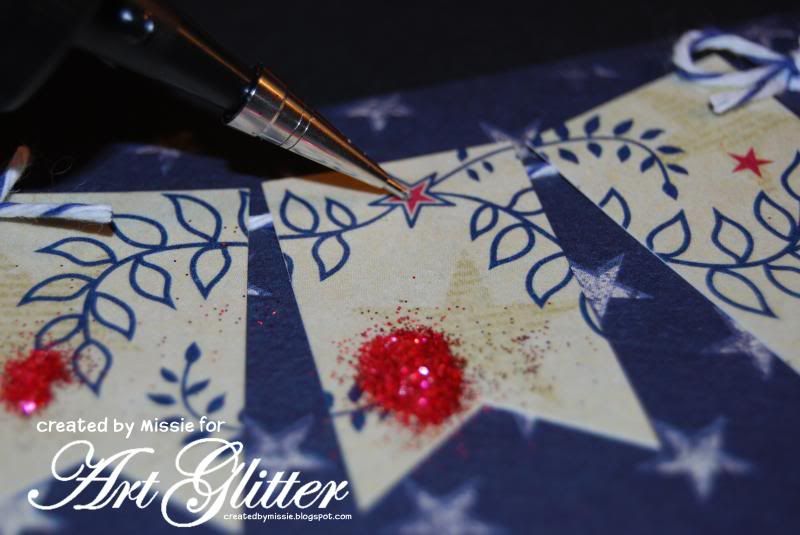
Areas of the "Lady Liberty" image and Sentiment were outlined with Designer Dries Clear Glue and both Red Oak and Challis glitters were applied. Please refer to photo below for placement.

Step 10
#107 Red Oak glitter was applied to the sticker. Please refer to photo below for placement of glitter. She outlined the "Better Early" Penny Black sentiment, and the "July 4th" stickers with Designer Dries Clear glue. #337 Challis glitter was applied.

Step 11
Designer Dries clear Glue applied to Authentique Sticker.
Step 12
Midnight Glitter was applied to sticker, and excess glitter was removed.

Step 13
Heather used the Ultra Fine Tip to apply decorative strokes with the Designer Dries Clear Glue to the top area of card. Please refer to photo below.

Step 14
She did the same to the bottom area of card. Please refer to photo below.

Step 15
Red Oak Glitter was then applied to these areas. The card is now finished.

Heather's application of the gorgeous Art Glitters, really makes the Penny Black leaves stamps, sentiment and Authentique papers stand out!

Thank you for stopping by and hope you enjoyed Heather's Tutorial using Art Glitter, Penny Black Stamps and Authentique Papers!
Order from Art Glitter the entire month of July in the
amount of $25 or over, use the code PB20, and you will receive 20% off your
order total! And remember, Art Glitter is MADE IN THE USA!!!
Feel free to stop by and see Heather's other projects using Art Glitter on her blog.