
SUPPLIES NEEDED:
Designer Dries Clear adhesive by Art Glitter Institute with metal writing tip
Assorted Glitter by Art Institute Glitter
Wood blocks approximately 3x3 inches
PVA paper glue
Creative Paperclay modeling medium
Rubber stamps and dye ink pad (the stamps I used here are by Stampotique Originals)
Adirondack Re-inkers by Ranger (if you don’t have, watered down acrylic paint works too)
Paint Brush
DIRECTIONS:
Knead a 1 or 2 inch piece of paper clay with about a half inch dollop of PVA glue until it is soft, sticky and pliable. Cover the top and sides of the woodblock with the clay mixture. Repeat this step if necessary until the whole block is covered with a layer of clay that is approximately 1/8 inch thick. Make sure the clay is relatively smooth.
Ink a stamp with the dye ink pad and stamp the design into the wet clay on the wood block. Let the clay dry completely (this may take several hours).
Paint the areas outside of your stamped design with your desired color of Adirondack Re-Inkers or watered down acrylic paint. Let dry.
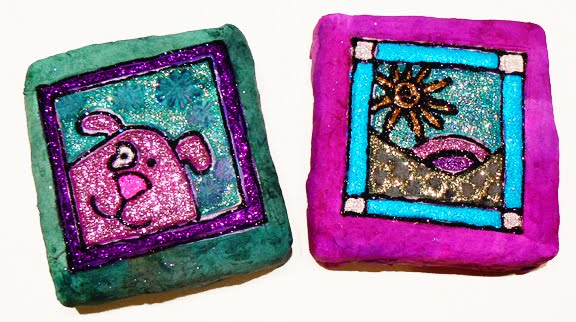
Use the Designer Dries Clear adhesive with the metal writing tip to coat a section in your stamped design. Pour your desired color of glitter on the glue and shake off excess. Let dry.
Repeat step 4 with different colors of glitter until you have the desired effect.
You can either glue a magnet on the back of these to hang on your fridge, or attach a small picture hanger and hang it on your wall.
This looks very intriguing Laura, I'll have to try this one out! Thank you!
ReplyDelete