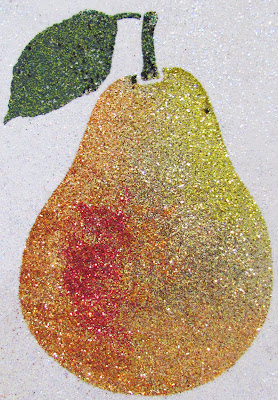
For my project, these are the instructions:
MATERIALS:
Dreamweaver Stencil Large Pear LL 563
Double Sided Mounting Paper 3" x 4"
A Soft Bar Soap, such as Handmade Hawaiian Coconut Soap from Dreamweaver Stencils
Large Stencil Brush
Globecraft and Piccolo Embossing Powder Mossy Glen
Heat Gun
Cardstock
Graphic 45 Printed Paper
DIRECTIONS:
1) Rub soap on the back of the stencil. If the soap is soft enough, it should leave a cloudy film. Cover the whole thing.
2) Use the large stencil brush to brush off the "crumblies" of soap that have been left around the edges of the stencil.
3) Remove one side of the covering on the double sided mounting paper and center the stencil over the top. The stencil will be slightly smaller than the adhesive paper, which allows us to get the sparkling edge.
4) Place some of the embossing powder on the stencil next to the leaf and stem. Push embossing powder into the open area on the stencil. Press down a little to make sure that it is securely in place.
5) Get a small pinch of the Poppy glitter and place it as an accent in the pear.
6) Pinch a little of the Cat Eyes color and place on the stencil on the upper opposite side from the red mark. Push it into place.
7) Place a little of the Copper Canyon around the Poppy and down on the bottom of the pear.
8) Place Butterscotch on the side by the Copper Canyon and up along the edge of the pear.
9) The next color next to the Butterscotch is the Golden Orange. Also use this color around the edge of the stencil to create a border.
10) You should have very little empty space remaining. Fill it with Light Gold. Rub all the glitter colors in with your fingers and swirl them around a little to blend.
11) Place the project upside down on a flat surface and carefully peel the mounting paper off of the stencil. Walk your fingers along the bare stencil as you do so to keep the stencil as flat as possible.
12) Heat set the leaf and stem. Be careful to only heat the area with the embossing powder so that you do not scorch the glitter.
13) Cover the entire project with Crystal glitter and brush off with the large stencil brush.
14) Assemble the card.
Thanks for stopping by today. Stop by my blog any time to see more projects at www.rememberinglifesmoments.blogspot.com.


No comments:
Post a Comment