Showing posts with label Designer Dries Clear. Show all posts

Thursday, March 13, 2014

Art Glitter


Spring Break with Art Glitter


Supplies:
Journaling Cards

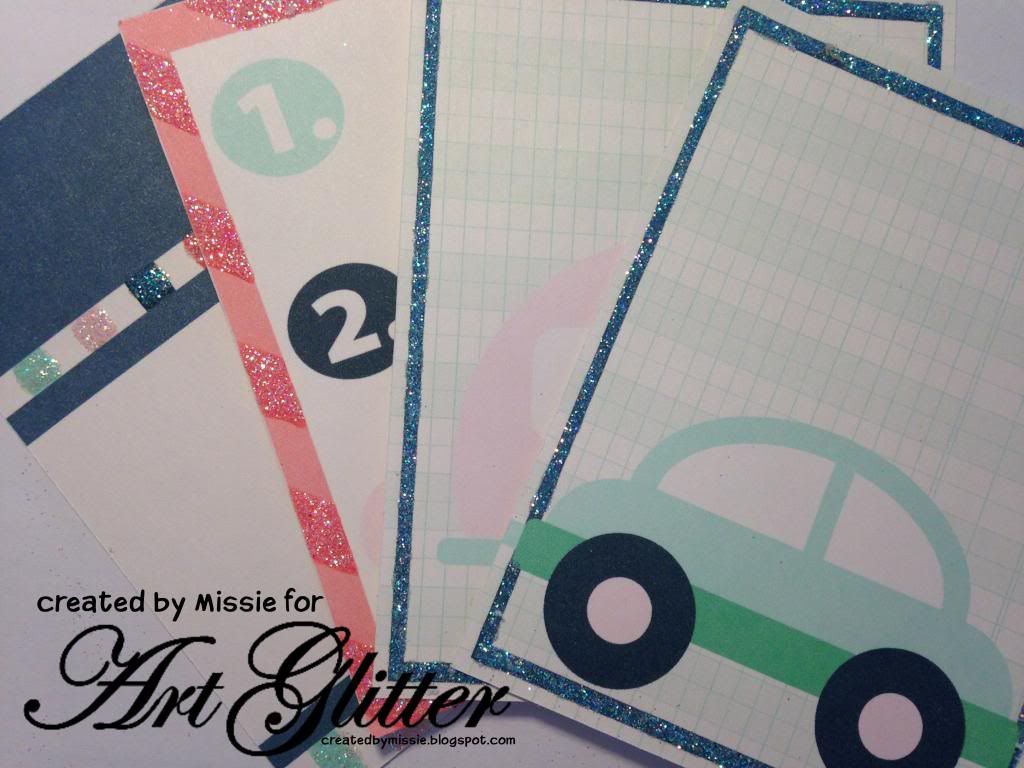
This year I am striving to expand my scrapbooking from traditional pages and add the project life style of pages to my skill list.  So, today, I want to share a fun project life style layout I created for spring break.  The graphics for this page are from Lettering Delights.  They offer a variety of SVG, graphic, and font files.  For this project I used the Spring Break Graphic set.  As you can see a few of the journaling cards above are strait from the graphic set. I then created a few unique journal cards to coordinate with the set (I created the car and camper cards, the cards that have just a background and frame, and the 2014 card.  The images were sized to 4x6 and 3x4, and printed on my home computer using white cardstock.


Here you can see the printed cards just waiting for glitter!


Art Glitter Dries Clear adhesive is selectively applied to the journal cards and then Art Glitter Crystal Glitter is added.

 Beautiful Glittered Journal Cards


Thanks for stopping by to see my creations.
Missie Todd
createdbymissie.blogspot.com


Friday, January 10, 2014

Think Spring!


Heather decided she would like to share with you a bit of spring!!  Yes it is still snowing and freezing cold in Michigan, and Heather is already eager for spring!!  So if you live in her neck of the woods or are lucky enough to live somewhere that you don't know the meaning of "snirt"  (the yucky mix of slushy snow and dirt), hopefully you will enjoy this easy to make darling little posey, that you can add to your cards, fridge or jars to give them a little sparkle.
You will need the following:

Here is a look at the supplies!
Here is Heather's step by step tutorial so you can create some Posies of your own.  Feel free to choose your own colors!  These are great, because no matter what you favorite colors are...you can use them!!  
Step 1
Heather used scrap pieces of corrugated cardboard from some left over Christmas delivery boxes.
If you are not much into drawing, you can trace a circle on the cardboard, then slightly offset it to create the simple three petals.  You could even just trace a smaller circle for the center, that would work too!!  Think of the leaves as drawing a fat letter "V" or "U."  Have two that slightly overlap.
Step 2
Super easy Posy!  
Step 3
Step 4
Step 5
 Step 6
Steps 7 & 8
Steps 9 & 10
Step 11
The great thing about corrugated cardboard is the layers, and you can just slide your hanger into one of the grooves!
Step 12
Heather loves the artsy look of the edges, since they are are corrugated and not solid!
Step 13
Here is a close up of one, so you can see how it looks on the sides.
Here is a picture of all three.
If you are wondering what Heather did to the backs?  She just painted them, and left them as is.  If you were going to hang it where you would see the back, then she recommends glittering the back as well.
Heather hopes you enjoyed her tutorial, and hopes it adds a little Sparkle to your day!

Here is a special 
New Year Tussie Mussie

Ingredients
 and Platinum Art glitter 
Heather outlined the edges of her tussie mussie, focal and rose petals with Designer dries clear glue.  She then applied the Platinum Glitter.  It really makes the the tussie mussie feel
New Year's Eve Sparkly!
Here are a few close ups
Another view
Another
If you would like, you can see more photos and Heather's Tutorial on her blog post here.

How about a Pink Heart Shaped Cone /Tussie mussie for Valentine's Day??
Heather used the Art Glitter Designer dries clear Glue & Ultra fine Metal Tip to apply dots of glue around the focal edge and then added #287 Arbor Glitter.  
Heather also added the  #287 Arbor Glitter to her text boxes below.  She used the glue to add dots to her raised heart and applied #267 Cheeky Pink Art Glitter.  She outline the heart shaped cone base with glue and used #160 Rose Gold.  
These glitters give her heart cone a soft vintage romantic feel!

One last extra project that Heather would like to share.
Vintage Christmas Tag.
Isn't it Sparkly!!
Here is a close up of the poinsettia.
Heather used #162 Just Peachy, and #142 Coral Reef on the poinsettia petals.  #295 Ensalada was used on the leaves!  
Here is a look of the back of the tag.
 
You can see the rest of the details on Heather's Blog Post here.

Heather hopes that you have a Sparkly New Year!!
Feel free to stop by and see Heather's other projects and Tutorials using Art Glitter on her blog.
and her 


Tuesday, December 31, 2013

3D Art With Glitter


Create framed artwork to add to your décor.  Dress things up for the holidays or add a special touch to an every day room just by adding a little sparkle of glitter.  Change it for the seasons and enjoy a new look year round!
 

Supplies Needed:
 Glitters- http://www.artglitter.com/retail/Rartglitter.html
     Christmas Red Ultrafine Opaque Glitter
     Saddlebag Ultrafine Opaque Glitter
     Lemon Drop Ultrafine Transparent Glitter
     Fire Engine Red Ultrafine Opaque Glitter
     Cavalado Ultrafine Opaque Glitter
     Florida Orange Ultrafine Pearlescent Glitter
Tools and Other Art Glitter Supplies-http://www.artglitter.com/retail/rtools.htm
     Metal Tip
     Spoons
  Designer Dries Clear Glue-http://www.artglitter.com/retail/Radhesives.htm
 
Also Needed:  Picture Frame, White Card Stock, Card Stock to Match Theme for Background, Favorite Spray Ink, Embossing Folder and Die Cut Machine for embossing background (optional) 

Begin by spraying a piece of card stock that is a little smaller than your picture frame using your favorite spray ink and allow it to dry.  

 Trace or draw a picture onto the paper. 
 Use the metal tip to start outlining the small areas.  Add extra detail by using different colors in the same  section. 

Flood larger areas in glue and cover them with glitter.  Allow them to dry completely.   
 
Once the entire piece is dry, place it in a frame.  You can create a background for it by adding an embossed piece of card stock to finish off the look.
 
No matter if it's a holiday or every day, a 3-D piece of artwork set on a table or hung on the wall adds a lot to the look of a room.  Create a theme or individual pieces.  It's all up to you so add new life to your décor and use some Art Glitter to dress it up!  Start creating now and give your house a new shine with the beginning of a new year!  
                                                 http://www.pegscraftingcorner.blogspot.com/

Monday, August 26, 2013

Gated Chip Board Book

Hi everyone it's blog time. This month we are working with Want 2 Scrap and Art Glitter. While I don't ususally get much time to scrap I think I might actually get finished with this great book from Want 2 Scrap. Here are the products I have used so far:

Art Glitter

Shadow (720) Microfine Transparent
Silver Moon (508) Microfine Opaque
Cayman (521) Microfine Opaque
Monarch Microfine Opaque
Spoon Man
Dries Clear Adhesive
Ultrafine Metal Tip

Want 2 Scrap

Gate Book
Lock and Keys embellishments


I started by painting the gate black using a dabber paint and then added pearl and olive green and sort of marbed it together. When it was dry I added Shadow Microfine Transparent Glitter to the swirls to make it look like the moon was shining and giving it some hilights.

On the inside I added gray paper over the chip board and stanped the moon and clouds in purple and then glittered the moon with Cayman Microfine Opaque Glitter. I die cut the tree from the new die from Dreamweaver stencil and and hilighted the tree branches with Silver Moon Microfine Opaque glitter.


This is what is done so far, but keep checking my blog sommrstamping.blogspot.com to see how this book continues to grow. 

DON'T FOGET THIS MONTH THE CODE: W2S20 WILL GET YOU 20% OFF ON 
ANY RETAIL ORDER OF $25.00 OR MORE. THERE ARE A FEW MORE DAYS TO 
GO.......


Thursday, December 20, 2012

Art Glitter and 52 Kids!

I had the joyous pleasure of teaching the K-8th graders at the United Christian School in Camp Verde down the road from us this week. They know all about glitter now! Truly a craft worth cultivating for well rounded students! 

Here's the card the Kindergarten class made. It's a snowman made from recycled white lids at Art Glitter and Faux Snow! The face and buttons are  #850 Model T Grande Beads, and we used Sticky Tape to attach the lids to the cards so they could work on them without waiting for them to dry. And of course we used Designer Dries Clear Adhesive for all the projects. We could have used our Dries White Adhesive to make the snow whiter, but I don't use it with children so they don't ruin their clothing.


They were so focused! I love using Faux Snow with the little guys because they can get their hand in it and not get TOO messy. Really turned out great!


The 1st and 2nd graders made some fabric ornaments, which I sadly did not get any photos of, but they had a few more minutes afterward and we glittered some pine cones. I always bring pine cones in case I need something quick and easy to fill in some time and the kids just love them.


We used all Opaque Ultrafine Art Glitter. It is a little more forgiving for kids to use. Meaning, it doesn't cross pollute as much as Transparent.


You can see my friend Miss Kathy in the purple with the 1st graders above. She's so wonderful. I have bling strands or sometimes referred to as shimmers in my hair... she told the kids that I had been working at Art Glitter for such a long time that I had started to grow glitter in my hair! A few fell for it, but most thought it through and called her on it!


We didn't even attempt the glitter hair story with the 5th-8th graders. Of course they've seen the shimmers before! So many boys (one girl above) working diligently on their butterflies! This is a larger version of Barbara's Butterfly image printed on our Transparencies.


Always a big hit we used all Ultrafine Transparent colors here. The girls were in heaven! When it dries you cut the butterfly out and add ribbon so you can hang it in a window or on the tree.

The 3rd and 4th graders made Bling Bells. It's a recycled tin can glittered to the max with a pipe cleaner and bell for hanging and ringing.

Again we used a rainbow of Ultrafine Opaque Art Glitter colors and some Hexi Dazzlers. They were so creative, it's great to see the diversity of designs they come up with.

If you make this project, start at the top and work your way down. Don't worry about the glitter that clings to the walls while you are moving along. You can brush all that off when it is dry. Much fun!


Thank you United Christian School for sharing your talented and well behaved students. And thank you Art Glitter fans for joining along. If you ever need any advice or ideas on creating glitter classes for students of any age, give us a call!  - GlitterEmm........

DON'T FORGET TO TAKE ADVANTAGE OF OUR 25% OFF SALE THROUGH DEC. 25TH Details here...

HAPPY HOLIDAYS!