Today Carrie is sharing with you what can be done with ribbon, votives, Art Glitter and Designer Dries Clear Adhesive into a fun decorative piece!
 Supplies:
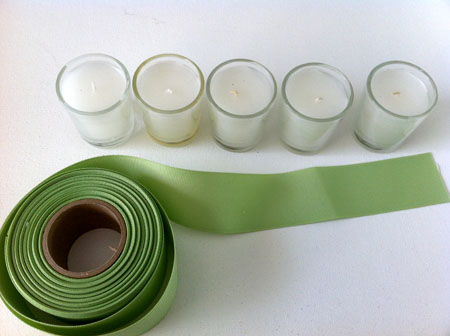
- At least 6 feet of grosgrain ribbon that's about 1 3/4" wide
- 5 round glass candle votives (don't get any that flare out!) - 1 3/4" in diameter and 2 1/8" tall - You can usually find these by the box in the bridal section of Michael's. (You can always adjust the ribbon-holder size if you get bigger candles)
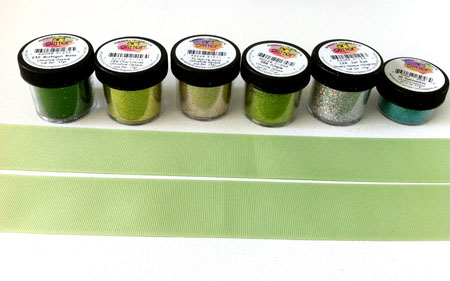
- #358 - Jungle Green - Ultrafine Opaque Glitter
- #156 - Chartreuse Green - Ultrafine Opaque Glitter
- #232 - Michigan Moss Green - Ultrafine Opaque Glitter
- #46 - Summertree Green - Ultrafine Opaque Glitter
- #71 - White Gold - Ultrafine Opaque Glitter
- #124 - Jet Eye - Chunky Opaque Hologram Glitter
I used
Designer Dries Clear Art Glitter Adhesive and the
ultrafine glue tips for the finer detailed open dots.
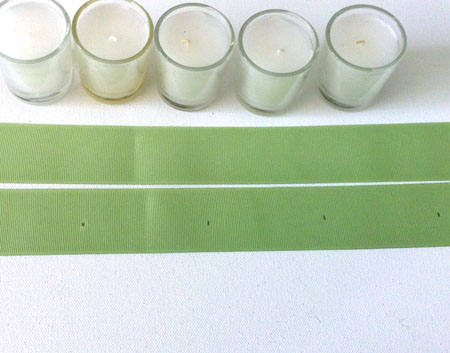
First, cut your ribbon into two 3' strips. Then, fold one in half to create a crease. You are going to use a ball-point pen to mark lines every 2 3/4" to create 5 little "pockets" that the candles will sit in. Start in the middle and work your way out.
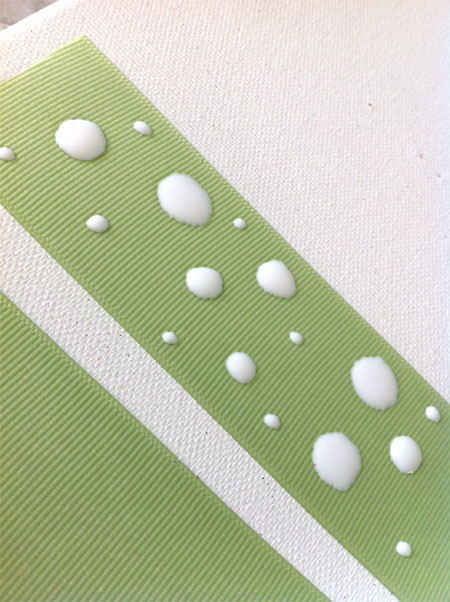
Flip your ribbon over so the ball point marks are on the back and start gluing little polka dots...
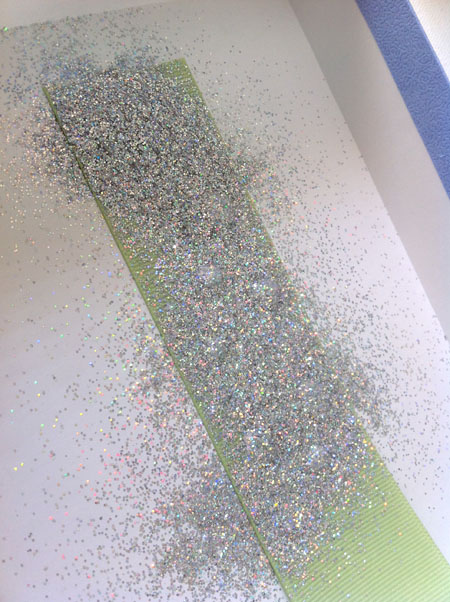
Start glittering with your favorite color... I started with Jet Eye...
Add the other polka dots and apply the other colors of glitter. I used the
ultrafine tip attached to the glue bottle to do the final open polka dots... These tips are fantastic to give you glue flow control and add fine detail! (I always clean the tips immediately after use by soaking in hot soapy water!)

Let the polka dots all dry and then flip over, put down a thick stripe of glue on the ball point lines you made earlier and place it carefully on the other ribbon, non-decorated side to non-decorated side... Don't move, slide or smear it! Let this dry... (You could also sew these lines if you want... you do have to pull on this a bit to tie the knots etc).
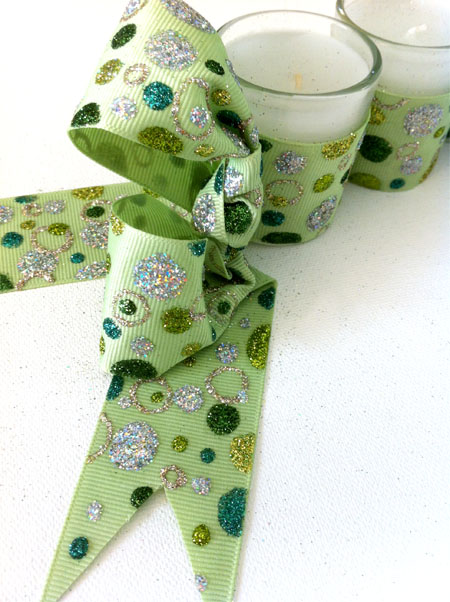
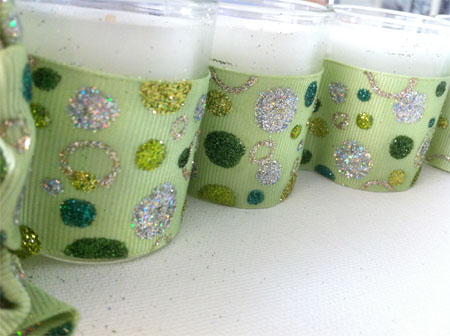
After an evening of glue drying, slide in the candles, tie knots on each end, trim the ends and you're done! You can also "fake" a bow, like I did here, but folding two loops in. Since the design is one-sided, it's hard to actually tie a bow that shows off the glitter. You could glue this down, if you'd like.
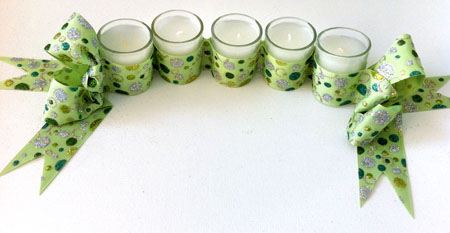
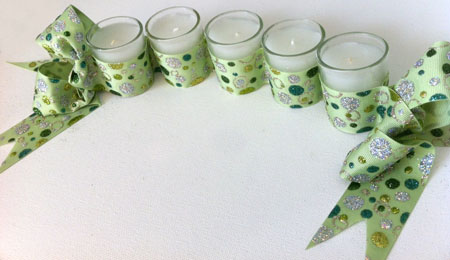
This would be super cute with flower designs, stripes, sew on other ribbon scraps etc. Be creative! Makes a great centerpiece!


I LOVE this! Glittered ribbon is so expensive and I often can't find what I need! What a great idea to make your own!
ReplyDeleteI love how you wrapped your candles in the ribbon..and the little circle pattern is sweet!! Love it!!
ReplyDeleteHugs
Heather
Love this idea, I have several candle holders but they has a B on them and nobody I know has a B that needs them!
ReplyDelete