Tuesday, July 30, 2013

Penny Black & Art Glitter


 This month at Art Glitter, we have been fortunate enough to play with some absolutely beautiful Penny Black Stamps.  Here is what I did with my favorite Penny Black stamp:


I have listed the directions and materials that I used.  As long as you work from the finest (Microfine) glitter to the coarsest you are planning on using, you can create with any colors.  Also, be sure to use opaque glitters if you want to completely cover the main color. If you plan on changing the base color, you should change the ink color to one that matches, as the bonding powder does not completely cover the area.
MATERIALS:
Penny Black Slapstick/Cling Stamp 40-193 Wistful
Penny Black Simply the Best Clear Stamp Set
Acrylic Block to Fit Stamp
Stampee Crafts Stuck on You Bonding Powder Adhesive
Adirondack Denim Pigment Ink
Heat Gun
Card Stock
Patterned Paper
Adhesive
May Arts Ribbon

DIRECTIONS:
1)  Stamp on white card stock, pour bonding powder on when wet, and heat set.
2)  Pour the Microfine powder on immediately and shake off excess.  This will create a shimmering blue image that will look a lot like the picture below.   
 3)  Use the image of the stamp to add the sparkling details.  Just follow the gorgeous lines with the fine tip on the Designer Dries Clear and cover with the glitter of your choice.  I started with the silver and the gold swirls.
4)  Then, add the small green leaves with the Ultrafine Lime Rind.
5)  Next, color the butterflies with the various colors of Hologram Glitter.
6)  Add the flower colors.  I chose neon pink for this.
7)  Finally, color the larger leaves.  I used the Vintage Glass Glitter.  Let it dry completely.
8)  Assemble the card.

Thanks for stopping by today.  Come check out my blog at www.rememberinglifesmoments.blogspot.com any time! Until the next time that I see you, keep glittering!

Sunday, July 28, 2013

Penny Black Magic

Supplies 
Art Glitter 18 Purple Ultrafine Opaque Glitter
Art Glitter 22 Lilac Ultrafine Opaque Glitter
Art Glitter Designer Dries Clear Glue
Art Glitter Ultrafine Metal Tip
Penny Black Sweet Dahlia Cling Stamp
Momento Black Ink
Copic Makers
Cricut Elegant Edges Cartridge
White Card Stock
Violet Card Stock
Green Card Stock
Assorted Ribbon
Assorted Zig Makers

You may have seen the alcohol maker coloring trend and loved the dimension it adds to stamped images.  You can also add dimension and sparkle using Art Glitter!

 Check out this card Clare made using Penny Black's Sweet Dahlia Stamp, Copic Markers and Art Glitter! Clare started by cutting a frame with Cricut Elegant Edges Cartridge.  She stamped it with Black Momento ink.  Be sure to use Momento ink if you plan to use Copic Makers so the black ink will not smear!  She colored the image with the following Copic Maker Colors (see photo below).

Using Art Glitters Designer Dries Clear Adhesive and the Ultrafine Metal Tip she accented the stamped image.  She applied 18 Purple for the darker glitter color and 22 Lilac for the lighter glitter color.  Adding glitter for shading is perfect for making the dahlia stamp more 3 dimensional!

For more detailed coloring in the words, Clare used some assorted Zig markers.  She then stamped the Happy Birthday on some matching card stock and added assorted ribbons along the side for a trendy look.


Order from Art Glitter the entire month of July in the amount of $25 or over, use the code PB20, and you will receive 20% off your order total! And remember, Art Glitter is MADE IN THE USA!!!
You can find more of Clare'e work at her blog:  Cricutcraftyclare.blogspot.com. 


Wednesday, July 24, 2013

Girls Just Want to Have Fun

Order from Art Glitter the entire month of July in the amount of $25 or over, use the code PB20, and you will receive 20% off your order total! And remember, Art Glitter is MADE IN THE USA!!!


I am the only girl in the house and sometimes it fun just to create something that's says girly girl.  This project is a great piece to hang in any craft room or anywhere a girl just wants to have fun.  This month, Art Glitter teamed up with the wonderful Penny Black Stamps to tell everyone we just want to have fun!  
 
Supplies Needed:
 
     From Art Glitter
      
            Lemone Ultrafine Transparent
            Fresh Green Ultrafine Transparent
            Atlantis Ultrafine Transparent
            Crystal Ultrafine Transparent
            Jet Eye Chunky Opaque
            Razzle Dazzle Kit-http://www.artglitter.com/retail/kitpages/rourkits.htm
            Ink Pad-http://www.artglitter.com/retail/Raccessories.htm
 
     From Penny Black
             Tour de Fun Stamp
 

    Additional Items:
             Small and Medium Paint Brush, Blue and Green Ink Pads, Inking Tool (optional) Wooden Paintable Frame, Acrylic Paint-Green or Your choice of color, Ribbon for hanger and bow, colored pencils or markers to color stamped image, alphabet stencil, pencil, white card stock 
 
Begin by cutting a piece of white card stock to fit into the opening of your wooden frame.  Stamp the image onto the paper using the black ink pad.  Add blue sky and green grass colors around the image using the inking tool or just the ink pads by lightly moving them on the paper and around the image. 
 
 
Use the stencil to write in the saying.  Color the image in the areas that you do not want covered with glitter using your choice of markers or colored pencils.  


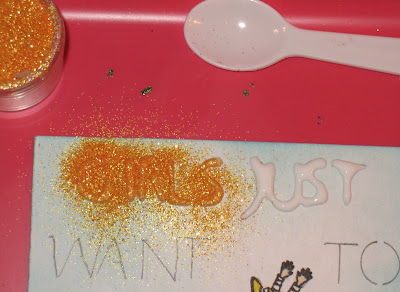
Using the Designer Dries Clear Glue and the metal tip from the Razzle Dazzle Kit to outline the letters and cover with the Tang glitter from the kit.  Remove the excess glitter and allow to dry completely. 

Working around the parts of the image, add glitter to that hat band and the blades of grass using the Fresh Green Glitter, the bicycle using the Atlantis Glitter, center of the tires and the bike seat using Jet Eye Chunky Glitter, do each flower center and every other stripe on her shirt using the Lemone Glitter.  Remove the excess glitter and allow all of the sections to dry.

Using the small paint brush with a small amount of glue on it lightly dab the glue onto each petal of the flowers and then sprinkle with the Cheeky Pink Glitter from the Razzle Dazzle Kit.  Remove the extra glitter and allow the flowers to dry.  

 
Set the image aside to completely dry and begin painting the frame with the green acrylic paint.  While the paint is still wet on the front edges lightly sprinkle some of the Crystal Ultrafine Transparent Glitter into the wet paint. 
 
Once everything has dried add the image into the frame using some of the glue and cut a piece of ribbon to make the hanger for the frame.  Use a separate piece of ribbon to form the bow and glue it to the ribbon after gathering a small section of the hanger to form a small loop at the top as shown in the picture below. 
 
Now, go have some fun and create one of your own using these fabulous glitters from Art Glitter and this great Penny Black stamp!  


Saturday, July 20, 2013

Friends Layout

 
Featuring Penny Black Stamps and Art Glitter

Order from Art Glitter the entire month of July in the amount of $25 or over, use the code PB20, and you will receive 20% off your order total! And remember, Art Glitter is MADE IN THE USA!!!
 
Hello everyone I am sharing my last project using Penny Black Stamps
this month at Art Glitter. I had a great time using these stamps. I love that you can get a clean and clear image on the first try using these stamps.


Supplies:
Art Glitter Ultra Fine Opaque #329 Egyptian Blue
Art Glitter Ultra Fine Opaque # 83 Silver
Art Glitter Ultrafine Opaque Brocade
Art Glitter Ultra Fine Transparent #312 Fresh Green
Art Glitter Ultra Fine Opaque # 23 Periwinkle
Art Glitter Shard Vintage Glass Glitter # 916 Confetti
Art Glitter Designer Dries Clear Adhesive
Art Glitter Ultrafine Metal Tip
Art Glitter Transparency Black Ink Pad
Penny Black Slapstick/Cling Rubber Stamps  30-160 Friendship
Cardstock
Pattern Paper
Alphas
First Choose your pattern paper and cut to size
 Next choose your stamps and use your black ink to stamp image
 then choose your glitter colors and go to town adding a bit of pizazz
 

 Finally I decided to make a border all the way around the layout and used the Vintage Glass Glitter


I decided to snap a few close ups of the stamps that I glittered.
 
I really like how this turned out and my daughter Ayla loves all the sparkle.
 

Thursday, July 18, 2013

Thank You Penny Black Style


Ingredients

Directions
Step 1
Heather started out by stamping the Penny Black Large Dahlia, large leave, and "Thank You" sentiment using Art Glitter Transparency Pad black ink onto white cardstock.  She cut out the stamped images.  She added a blue polka dot piece of scrap paper to a Tim #8 manila tag with Designer Dries clear glue.  She Created a smaller tag out of a piece of pink polka dot scrap paper.  Both tag edges and the "Thank you" sentiment were inked using Ranger's Vintage Photo Distress ink.  Holes were created using a Crop-O-Dile punch.  She used a Martha Stewart lace punch to punch some of the Scrap paper.

Step 2
Heather used an orange piece of chalk to color in the large Penny Black Dahlia.


Step 3
Heather used a green piece of chalk to color in the large Penny Black leaves.


Step 4
Heather used a magenta piece of chalk to color in the Penny Black "Thank you" sentiment box.  Below you will see how she used a tiny cotton ball and an alligator clip to spread out her chalk.

Step 5
Heather used the Sticky tape on the back of the tiny orange chevron bag, and scrap piece of pink paper.

Step 6
Heather cut the punched strip to size, applied the Designer Dries clear glue to it, and tucked it in under the orange chevron bag.  She then adhered the pink paper and used the Designer Dries clear glue to adhere the orange ribbon to the orange chevron bag.

Step 7
Heather then added the orange bag (with tag insert) to the blue poka dot base.  She then set her Penny black images on her project to check for placement.


Step 8
Heather used the Ultra Fine Tip and Designer's Dry Clear glue to outline the leaves.


Step 9
Next she used the Ultra Fine tip applicator and Designer's Dry Clear glue to outline the Penny Black Dahlia.  


Step 10
 #94 Key Lime glitter was applied to the leaves, and #350 Butterscotch glitter was applied to the Dahlia and the outlined areas on the orange chevron bag.  Then she used the Fine tip applicator with the Designer Dries Clear Glue to add dots to the bag.


Step 11
 Heather used Ranger's Barn Door Distress ink and the Small Dahlia, full small dahlia, and small leaves stamps and created her own background on the pink tag.  She added a "Dream" text box with sticky tape, and inked the edges with Ranger's Vintage Photo distress ink.  Next she added Designer Dries clear glue in the same manner to the edges of the tag.  Please refer to photo below for placement.


Step 12
 Heather continued to add more Designer Dries Clear glue to the edge of tag and the edge of text box.  She then added the #7 Red Rose glitter to the edge of tag, and the #352 Chamois around the text box.  Please refer to photo below for placement.

Step 13
Heather used Pop dots to elevate her Penny Black Dahlia and leaves above the orange chevron bag.  She used the Fine Tip Applicator, applied a line of glue around the edge of the pink scrap paper and "Thank you" text box and applied the #7 Red Rose glitter (she applied it to the little dots in the white part of the orange chevron bag as well).  She added the glue in the same manner to the "Just for You" text box and applied the #183 Blue Angel glitter.  A bow was created out of the same orange ribbon and glued in place with the Designer Dries Clear Glue.
Here is the finished piece.  Orange Seam binding was added to the pink tag top, and Pink with White polka dot ribbon was added to the blue tag base (this ribbon was inked with Ranger's Vintage Photo distress ink).  
Here is a couple close ups.
Top of tag.
Middle of tag.
Bottom of tag.
Here is a look of the two tags next to each other.


What a Gorgeous Combination of Summery Glitters!!  Perfect combination with the Penny Black Dahlia Stamp Set!! 
Thank you for stopping by and hope you enjoyed Heather's Tutorial  using Art Glitter and Penny Black Stamps!
Feel free to stop by and see Heather's other projects using Art Glitter on her blog.
heatherahudson.blogspot.com

Tuesday, July 16, 2013

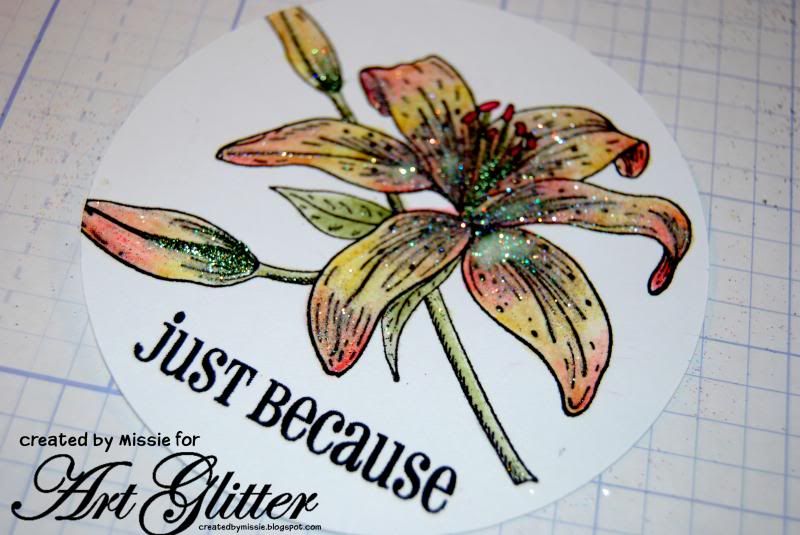
Just Because!

Just because I love Art Glitter and Penny Black Stamps


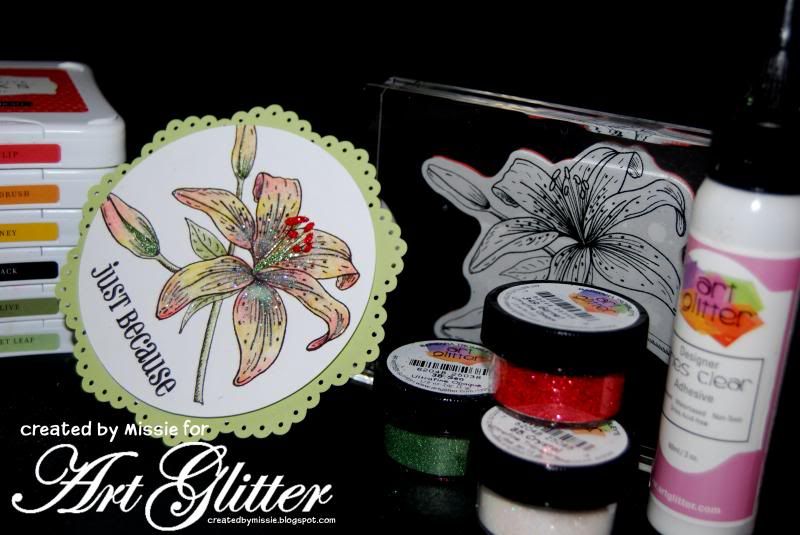
Supply List:
Art Glitter #38 Sea
Art Glitter #349 Garnet
Art Glitter #85 Crystal
Art Glitter Dries Clear Adhesive
Penny Black tiger lily stamp
Close To My Heart Say phrase stamp
Inks and blender pen

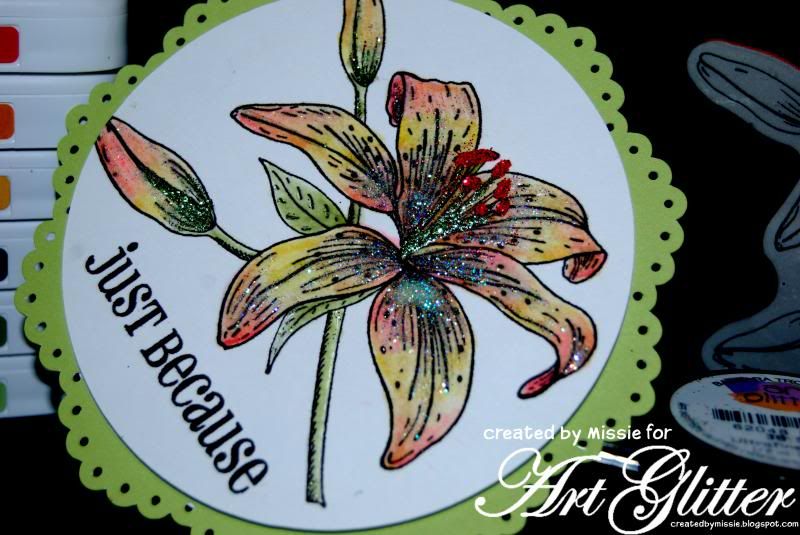
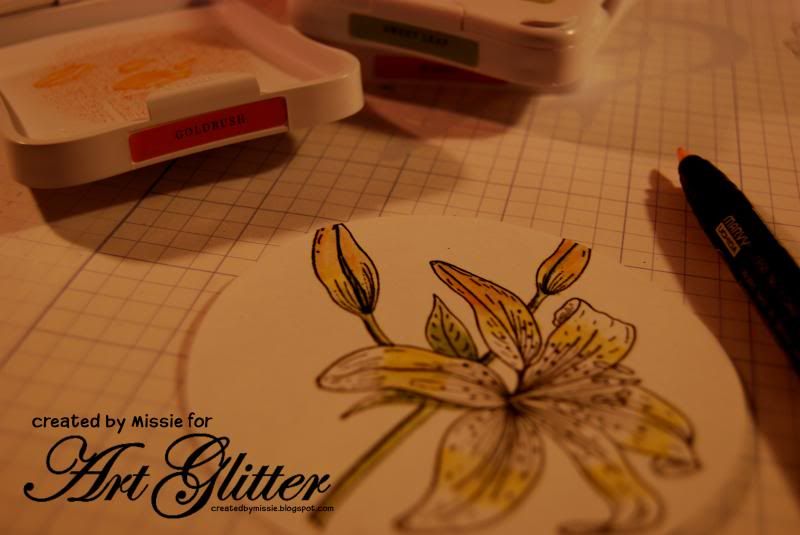
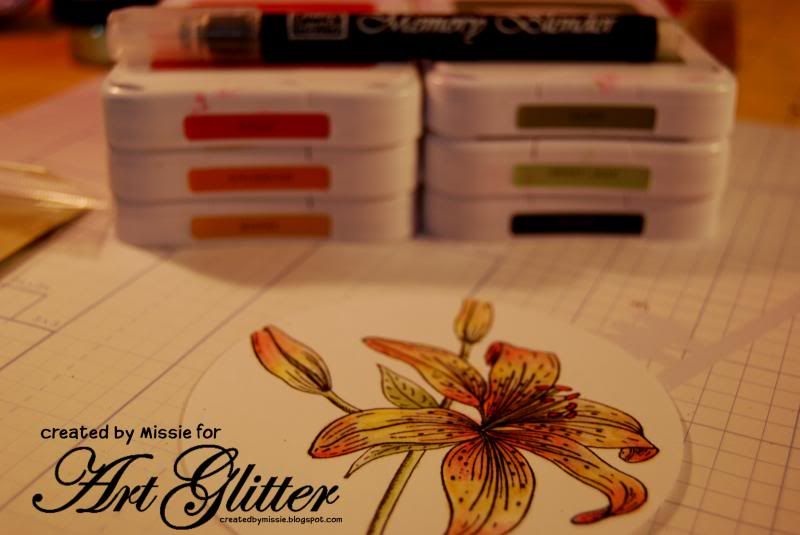
Begin by stamping the Penny Black Tiger-lily stamp on a white card stock circle (3.75 inches) with black ink.  There are many ways to color stamped images.  Designer, Missie Todd, likes to use a blender pen and any water base ink can be used for blending. Another option would be watercolor markers such as Tombow .  When coloring images with ink use a blender pen to pick up the ink from the ink pad (or the lid of the ink pad) and the blend.  Always start with the lightest color you plan to blend then add in the darker colors as you go.


After coloring the stamped image add a phrase (stamped) and use Art Glitter Dries Clear Adhesive to add accent glitters to the stamped image. 

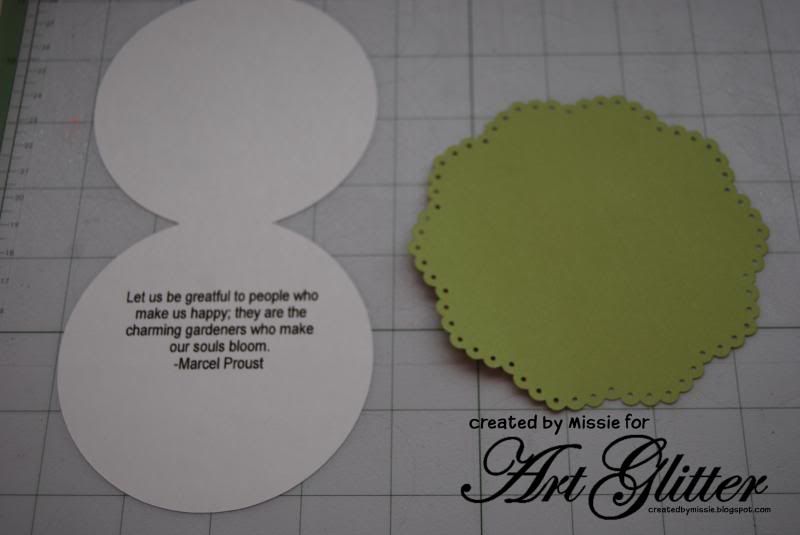
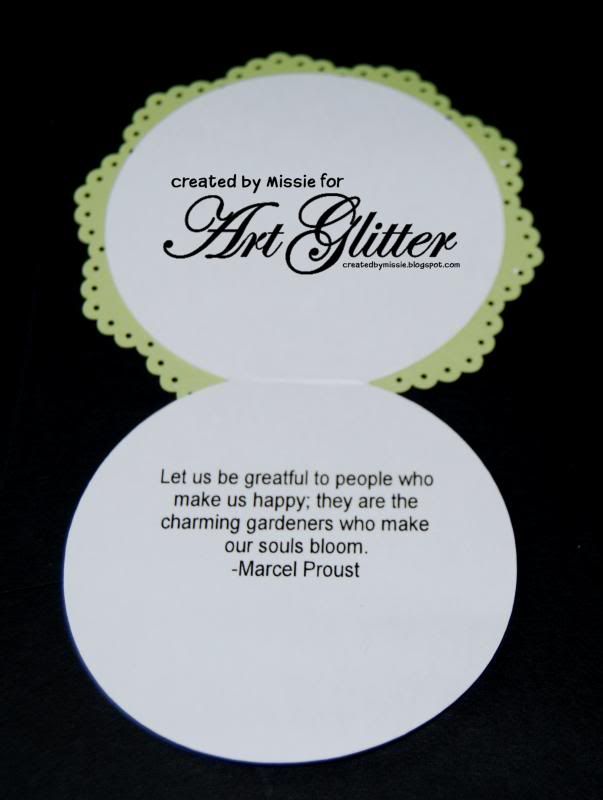
Create the card base of your choice for the image.  The example illustrated used a silhouette cameo to print the passage and cut the card and card front.

Attach the card front to the card base using double sided adhesive tape.  The final step is to attach the stamped image to the card base/front. 

 
Thanks for stopping by to see Missie's creation and don't forget...
Order from Art Glitter the entire month of July in the amount of $25 or over, use the code PB20, and you will receive 20% off your order total! And remember, Art Glitter is MADE IN THE USA!!!

Missie Todd
createdbymissie.blogspot.com