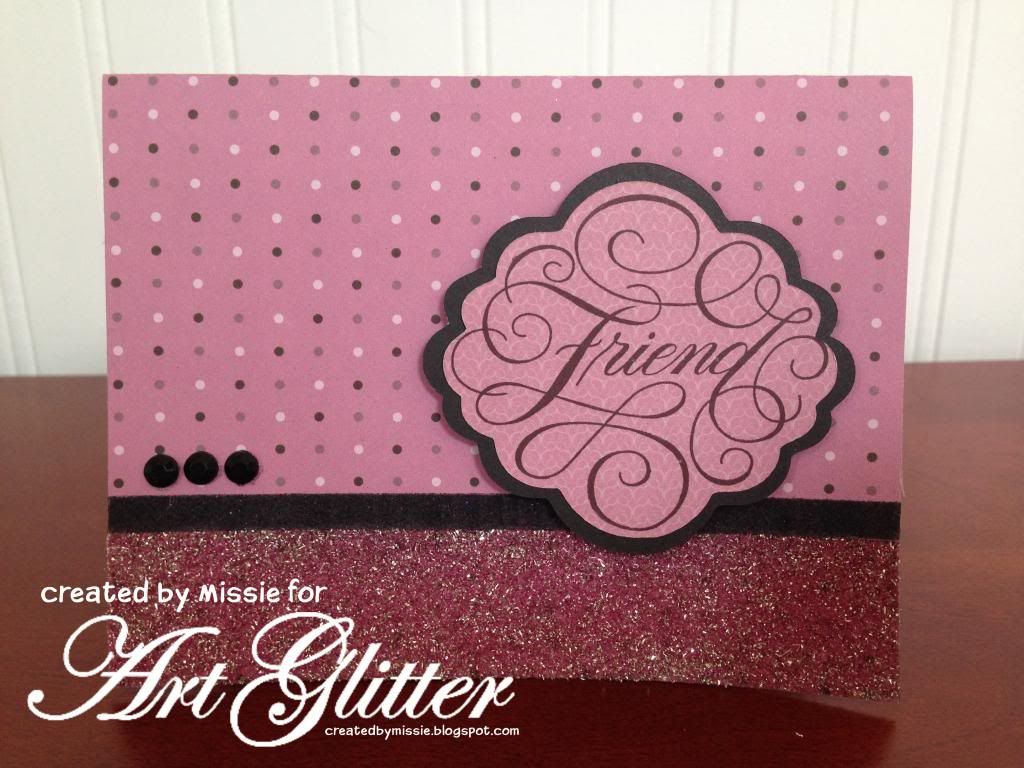
Supplies:
Assorted card stock
Friend Stamp (CTMH A1142)
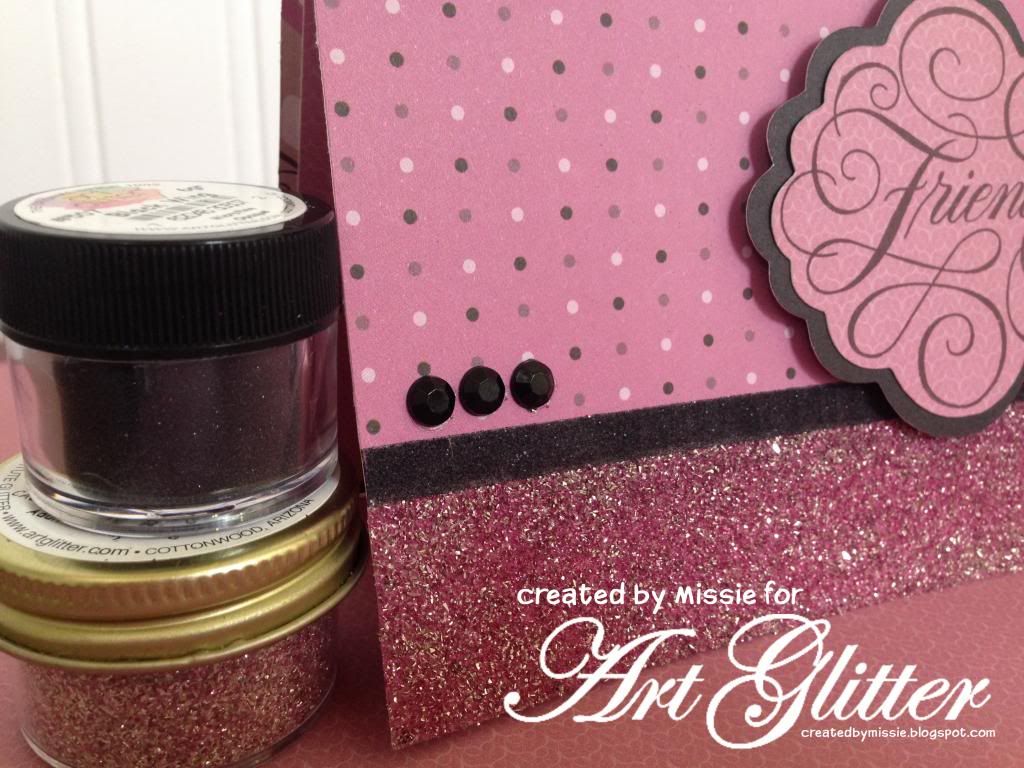
Art Glitter Vintage Glass Glitter - #623 Rose Bud
Art Glitter Microfine Opaque #507 Black wing
Double sided adhesive in two widths
Black gems
Die Cut shapes
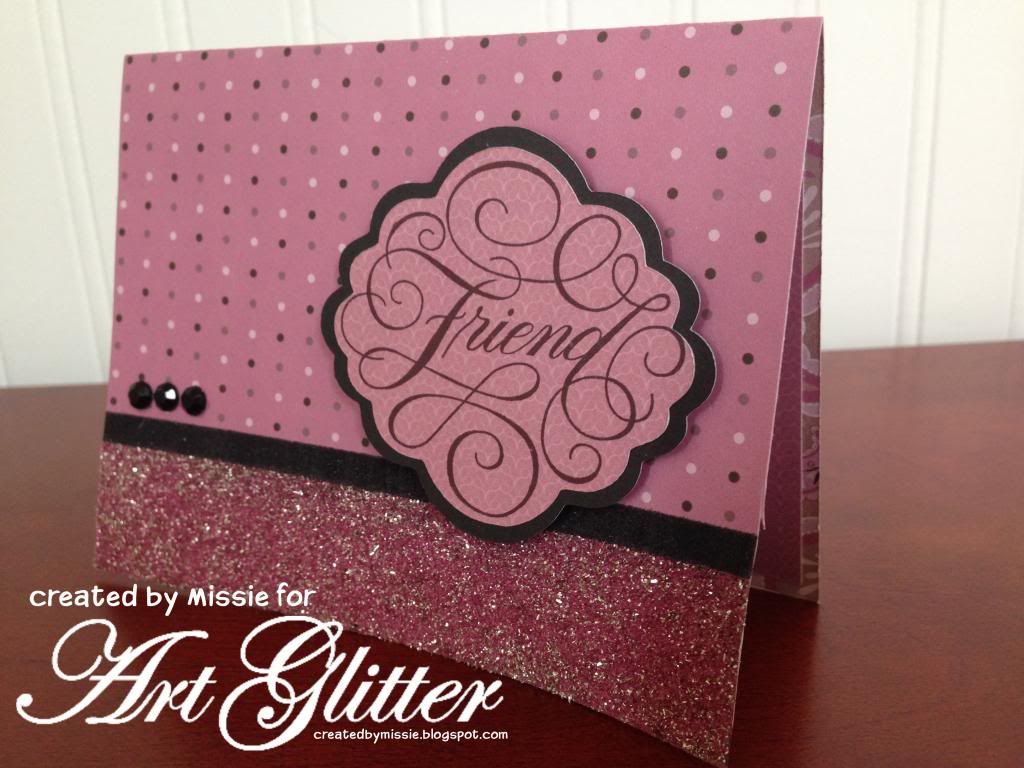
December is traditionally a time to spend with family and friends. Like so many others many of my dear friends live far away. So this month I am making a point to send cards (not just my family holiday cards) to some of those friends. In that spirit I want to share a lovely card that I created last week while I enjoyed a crafting day with a dear friend!
Begin by stamping on die cut shapes and then layering on a slightly larger black die cut. Using double sided tape in two different widths place adhesive in two stripes at the bottom of the card front. Remove the backing of the bottom adhesive and apply Vintage Glass Glitter- Rosebud, then remove the backing from the thinner tape and apply Black wing glitter. Add a few gems to finish off the card for an elegant look, yet easy to create card.
Thanks for stopping by to see my creations.
Missie Todd
createdbymissie.blogspot.com
Showing posts with label Fine Vintage Glass Glitter. Show all posts
Saturday, December 7, 2013
Thursday, December 5, 2013
Glitter Fun With Resin
I have been having the best time using the bezels from Spellbinders with the matching dies! I also am loving all things resin. I have used Enviro Tex for years and now we also have ICE Resin! To be honest...I LOVE THEM BOTH. What I REALLY love is the way the VINTAGE GLASS GLITTER looks under the resin!
I start with any bezel and then cut sticky paper with my Mixed Media machine and put in the base of the Bezel. I then cover it with Glass Glitter. I shake of the excess and put in whatever I want and finish off with resin!
I will finish off the pieces when I get time but wow this is fun!
Happy Creating!
Kristi For Art Glitter
Stop by my blog for more fun with all things that sparkle!
I start with any bezel and then cut sticky paper with my Mixed Media machine and put in the base of the Bezel. I then cover it with Glass Glitter. I shake of the excess and put in whatever I want and finish off with resin!
I will finish off the pieces when I get time but wow this is fun!
Happy Creating!
Kristi For Art Glitter
Stop by my blog for more fun with all things that sparkle!
Tuesday, October 8, 2013
Trick or Treat Card
Trick or Treat Card
Featuring Art Glitter and Northwoods Stamps
This month at Art Glitter we got to work with the Northwoods Rubber Stamp Company.
I have never used their stamps before but was pretty impressed with such detail. The ink went on very smooth and the image turned out perfect.
Supplies:
Art Glitter Ultra Fine Transparent # 165 Autumn
Art Glitter Vintage Glass # 624 Chocolatta
Patterned Paper
Copic Markers
Twine
This card turned out pretty great.
Here is a little close up to see some of the details.
Be sure to check out Art Glitter and if you purchase 25.00 of AG product
and use NW15 coupon code you can save 15%.
Friday, June 7, 2013
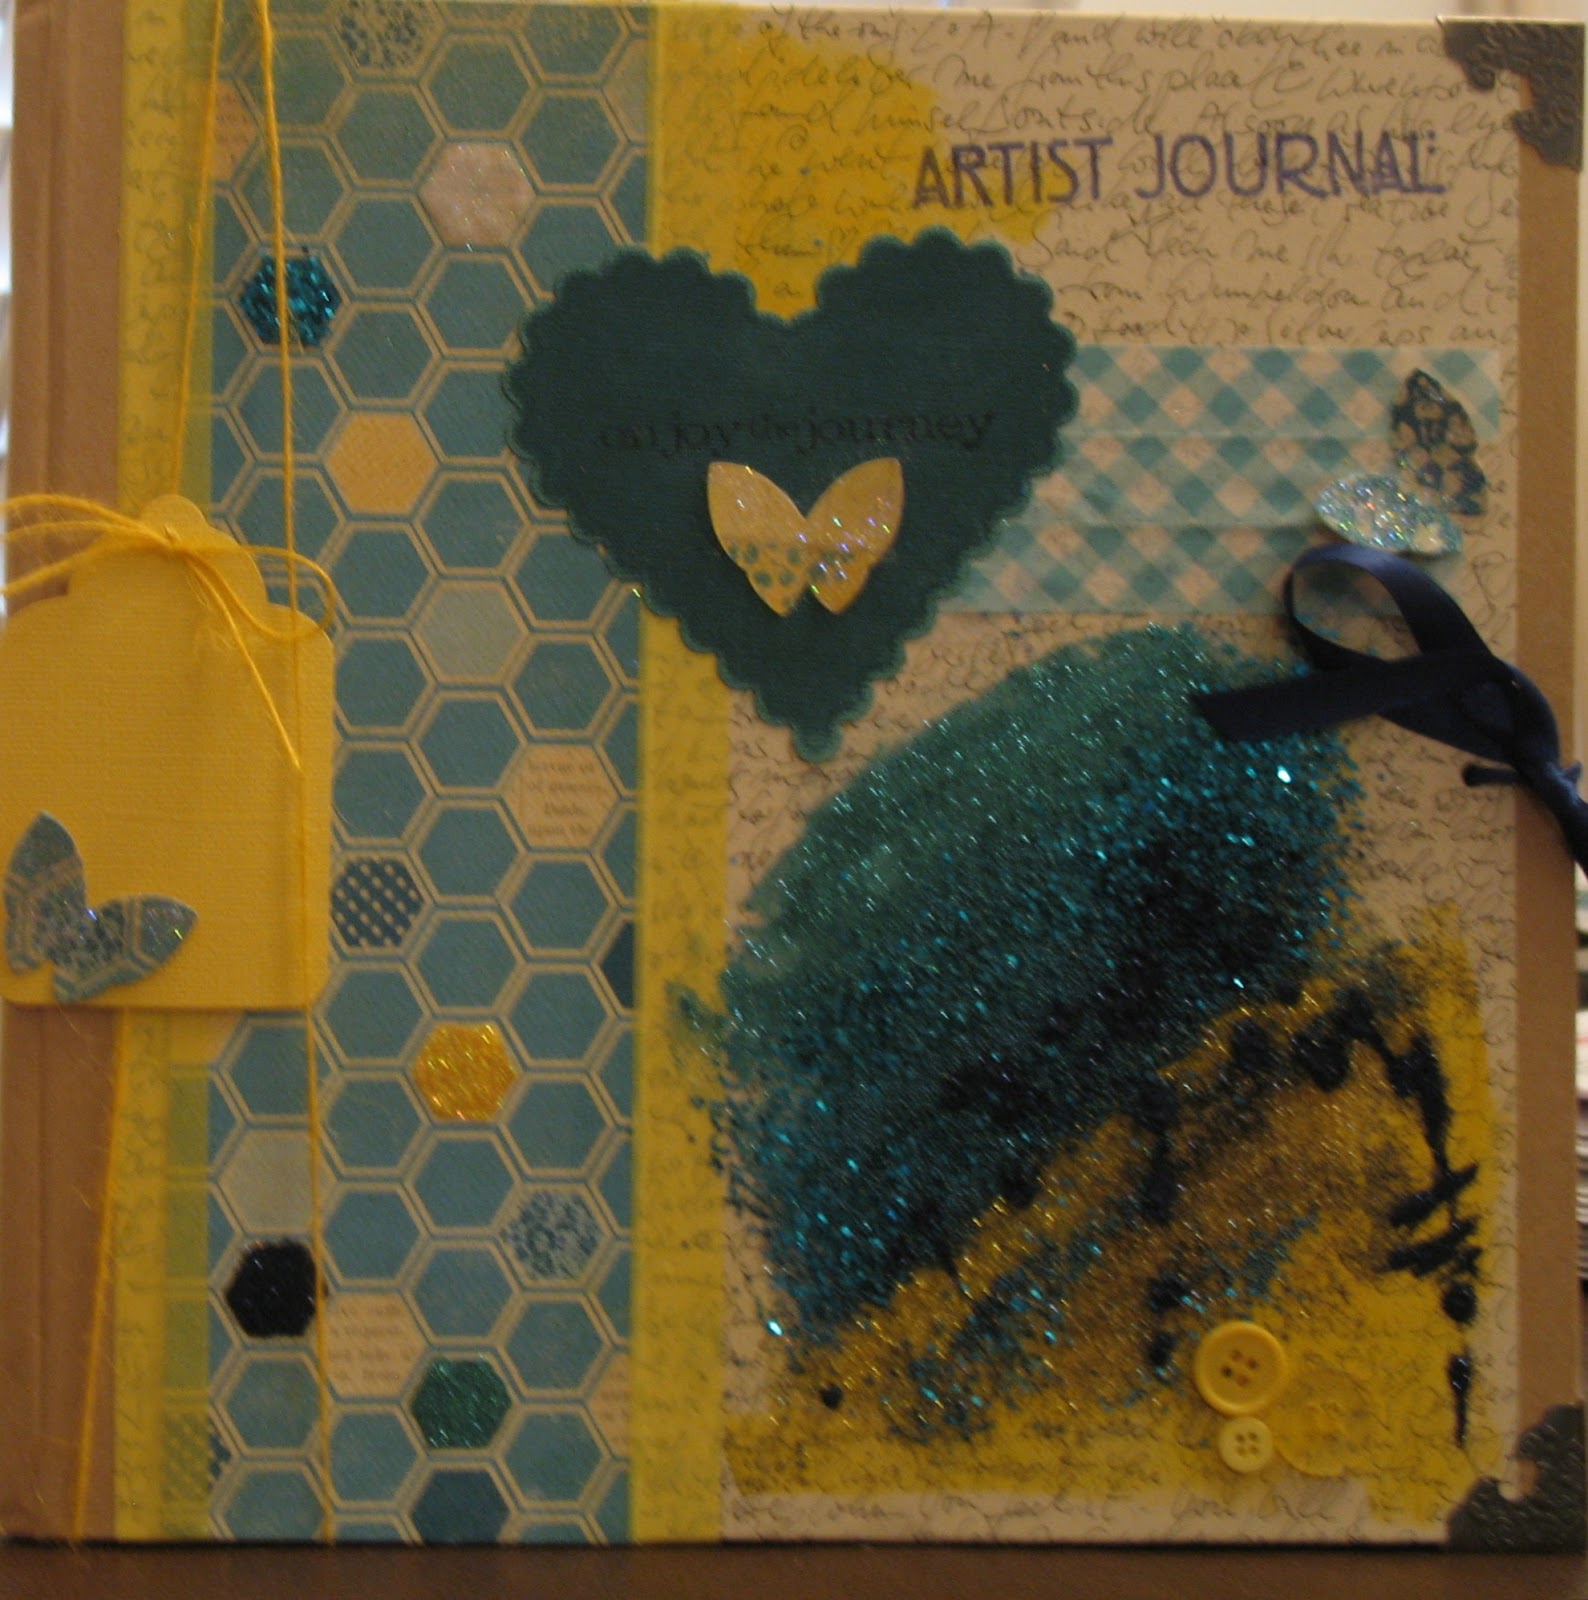
Mixed Media With Georgia
The month of June, Art Glitter is partnering with Authentique Papers. The papers are so pretty and the addition of Art Glitter makes them POP! Use the code: AQ20 on your order at www.artglitter.com to save 20% on your order of $25. or more. Happy Shopping and hope you enjoy the month of Art Glitter and Authentique.
The Supplies I used were:
Authentique - Seasons Collection
D50- Baja Cove Dazzlers
#85 Crystal Transparent Ultrafine Glitter
#40 Ocean Ultrafine Opaque
#27 Navy Ultrafine Opaque
#513 Mediterranian Microfine Opaque
#521 Cayman Microfine Opaque
#612 Golden Glow Fine Vintage Glass Glitter
#822 Hiawatha Sm. Opaque Glass Beads
I really had some fun with this project, I"m normally a cardmaker, but at CHA the Faber-Castille booth used this book portfolio for their info. I just felt the need to alter this for my own use. I love the Authentique colors of yellow and turquoise used in these papers.
I picked the colors above because they represented a nice range of color to blend with the papers. I glittered a fes of the hexagons on the paper and then applied dries clear adhesive with a brush and just started adding the different colors and textures of glitter. Using the different papers I punched out 3 butterflies painted them with the adhesive and sprinkled them with crystal transparent glitter to make them POP. As you can see I added several embellishments to my project. I'm looking forward to doing some more altered art adding elements of glitter. I hope you all have a sparkling day.
Georgia!
Georgia!
Saturday, February 23, 2013
Pretty In Pink Birdhouse
Hello, Kristi again! I did a cool birdhouse a couple of days ago and since I had everything out I did another one. This time instead of colors from nature I used Pink and Purple!
I covered the roof in sections with Designer Dries Clear Adhesive. I then applied # 7 Red Rose Ultafine Opaque glitter to the roof of the house.
I covered the base, the perch and the trim under the roof with #115 Heather Ultrafine Opaque Glitter! Of all of the purples I just love this color. As of this photo I was getting ready to adhere #616 Primrose Fine Glass Glitter. It is heavier than Ultrafine but it is so pretty!
I let it all dry then took it outside to see how it looked in the tree!
Thanks for checking this out and hope you enjoyed and are inspired to make a nice fun sparkling spring project. Sparkle On!
Come on over to my blog and see what else I am up to!
Kristi
Thursday, October 18, 2012
Globecraft Memories Earrings and Vintage Glass Glitter
Globecraft Memories makes it so easy to use their products I hardly had to think about this one!
I started out with their Butterfly Earrings Set and applied their Metallic Copper Cool-Set Enameling Gel on the backside of the butterflies. This set is small so I just spread the Enamel around with my finger then let dry.
Then I decorated the front sides with Art Glitter Fine Vintage Glass Glitter and Glass Beads applied with Designer Dries Clear Adhesive. I just love the look of the Glass Glitter, but I usually don't use it with jewelry, except...
Globecraft Memories has a great sealant, Glastique Gloss that seals in the color and makes the glass glitter 'safe' to wear! Add some beads and string them together for a fast and easy pair of blingrings!
See how the back side look just as great as the front? I love it! Enjoy! -emm
I started out with their Butterfly Earrings Set and applied their Metallic Copper Cool-Set Enameling Gel on the backside of the butterflies. This set is small so I just spread the Enamel around with my finger then let dry.
Then I decorated the front sides with Art Glitter Fine Vintage Glass Glitter and Glass Beads applied with Designer Dries Clear Adhesive. I just love the look of the Glass Glitter, but I usually don't use it with jewelry, except...
Globecraft Memories has a great sealant, Glastique Gloss that seals in the color and makes the glass glitter 'safe' to wear! Add some beads and string them together for a fast and easy pair of blingrings!
See how the back side look just as great as the front? I love it! Enjoy! -emm
Saturday, May 12, 2012
Glitter by Numbers with Carrie
Let's get started with this GREAT project by Carrie!
Here is my take on painting (GLITTERING) by NUMBERS!
It's just like painting, but you'll be using glue and glitter on a template instead!
Here's what you'll need:
Your canvas, image, gluing implements for this step and scissors.
So, to start, you'll need to cut out your image to 5.75" x 7.75" (Which is 4" x 6" with a 7/8" border on all four sides). I'm going to wrap my image around this canvas, but you don't have to. I just like the finished look better!
See how up close you can see the pixels? This will make it easier to figure out where to put your glitter colors.
Now align your image on the canvas so it's centered and even and fold the edges down a bit.
Fold the edges down and pinch the corners like so...
Cut the corners from the edge to about 7/8" in, as shown
Now get ready to make a mess with that old paintbrush!
Slather on the Modge Podge...
Then, put your image back on top and centered... Try to not get Modge Podge on the front of your image too much. If it is wet on top, it could bubble up more. I like getting the back wet and adhered FIRST, letting it dry, then putting a top coat.
Use your fingers to smooth out the bubbles and then start smoothing out the top and bottom, as shown... it's like wrapping a present!
Keep on smoothing and wrapping. Yes, your fingers will be blue at this point, but it will come off! You will be getting a little bit of the Modge Podge on the top of the image, but that's okay. We just don't want it swimming in wet adhesive right now!
It's not perfect, but it's the back! If you need more Modge Podge at this point, add some using your brush.
Voila! It's wrapped! Let dry for about an hour.
Now, you're going to coat your image with the clear surface prep Gesso. You could use Modge Podge on the top, but I prefer the grittier, not-so-glossy Gesso. I let this dry overnight, but you could let it dry for about an hour or two.
Behold... most of my glitter collection. Various colors, shapes, mediums and coarseness. Glass glitter, mylar glitter, tiny plastic or metal beads... I've got lots.
I've decided that I'm going to use 5 shades of glitter for the roses. Clear (in shards and in fine), light pink, a darker pink, a deeper magenta and then a red/magenta mix for the deepest part of the roses. Specific colors and brands are listed below. I'm using mylar and glass glitter in fine and coarse. Please use extreme caution when using glass glitter! I wear glasses and am careful not to get it on my hands and I keep the dog away from my crafting table when I'm using it! Glass glitter is amazing because it sparkles so much and has a rich, vintage feel to it. It just makes my pieces look and feel more special.
I'm starting with the lightest color. Clear glass shards on just the tips of the roses and leaves. I'm using Art Institute Glitter #901 "Krystallos" Shard Glass Glitter. I'm not using too much of this, but I want to use it first so that I can easily scoop up the "over shake" glitter and use it again without it getting mixed with any other colors. Trying to keep it pure ;) I always return the excess glitter to the jar after each colored glitter application. I also have a large paint brush reserved just for sweeping up glitter from surfaces.
Daub your glue on the lightest color pink and green areas. I'm using the Art Glitter Institute clear adhesive.
Cover with clear glitter...
Turn the canvas over and shake off the excess. I like to tap the back of the canvas with a large pen or my scissors to tap off the excess glitter back into the box.
Next, I'm going to add my lightest pink fine glass glitter. I'm using Art Institute Glitter #616 "Primrose" Fine Glass Glitter. Don't forget to add glitter to the sides of the canvas, too!
Glue, pour on, shake off...
So, Here's what it looks like with the clear and the first round of light pink...
It was at this point that I decided to add more clear fine glitter. So, you can see my glue lines here...
I'm going with a Crystal clear fine glitter. This will pick up the light pink underneath when it dries clear. Don't forget to add glitter to the sides of the canvas, too!
Pour on glitter, shake & tap off... and this is what it looks like!
Now we're adding the slightly deeper pink glass shard glitter. I'm using Art Institute Glitter #913 "Pink Coral" Shard Glass Glitter. Put down your glue, add glitter, shake & tap off. Don't forget to add glitter to the sides of the canvas, too!
Now, we're adding the even deeper pink fine glass glitter. I'm using Art Institute Glitter #601 "Royal Rose" Fine Glass Glitter. Put down your glue, add glitter, shake & tap off. Don't forget to add glitter to the sides of the canvas, too!
Now, you should be at the last color block, which is the darkest red shadow area on the roses. If you have more areas showing through, no problem! Just go back and repeat the steps above until you only have the darkest red patches left. I must mention... this is where it gets a tad tricky. I've picked out two glitter colors for the darkest areas of the roses. Art Institute Glitter #608 "Red Damask" Fine Glass Glitter and #141 "Magnolia" Ultrafine Transparent mylar glitter.
What I'm going to do is put down my glue on the darkest part of the rose...
Then, I'm going to very lightly sprinkle the lighter magenta color down first. We're going to be mixing colors here and you don't want to be too heavy handed with either color. Don't cover up all the glue, leave some glue exposed for the red, which is coming next. Don't forget to add glitter to the sides of the canvas, too!
Add the red fine glass glitter. I've used my little spoon to add a very slight amount of pressure to push the red into the glue so the magenta we just put down doesn't get all the attention.
Let's pause for a moment to look at our handiwork. That's a LOT of glitter... it's sort of like a Monet painting, it's going to look a little better from a distance, trust me. The texture, color and sparkle is going to look fantastic when it's done!
Now, we're moving onto green. Now that you are a glitter-by-number PRO, I don't have to go into agonizing detail with each step... so, I'll make it a bit quicker this time! Here are the colors I am using for the green leaves:
I first put down some glue on the lightest areas of the leaves, and dusted that area with the #5 yellowy "Cat Eyes" color. Don't forget to add glitter to the sides of the canvas, too!
I then went over that dusting with the #4 color, "Peapod". Don't forget to add glitter to the sides of the canvas, too!
After shaking and tapping... here's our progress so far...
Keep adding color, #2 "Peridot" and #603, Shamrock... Don't forget to add glitter to the sides of the canvas, too!
Then for the very last dark green area, put down your glue and add a mix of the #1 color, "Summertree" and the #6 color "Gunmetal". Don't forget to add glitter to the sides of the canvas, too!
Let this whole thing dry for at least an hour. Then, take a clean paint brush to the piece and lightly brush off the excess glitter. Some would leave the piece as it is, with the blue showing through. But not me! I'm going to fill in that blue with Crystal glitter. Let's make sure this whole piece is just covered! :) Cover the blue areas with glue... don't forget the sides!
And here it is... dried after a few hours... covered in glitter!!
I hung it on the wall that is directly behind my computer in my studio so I can gaze at it all day long. It shimmers and glitters and catches my eye when I walk in... I just love it!
Hope you have fun making yours!
Here is my take on painting (GLITTERING) by NUMBERS!
Here's what you'll need:
- A small 4" x 6" canvas that is 7/8" deep
- An image that is 5.75" x 7.75" that has been pixelated or run through a similar Photoshop or Elements filter*
- Modge Podge
- Clear Gesso - Surface Prep
- Scissors
- An old small paintbrush (to use with the Modge Podge & Gesso)
- Glue that dries clear
- Lots and lots of colored glitter... preferably in different sizes and textures, but not necessary
- A little box to catch said ample amounts of glitter
- A little plastic spoon for scooping glitter (or just use a shaker bottle that comes on some glitter containers)
- A clean, dry paintbrush used to sweep away excess glitter from the table, canvas, your pants and the walls (yes, that has happened to me!)
Your canvas, image, gluing implements for this step and scissors.
See how up close you can see the pixels? This will make it easier to figure out where to put your glitter colors.
Now align your image on the canvas so it's centered and even and fold the edges down a bit.
Fold the edges down and pinch the corners like so...
Cut the corners from the edge to about 7/8" in, as shown
Now get ready to make a mess with that old paintbrush!
Slather on the Modge Podge...
Then, put your image back on top and centered... Try to not get Modge Podge on the front of your image too much. If it is wet on top, it could bubble up more. I like getting the back wet and adhered FIRST, letting it dry, then putting a top coat.
Use your fingers to smooth out the bubbles and then start smoothing out the top and bottom, as shown... it's like wrapping a present!
Keep on smoothing and wrapping. Yes, your fingers will be blue at this point, but it will come off! You will be getting a little bit of the Modge Podge on the top of the image, but that's okay. We just don't want it swimming in wet adhesive right now!
It's not perfect, but it's the back! If you need more Modge Podge at this point, add some using your brush.
Voila! It's wrapped! Let dry for about an hour.
Now, you're going to coat your image with the clear surface prep Gesso. You could use Modge Podge on the top, but I prefer the grittier, not-so-glossy Gesso. I let this dry overnight, but you could let it dry for about an hour or two.
Behold... most of my glitter collection. Various colors, shapes, mediums and coarseness. Glass glitter, mylar glitter, tiny plastic or metal beads... I've got lots.
I've decided that I'm going to use 5 shades of glitter for the roses. Clear (in shards and in fine), light pink, a darker pink, a deeper magenta and then a red/magenta mix for the deepest part of the roses. Specific colors and brands are listed below. I'm using mylar and glass glitter in fine and coarse. Please use extreme caution when using glass glitter! I wear glasses and am careful not to get it on my hands and I keep the dog away from my crafting table when I'm using it! Glass glitter is amazing because it sparkles so much and has a rich, vintage feel to it. It just makes my pieces look and feel more special.
I'm starting with the lightest color. Clear glass shards on just the tips of the roses and leaves. I'm using Art Institute Glitter #901 "Krystallos" Shard Glass Glitter. I'm not using too much of this, but I want to use it first so that I can easily scoop up the "over shake" glitter and use it again without it getting mixed with any other colors. Trying to keep it pure ;) I always return the excess glitter to the jar after each colored glitter application. I also have a large paint brush reserved just for sweeping up glitter from surfaces.
Daub your glue on the lightest color pink and green areas. I'm using the Art Glitter Institute clear adhesive.
Cover with clear glitter...
Turn the canvas over and shake off the excess. I like to tap the back of the canvas with a large pen or my scissors to tap off the excess glitter back into the box.
Next, I'm going to add my lightest pink fine glass glitter. I'm using Art Institute Glitter #616 "Primrose" Fine Glass Glitter. Don't forget to add glitter to the sides of the canvas, too!
Glue, pour on, shake off...
So, Here's what it looks like with the clear and the first round of light pink...
It was at this point that I decided to add more clear fine glitter. So, you can see my glue lines here...
I'm going with a Crystal clear fine glitter. This will pick up the light pink underneath when it dries clear. Don't forget to add glitter to the sides of the canvas, too!
Pour on glitter, shake & tap off... and this is what it looks like!
Now we're adding the slightly deeper pink glass shard glitter. I'm using Art Institute Glitter #913 "Pink Coral" Shard Glass Glitter. Put down your glue, add glitter, shake & tap off. Don't forget to add glitter to the sides of the canvas, too!
Now, we're adding the even deeper pink fine glass glitter. I'm using Art Institute Glitter #601 "Royal Rose" Fine Glass Glitter. Put down your glue, add glitter, shake & tap off. Don't forget to add glitter to the sides of the canvas, too!
Now, you should be at the last color block, which is the darkest red shadow area on the roses. If you have more areas showing through, no problem! Just go back and repeat the steps above until you only have the darkest red patches left. I must mention... this is where it gets a tad tricky. I've picked out two glitter colors for the darkest areas of the roses. Art Institute Glitter #608 "Red Damask" Fine Glass Glitter and #141 "Magnolia" Ultrafine Transparent mylar glitter.
What I'm going to do is put down my glue on the darkest part of the rose...
Then, I'm going to very lightly sprinkle the lighter magenta color down first. We're going to be mixing colors here and you don't want to be too heavy handed with either color. Don't cover up all the glue, leave some glue exposed for the red, which is coming next. Don't forget to add glitter to the sides of the canvas, too!
Add the red fine glass glitter. I've used my little spoon to add a very slight amount of pressure to push the red into the glue so the magenta we just put down doesn't get all the attention.
Let's pause for a moment to look at our handiwork. That's a LOT of glitter... it's sort of like a Monet painting, it's going to look a little better from a distance, trust me. The texture, color and sparkle is going to look fantastic when it's done!
Now, we're moving onto green. Now that you are a glitter-by-number PRO, I don't have to go into agonizing detail with each step... so, I'll make it a bit quicker this time! Here are the colors I am using for the green leaves:
- Art Institute Glitter #46 "Summertree" Ultrafine Opaque Mylar Glitter
- Art Institute Glitter #909 "Peridot" Shard Glass Glitter
- Art Institute Glitter #603 "Shamrock" Fine Glass Glitter
- Art Institute Glitter #618 "Peapod" Fine Glass Glitter
- Art Institute Glitter #361 "Cat Eyes" Ultrafine Opaque Mylar Glitter
- (Shown Below) Art Institute Glitter #D14 "Gunmetal" Dazzlers Hexagon Shape
I first put down some glue on the lightest areas of the leaves, and dusted that area with the #5 yellowy "Cat Eyes" color. Don't forget to add glitter to the sides of the canvas, too!
I then went over that dusting with the #4 color, "Peapod". Don't forget to add glitter to the sides of the canvas, too!
After shaking and tapping... here's our progress so far...
Keep adding color, #2 "Peridot" and #603, Shamrock... Don't forget to add glitter to the sides of the canvas, too!
Then for the very last dark green area, put down your glue and add a mix of the #1 color, "Summertree" and the #6 color "Gunmetal". Don't forget to add glitter to the sides of the canvas, too!
Let this whole thing dry for at least an hour. Then, take a clean paint brush to the piece and lightly brush off the excess glitter. Some would leave the piece as it is, with the blue showing through. But not me! I'm going to fill in that blue with Crystal glitter. Let's make sure this whole piece is just covered! :) Cover the blue areas with glue... don't forget the sides!
And here it is... dried after a few hours... covered in glitter!!
I hung it on the wall that is directly behind my computer in my studio so I can gaze at it all day long. It shimmers and glitters and catches my eye when I walk in... I just love it!
Hope you have fun making yours!
Subscribe to:
Posts (Atom)