
 Hi glitterers! It's Amy from Mod Podge Rocks, with Art Glitter project number three. Before we begin, I can't tell you how long I've been waiting to use this paper! It's very fun and BRIGHT colored, so I knew that it wouldn't work with just anything. I like these three little storage containers because they are a great surface for these papers and, well, I need storage containers!
In this project, I used glitter not so much as a focal point but as a fun accent. I really dug through my stash to find goodies, so the supply list is going to be a little haphazard, but that is the fun. Use what you have to customize storage containers of your very own.
Gather These Supplies:
Unfinished wood storage containers - 3 small
Art Glitter Ultrafine Opaque: #111 Victoria, #234 Turquoise
Art Glitter Microfine Opaque: #528 Crimson
Art Glitter Designer Dries Clear Glue with Ultrafine Metal Tip
Mod Podge Gloss
FolkArt Acrylic Paint - Ocean Cruise, Yellow Ochre and Coffee Bean (or coordinating)
Sassafras Lass Scrapbook Paper - Hog Heaven (3 sheets)
Ribbon scraps - I used blue and polka dot, enough to go around the top of two of the containers
Buttons - I used one pink felt and one brown
Prima Flowers - I used four yellow
Cardstock scraps - I used green and blue to make my mushrooms
Flat Paintbrush
Craft Knife and Mat
Ruler
Pen or Pencil
 Your first step is to trace each container onto each of three sheets of scrapbook paper. I did all four sides of all three containers.
 Cut out the papers inside your tracing lines and set aside.
 Paint each container with the color of acrylic paint that matches the paper you will use. Paint the inside of the container, the bottom and the edges. You don't need to paint the entire container because you are going to cover some of it with paper. Paint all three containers and allow them to dry.
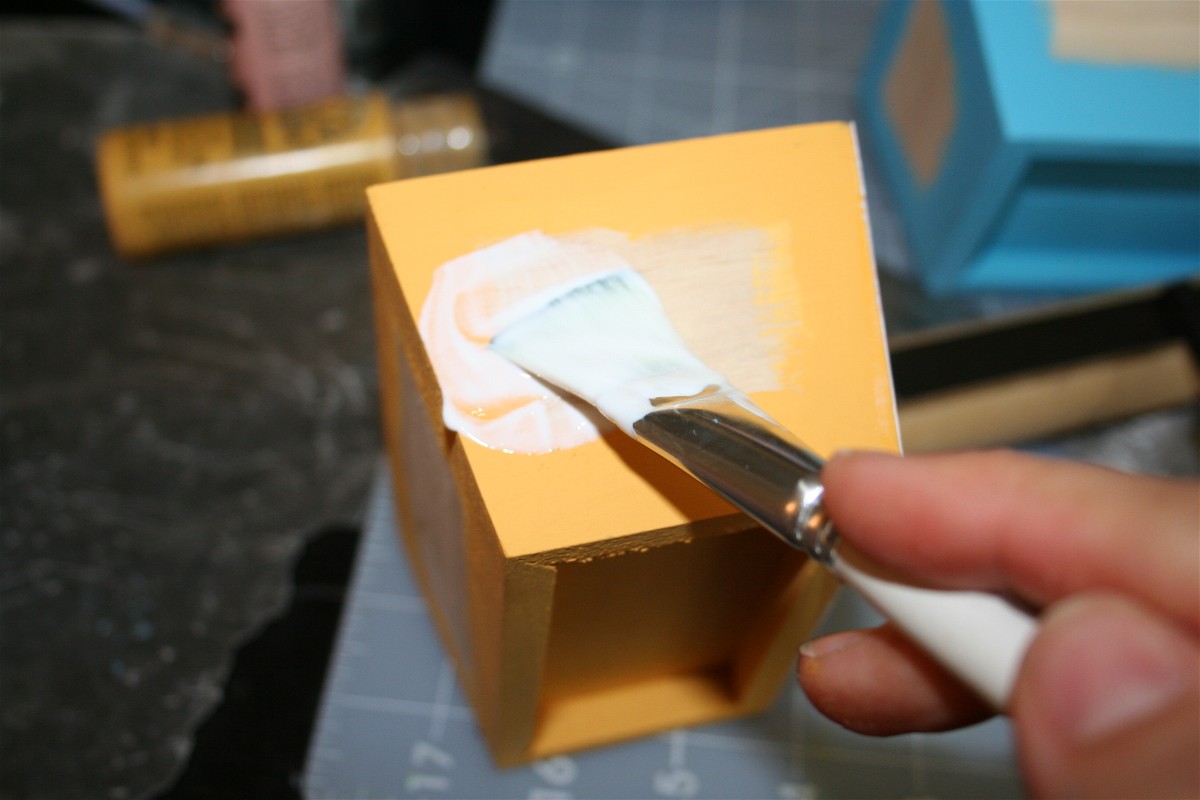 Grab your paper pieces and have them close. It's time to Mod Podge! Working one side at a time, coat your side with a medium layer of Mod Podge.
 When all three containers are dry, coat all of them (inside and out) with Mod Podge. Let dry and then give them a second coat. Let them dry again.
 It's embellishment party time! Using your Designer Dries Clear Adhesive, add ribbon and buttons! You'll see that I added flowers too. Use whatever you have in your stash to accent your creations.
 I found my largest container to be a little boring, so I grabbed some cardstock scraps and punched out some mushrooms with my Sizzix Big Shot. I love that thing! It's very easy to Mod Podge on TOP of Mod Podge. Simply brush a spot of Mod Podge down, press your item down and then Mod Podge over the top. Because these are so small and the cardstock is so thick, you don't have to worry about wrinkles.
 Your final step is to go back with your Designer Dries Clear glue and add glitter embellishments to all three containers! You see here that I've added dots and then covered the stems of the mushrooms. On my medium container I added centers to the flowers, and on the small container I outlined my flower.
I love these because the papers are so fun and of course, the glitter! Sometimes a little glitter adds a great accent, especially to a small project (or three).
Oh my, these are so fun. I love the papers, so cherry. Looking at these containers, just looking at them, could brighten a dreary day. Loved the tutorial. Thanks...
ReplyDeleteSo cute! Love, love, love the glitter!
ReplyDeletewow, that's adorable! :)
ReplyDeleteWhat a great tutorial. Thank you so much for sharing. I am always looking for new ways to use ribbon and scrapbooking embellishments outside of the norm : )
ReplyDeletevery cute. didn't realize from the first pic they were itty bitty-cute cute cute!
ReplyDeleteGreat fun! and it looks so easy :) Thanks for the step by step...love that glitter!
ReplyDelete