Monday, July 26, 2010

Sweet Happiness Sign by Cassandra Midkiff

One of my favorite pieces to create are these altered signs with inspiring words on them. For this project I decided to go with "sweet, happiness." I found these chipboard words at Michaels in the dollar bin and knew I had to work them into some of my projects.


Materials used:
Art Glitter Ultrafine Transparent Colors: #166 Atlantis, #100 Sea Shell, #288 Deep Blue Sea, #219 Lilypad, #215 Wild Rose
Art Glitter Ultrafine Opaque Colors: #113 Sky, #28 Twilight
Art Glitter Shards Vintage Glass Glitter: #922 Swan Lake
Art Glitter Faux Snow
Art Glitter Designer Dries Clear Adhesive
Brown ink pad
Chipboard word "happiness"
Forget me not flowers and scrapbook flowers
Wire
Dresden Trim
Rhinestones
Jewelry embellishments
Elmer's craft boards that measure: 7" by 2 3/4"
Scrapbook paper

Directions:
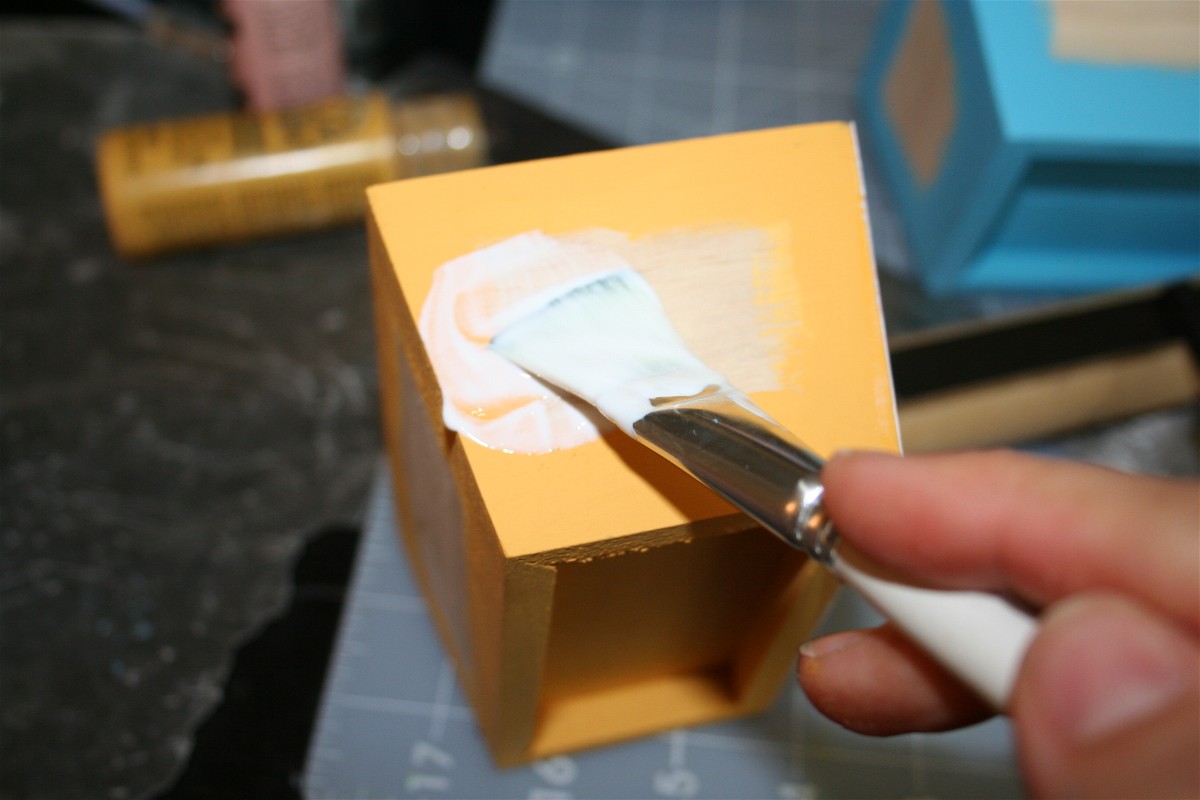
I always start by gluing my scrapbook paper to the board and aging the edges with my brown ink pad. Next I drill my holes where I want to place my wire for hanging. I put down a layer of the Designer Dries Clear Adhesive as wide as my chipboard word and then sprinkled the Faux Snow on top. I love layering I think it creates a lot of dimension to each piece. After the Faux Snow is dry I glue down the chipboard word. Because all of the lettering in happiness is different it gave me the idea to use a different color glitter on each letter. To do this I simply added my Designer Dries Clear Adhesive to each individual letter and added my glitter. It took a little time but I think the result is worth is!


After happiness was completly dry I added a few spots of #215 Wild Rose glitter surrounding it. Then I layered three scrapbook paper flowers to create a big beautiful flower. For each layer of the flower I added some glitter then glued it together with my Designer Dries Clear Adhesive. I also love to use the Dresden foil trim in my pieces (you can find this in several shops on etsy) and jewelry findings. I attached my wire to the holes I drilled, I like to play with the wire adding embelishments to it such as my forget me nots and plastic flower findings.

Finally you have a beautiful piece to hang up and enjoy. These are quite popular in my etsy shop jupiterdesigns.etsy.com.

Thursday, July 22, 2010

Sparkly Chandelier Canvas by Amy Anderson

Hello! It's Amy from Mod Podge Rocks, happy to share glitter project number four with you. With each project I'm getting more and more into glittering. I don't know if I can say the same for my dogs though - they always seem to be around when I am blowing or tapping off glitter, and sometimes they get a faceful. There was no exception for this project, which has TONS of glitter! I think my goal this time was to see how much glitter I could use, and it turns out I used a lot. I love my chandelier canvas!

Gather These Supplies:
8" x 10" canvas
Art Glitter - Ultrafine Opaque: #65 Old Gold, #111 Victoria
Art Glitter - Ultrafine Transparent: #272 Water Color
Art Glitter Designer Dries Clear Adhesive and Metal Tip
Mod Podge Gloss
FolkArt acrylic paint - Seashell Pink
Plaid Silhouette Stencils - Chandelier
Scrapbook paper, 1 sheet - I used Basic Grey Two Scoops Spumoni
Pink velvet ribbon - 3 feet
Stencil tape
Stencil brush
Flat paintbrush
Ruler
Scissors or craft knife and mat
Pen or pencil

Place your canvas onto the paper and trace.

Use your craft knife and ruler to trim out your paper piece - I actually trimmed the paper about 1/4" within the traced line so that the painted canvas would show around the sides.

Paint your canvas around the edge. I love covering the front of canvases with paper because, guess what - you don't have to paint the entire thing! Just make sure that your edges are covered well.

Time to Mod Podge your paper down. Use your brush to spread a medium coat of Mod Podge over the entire canvas.

Smooth the paper down on top of the canvas. I'm not sure what I'm doing in this picture - tapping the paper maybe? You don't need to do that. Just smooth it down and then let it dry for 15 - 20 minutes.

Give the entire canvas and paper a medium coat of Mod Podge. Allow to dry.

This part was so fun! I decided that I wanted a chandelier shape on the front of my canvas, but that I obviously needed a template. I had a Plaid silhouette stencil, so I grabbed the chandelier shape out of the pack and then taped it to the front of the canvas using stencil tape

The next step was to stencil the chandelier shape onto the front of the canvas. I used white, but then I realized I could have used the Seashell Pink from the first part of my project. The whole chandelier shape is used as a template for the glitter, so you won't see any of the paint below.

Remove the stencil and you should have a shape like this. The good news is that it doesn't have to be exact, since you are covering it with glitter. I love it when things don't have to be exact.

Take your glue with the fine tip and start filling in sections of the chandelier. Do a few at a time.

Sprinkle the glitter and then repeat the process until all the parts of one color are done. Allow this color to dry.

Repeat with the glitter and then the glitter, allowing to dry between colors. Once the entire chandelier shape is covered and dried, knock off all of the extra glitter, being sure not to hit your dogs in the face with a sparkle cloud.

Your final touch is to add the velvet ribbon around the edge. Allow to dry for 24 hours before gifting or hanging.

You know, this project is much more girly than I'm used to, but I absolutely love it. The great thing is that depending on the paper and the stencil, I can switch the style to coordinate with my decor.

Friday, July 16, 2010

Fantasy Film Pendants by Lori Mendenhall

I love the way colors and light play when using Fantasy Film. The effect is magnified under resin. I love combining materials to create sparkling dynamic pieces. Crinkled Fantasy Film is one of the best things I have found to simulate dichroic glass. I embed the Fantasy Film under resin and it looks very authentic – except much less expensive, lighter, easier, and accessible.


The piece above is reminiscent of a geode, with it’s organic design on one side and crystal sparkle on the other. I made this polymer clay pendant using a technique I invented to make polymer clay bezels. In this design, I left half of the pendant hollowed-out ready for filling. I crumpled up Fantasy Film and layered it in. It was then covered with resin. The finished pendant was strung with black and smokey grey glass and crystals with silver accents. I wish the picture would do justice to the sparkle.

Another way I like to use Fantasy Film in pendants is as a layered component.


In this piece I use a shell as my canvas. There is a cutout circle of fused Fantasy Film underneath the polymer clay hearts. This circle acts as an accent giving a more dramatic look to the pendant. Then I cut up tiny pieces of Fantasy Film and sprinkled them around. The whole thing is covered in resin. The pendant is strung on 4mm AB crystals. Very unique and sparkly!

Monday, July 12, 2010

Upcycled Mini Books by Marisa Pawelko


Marisa Pawelko, The Modern Surrealist, shared with us her photos from the Chicago Craft Social she was at, making these fantastic mini scrapbooks from recycled materials and a little Art Glitter!


She had visitors at her table use old cereal boxes and paper bag origami for the mini books and then they decorated the cover with Designer Dries Clear Adhesive, Dazzlers, Ultrafine Art Glitter and more!


Absolute fun!


The Dazzlers just look fantastic!


Save your excess!


These Ultrafine Neon Colors are perfect too!


Looks like a grand time, wish I had been there! Thank goodness she will showcase this project again at these upcoming shows:
Craft Studio at the CHA Trade Show: Wednesday, July 28th 10am – 10:30am
Westcott Fundraiser for the Wyland Foundation (for the trade by invitation only): Wednesday, July 28th 6-8pm
“Funky Junk” Super Show workshop sponsored by Westcott: Friday, July 30th 6-7:30pm
Craft Academy at the Super Show: Saturday, July 31st 2:15 – 2:45pm


What a great stash! To see more photos check out the Modern Surrealist on Face Book.


Thank you for sharing again Marisa, great design and fun too!

Thursday, July 8, 2010

Art Glitter Small Storage Boxes by Amy Anderson

Hi glitterers! It's Amy from Mod Podge Rocks, with Art Glitter project number three. Before we begin, I can't tell you how long I've been waiting to use this paper! It's very fun and BRIGHT colored, so I knew that it wouldn't work with just anything. I like these three little storage containers because they are a great surface for these papers and, well, I need storage containers!

In this project, I used glitter not so much as a focal point but as a fun accent. I really dug through my stash to find goodies, so the supply list is going to be a little haphazard, but that is the fun. Use what you have to customize storage containers of your very own.

Gather These Supplies:
Unfinished wood storage containers - 3 small
Art Glitter Ultrafine Opaque: #111 Victoria, #234 Turquoise
Art Glitter Microfine Opaque: #528 Crimson
Art Glitter Designer Dries Clear Glue with Ultrafine Metal Tip
Mod Podge Gloss
FolkArt Acrylic Paint - Ocean Cruise, Yellow Ochre and Coffee Bean (or coordinating)
Sassafras Lass Scrapbook Paper - Hog Heaven (3 sheets)
Ribbon scraps - I used blue and polka dot, enough to go around the top of two of the containers
Buttons - I used one pink felt and one brown
Prima Flowers - I used four yellow
Cardstock scraps - I used green and blue to make my mushrooms
Flat Paintbrush
Craft Knife and Mat
Ruler
Pen or Pencil

Your first step is to trace each container onto each of three sheets of scrapbook paper. I did all four sides of all three containers.

Cut out the papers inside your tracing lines and set aside.

Paint each container with the color of acrylic paint that matches the paper you will use. Paint the inside of the container, the bottom and the edges. You don't need to paint the entire container because you are going to cover some of it with paper. Paint all three containers and allow them to dry.

Grab your paper pieces and have them close. It's time to Mod Podge! Working one side at a time, coat your side with a medium layer of Mod Podge.

Take your paper sheet and smooth onto the side of your project. Now SMOOTH thoroughly. I like to use a brayer, but you can use your hands too. Keep smoothing and wipe away any excess Mod Podge that comes out the sides with your brush. Repeat this process until you've completed all three containers, then set them aside to dry for 15 - 20 minutes.

When all three containers are dry, coat all of them (inside and out) with Mod Podge. Let dry and then give them a second coat. Let them dry again.

It's embellishment party time! Using your Designer Dries Clear Adhesive, add ribbon and buttons! You'll see that I added flowers too. Use whatever you have in your stash to accent your creations.

I found my largest container to be a little boring, so I grabbed some cardstock scraps and punched out some mushrooms with my Sizzix Big Shot. I love that thing! It's very easy to Mod Podge on TOP of Mod Podge. Simply brush a spot of Mod Podge down, press your item down and then Mod Podge over the top. Because these are so small and the cardstock is so thick, you don't have to worry about wrinkles.

Your final step is to go back with your Designer Dries Clear glue and add glitter embellishments to all three containers! You see here that I've added dots and then covered the stems of the mushrooms. On my medium container I added centers to the flowers, and on the small container I outlined my flower.

I love these because the papers are so fun and of course, the glitter! Sometimes a little glitter adds a great accent, especially to a small project (or three).

Monday, July 5, 2010

Sparkle Flag Photo Album by Cassandra Midkiff

I hope everyone had a wonderful Independence Day! For this project I thought it would be fun to make an album to put all of your July 4th photos in.


Materials:
Art Glitter Ultrafine Transparent: Sea Shell #100
Art Glitter Ultrafine Opaque: Twilight #28
Art Glitter Designer Dries Clear Adhesive
Small photo album (the one pictured is a Kolo photo album I picked up at Tuesday morning)
Seam binding in Red and White
Illustration board or foam core
Forget my not flowers (optional)
Wire
Chipboard letters
Scrapbook papers
Brown stamp pad

Starting with the stars I made a very simple star outline on some illustration board and cut them out. With my stamp pad I aged the edges, then placed a small hole with a pin into the star where I attached the wire. Next I covered the star with Dries Clear Adhesive and sprinkled some of my Art Glitter “Sea Shell “ onto it. After finishing the stars I set them aside to dry. I took a hammer and nail and poked two holes into my photo album where I was going to place the stars (you could also use a small Dremel drill but I didn’t have one on hand.) I then went to work placing my red and white seam binding onto the photo album, I attached the ribbon with my Dries Clear adhesive scrunching the ribbon together slightly to create a wavy effect.

While the album was drying I glittered some of my letters in “Sea Shell”and the word July in “Twilight” Art Glitter. I had to create my own number four out of scrapbook paper since I didn’t have one on hand. To attach the stars I just slipped the wire into the holes made by my hammer leaving enough room to twist the excess wire to hold the stars in place. On the white stripes of the flag I smeared the dries clear adhesive where I sprinkled even more “Sea Shell.” After letting the glitter dry I attached my forget my not flowers. These little albums would be a fun gift to the ones you shared the holiday with or a sweet remembrance for yourself.

Thursday, July 1, 2010

Undersea Pendants with Fantasy Fiber by Lori Mendenhall

When I first laid eyes on Fantasy Fiber I knew it would make the perfect background for a pendant. The amazing dichroic colors mesmerized me as I envisioned a dazzling ocean scene. Fantasy Fiber colors can be used straight out of the package, or you can combine the fibers prior to fusing to create even more interesting looks.


For my ocean backgrounds, I use the color “Edge of Night”. Take a small clump of the fibers and sandwich them between parchment paper. Using a medium temperature iron, fuse the fibers together into a sheet. Make sure you don’t over-iron to avoid scorching. See the Art Glitter website for more complete instructions.


Once my fibers are fused, I cut out the exact shape and size to fit into the bezel. If you are really lucky, you’ll have a paper punch which is the perfect fit for the bezel. Alas, I did not have that so I had to cut with scissors. The fused fibers are very sturdy and hold up well to being cut.


Lay the Fantasy Fibers into the bezel and add the charms and beads to complete the scene. I use clear seed beads to make the cute little air bubbles. (Funny to actually simulate air bubbles when working with resin because almost always you are trying to eliminate real air bubbles!)


When the scene is complete fill the bezel with resin. Let cure for a full three days. For a complete write-up of this project, see “Bead Unique” magazine, Summer 2010.