I love to layer garlands with different textures, shapes and materials. They are very versatile and you can mix and match themes to fit any occasion.
For this project trifecta, I wanted to make a fringe garland, a chain garland and a ribbon garland with flowers.
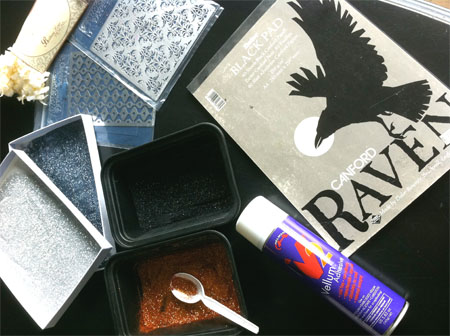
First, I gathered all the materials I'm going to use to make the chain garland and the fringe garland. This is what I used:
- Black construction paper
- Helmar Vellum Adhesive Spray
- Art Institute Fine Opaque Glitter - #62 Copper Canyon Orange
- Art Institute Fine Opaque Glitter - #79 Black
- Art Institute Fine Opaque Glitter - #83 Silver
- Art Institute Fine Opaque Glitter - #77 Pewter
- White paper fringe garland
- Dreamweaver Stencils - I used #LX 7001 Damask
- Large piece of paper to spray on
First off... do this outside! You are going to be using spray adhesive and making a mess.

I started by spraying the paper fringe garland liberally with the Vellum Adhesive spray.
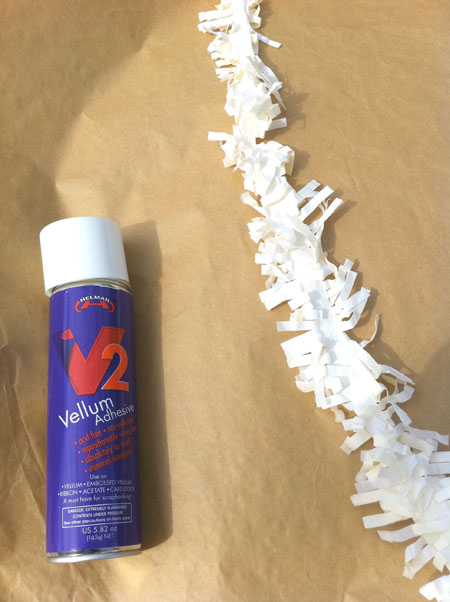
I then sprinkled the sprayed area with glitter and kept spraying, sprinkling glitter and rolled it around in the excess glitter. The Vellum spray was really neat because it made the white tissue garland paper turn more opaque and frosted, so the finished garland had a really neat vellum look to it.
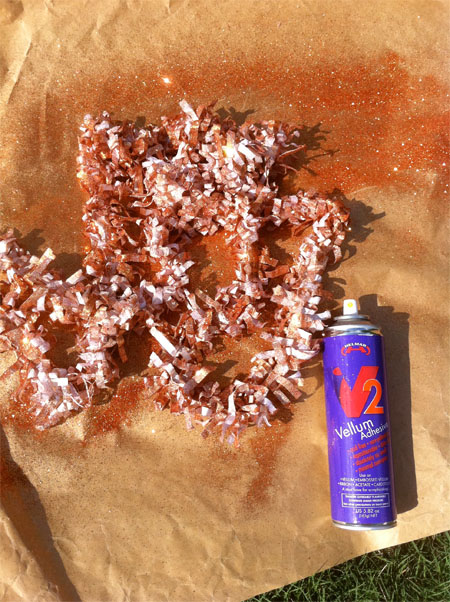
I set the paper fringe garland aside to dry. I then moved on to the next project... I set out a piece of the black construction paper and sprayed it liberally with the Vellum adhesive spray...
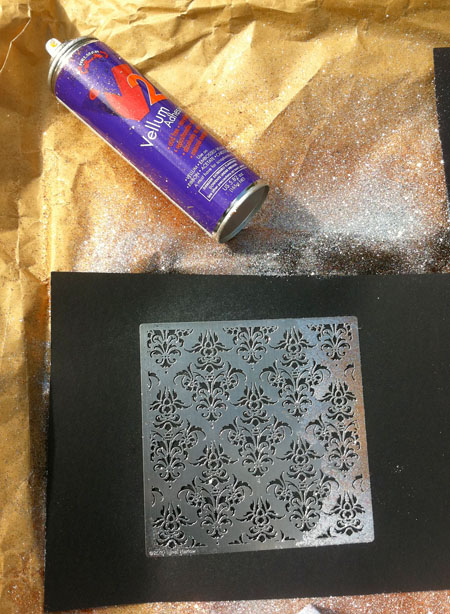
And quickly set a stencil on top of the sprayed area. I then sprinkled the silver glitter carefully over the exposed area of the stencil. Then I carefully removed the stencil, tapped off the excess and covered the remaining exposed paper with black glitter.
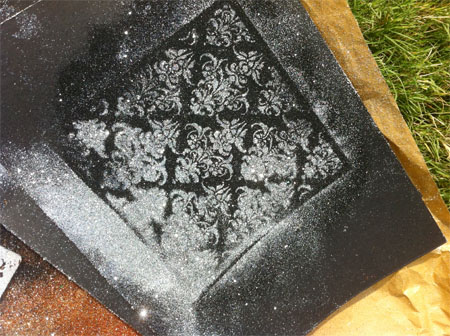
It wasn't perfect, but it did give me enough of that Damask pattern to work with. I did this with 3 more sheets of paper using all my glitter colors.
I left everything on my front porch to dry while I retreated into my office to start the flowers for the 3rd garland.
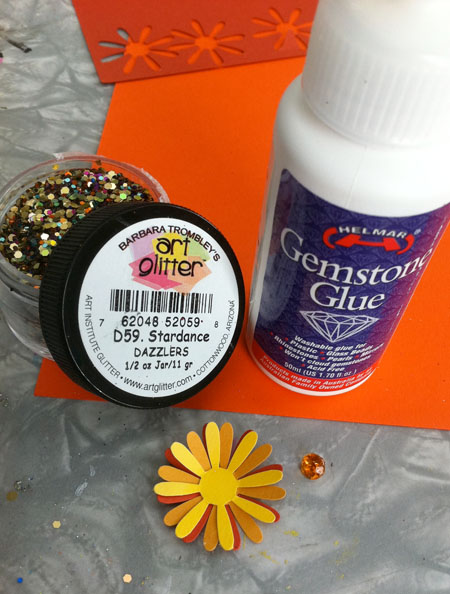
To make the flowers I used the following:
- Orange construction paper. 4 sheets in different shades of orange.
- Helmar Gemstone Glue
- Helmar 450 Quick Dry Adhesive
- Art Institute Glitter - D14 Gunmetal Gray Dazzlers
- Art Institute Glitter - D59 Stardance Dazzlers
- Black and white polka dot ribbon
- Lots of rhinestones
- Flower petal hole punch - 2 different designs
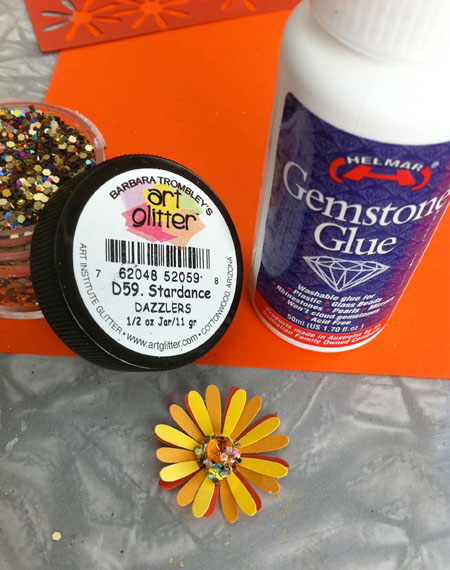
I put the flowers together, 3 petals deep and then used the Helmar Gemstone Glue to add the rhinestones and glitter on the inside of each flower.
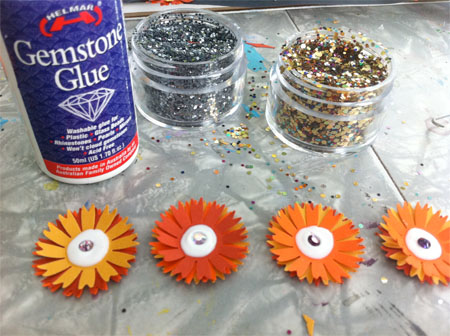
I made about 48 flowers total.
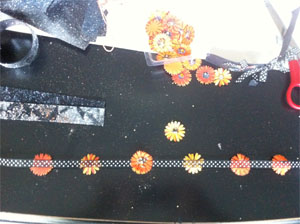
When the flowers dried, I glued them all back to back on the black and white polka dot ribbon using the Helmar 450 Quick Dry Adhesive. I love this glue because it has the consistency of rubber cement. When making this garland, I wanted to space the flowers evenly and using this glue allowed me to move each flower before it dried. Also, the glue seeped just enough through the ribbon to help form a bond onto the other side of the ribbon. It was the perfect glue for this project.
I set the flower garland aside to dry and went back to the paper chain project downstairs.

I cut the glittered construction paper into strips...
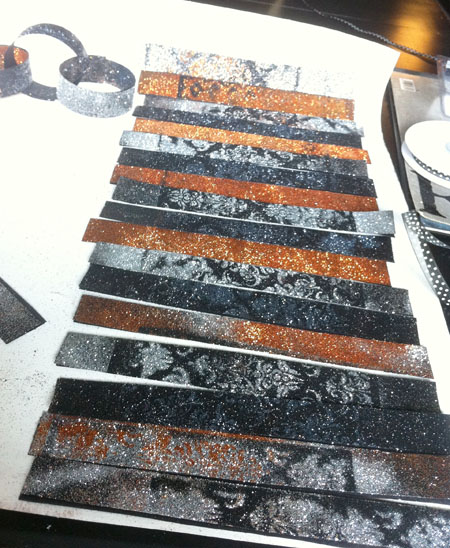
And then arranged the strips in alternating glitter colors... and glued them all together using the Helmar 450 Quick Dry Adhesive.
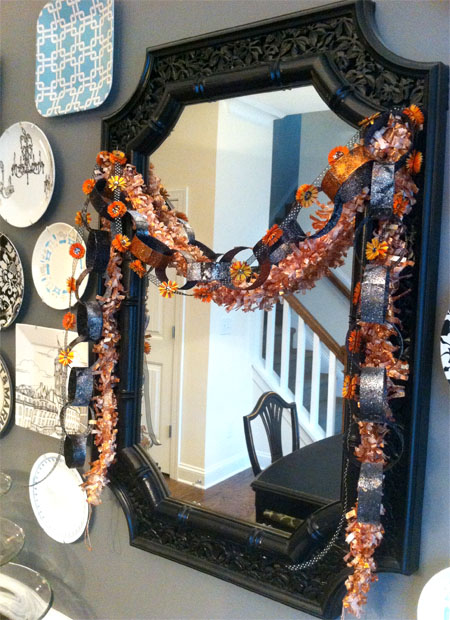
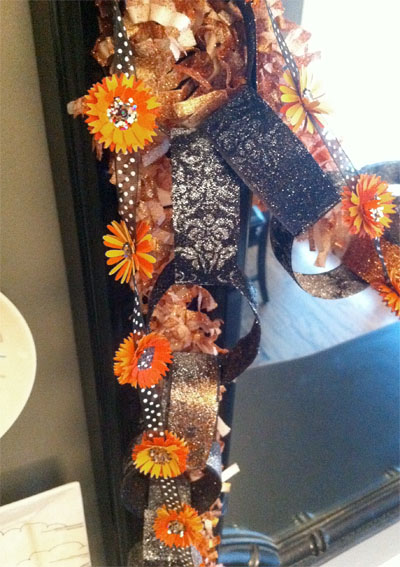
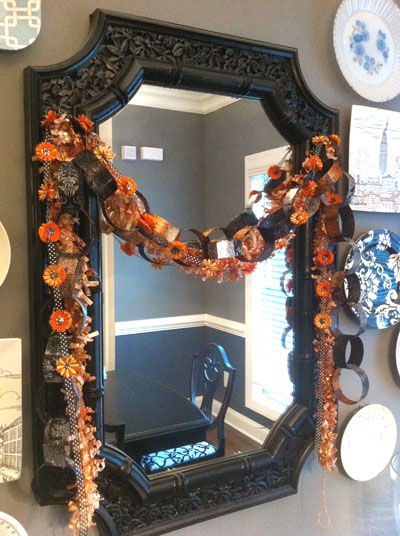
After everything was assembled and dried, I hung them all together over a mirror in my dining room...

I have one more idea for a garland to add to this collection... another Halloween-themed garland with ghosts. The cool thing is, once Halloween is over, I can remove the garlands that scream Halloween and leave the others up for Thanksgiving. Easy to make, easy to store and very versatile!
Thanks for checking out my post.
Carrie


Wow! These are gorgeous!
ReplyDeleteThese garlands are beautiful Carrie! And of course, glitter makes everything better! :) Thank you for sharing this ~ I will have to give at least one of them a try.
ReplyDeleteLove this concept and such a great decor addition
ReplyDeleteava