I got a lot of fun
Globecraft Memories & Piccolo crafting materials in the mail, including a great
kit to make a clear bubble style ornament, which I've always wanted to try!
I decided to go with the most forthcoming event, which is Halloween.

This piece has a lot going on and a lot to explain!
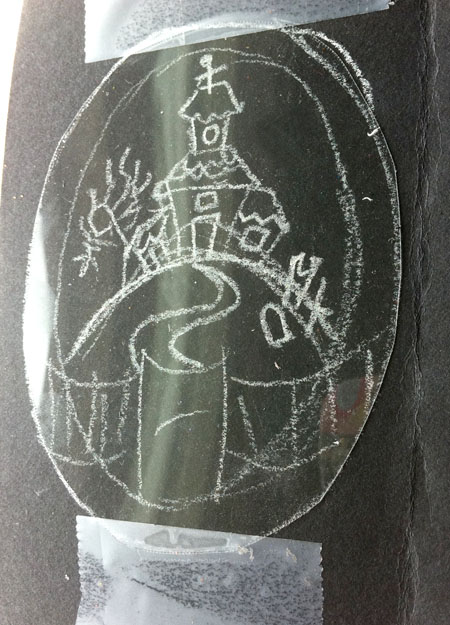
On the front bubble side I decided to have a glittered fence with a gate. The back bubble is filled with assorted glitter and large rhinestones. Sort of like a waterglobe. I decided that I wanted to have a clear acetate piece in the middle with a design on it, sandwiched between the two bubbles, so you could see all the way through it and to keep the glitter isolated to one side. So, the first thing I did was trace the bubble dome shape onto a piece of acetate and cut it out. I drew a design of an old spooky house on a hill in chalk on some black paper and put the acetate over it so I could paint the design onto the acetate.
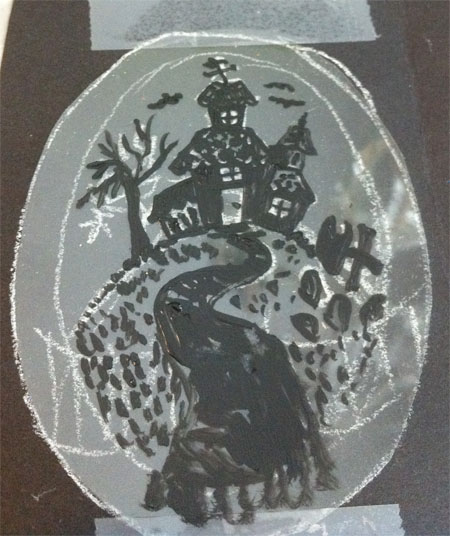
I then used a tiny brush and some black acrylic paint to put the design onto the acetate.
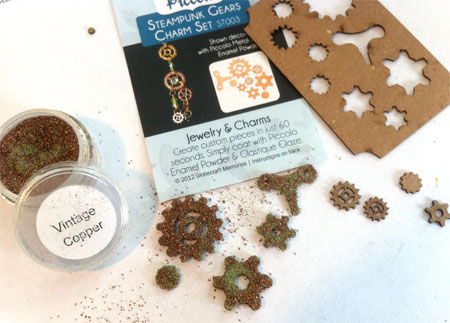
While that was drying, I decided to get my gears and key charms all ready to to. In my
Globecraft Memories and Piccolo sample pack, I got some super cool
Piccolo paper charms. They've come up with a great product that gives you results like you would get with real kiln-based metal or porcelain enamel, but you don't need a kiln or fancy special tools and expensive supplies. For this project, I used the
Steampunk Gears Charm Set and the
Vintage Lock and Keys Charm Set. The instructions say to use embossing glue or ink, but I ended up using
Art Institute Designer dries clear adhesive. Then, I liberally poured the special
Piccolo Vintage Copper enameling powder on each piece and tapped off the excess. The instructions say to put one coat on the back of the charm, and two on the front, but I just put one large coat over each charm.
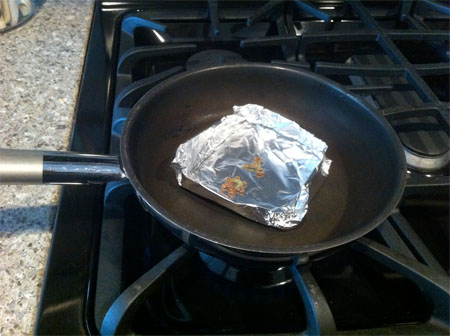
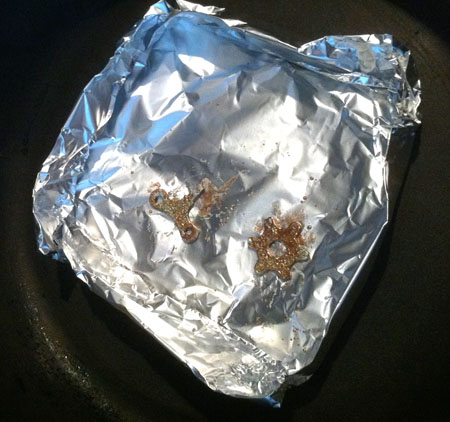
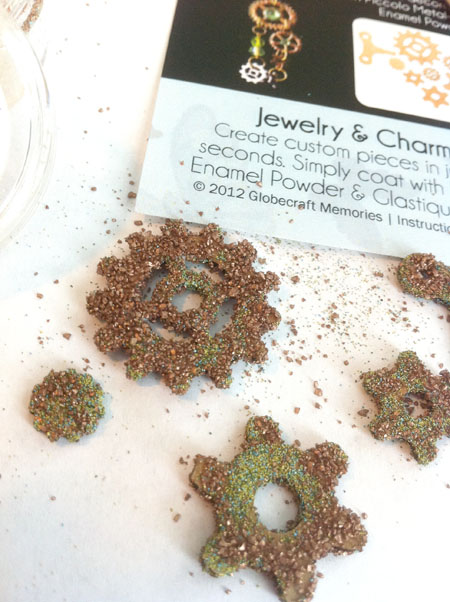
I let those dry and then marched them downstairs to "enamel" them. The instructions say to heat the enameling powder the same as you would embossing powder, to use a heat gun or put into a 400 degree oven for 60-80 seconds. I decided to try the hot plate approach (the only way I've ever used enameling powder). I made a little tin foil tray and put the charms in. Don't move them, don't flip them and don't try to pry them off of a cooled tin foil tray. I removed each charm from the still-hot aluminum foil tray using a straight pin, let them air cool and then put them down on my quartz countertops to cool them quickly. If you let them cool in the aluminum, they stick to it and it's fairly difficult to pry them off.
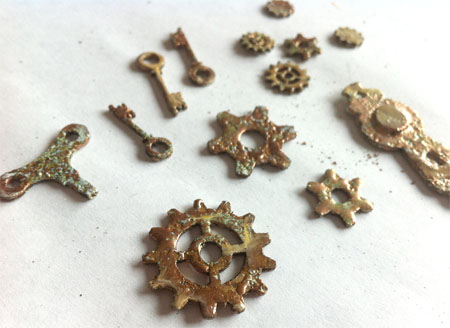
This technique produced some really REALLY cool results! The copper was bumpy, looked old and imperfect and there was plenty of that gorgeous green patina sprinkled throughout. I have often wondered how Disneyland made metal look old, rusty and full of patina, especially on the Pirates of the Caribbean ride... they must use a technique like this. I had a lot of fun doing this and can't wait to come up with more uses for it.
(Now I'm wishing I would have used it on that front gate I glittered on this piece... darn it!)
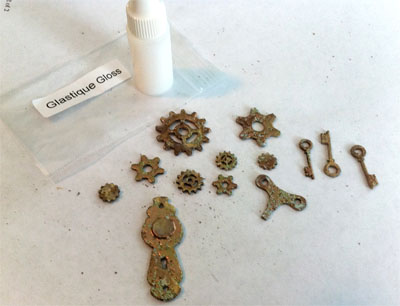
I then covered these pieces with Piccolo's
Glastique Gloss to make each piece thicker, seal in the gorgeous color and give it a good solid sheen.
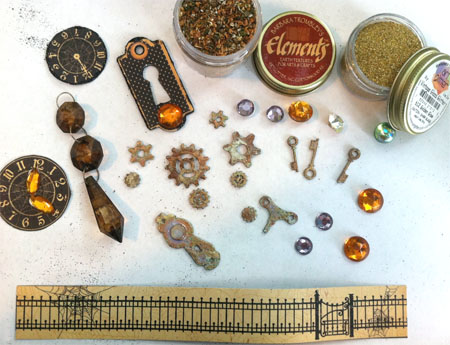
So, to take an inventory of what else I was going to put on or in my ornament... here are my gears, keys, a brown dangling crystal that I found in my junk jar, some
Graphic 45 Halloween Clocks,
a chipboard Keyhole charm from the Olde Curiosity Shop Line and a
Graphic 45 paper fence that I ended up x-acto cutting out and glittering with
Art Institute #79 Black Ultrafine Opaque glitter, some flat back crystals (I glued two together so they were round and could be put in the back snow globe bubble of my ornament) and some glitter that will go in the back bubble, too. I chose
Art Institute Elements Beehive, which is like glitter, sand and lovely bits of earth all rolled into one, and
Art Institute Fine Vintage Glass Glitter - #612 Golden Glow.
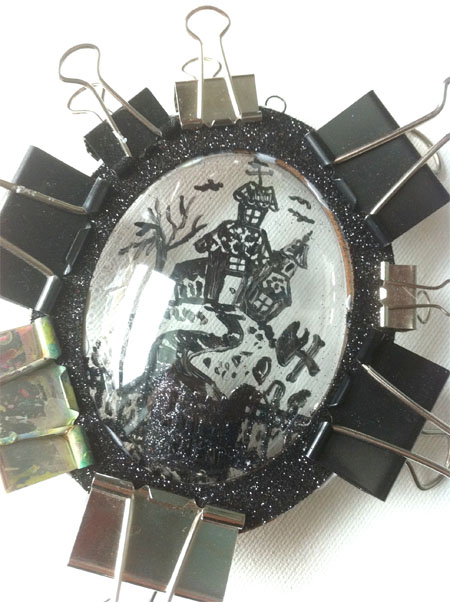
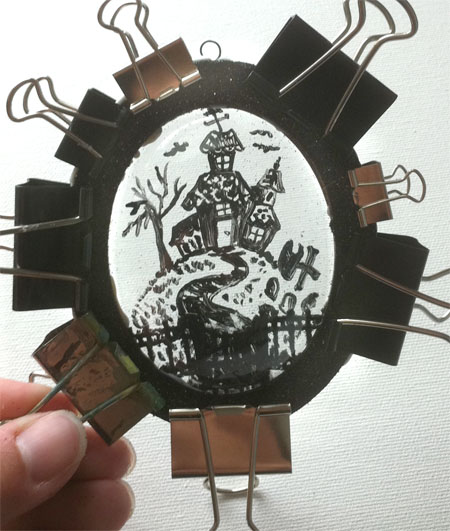
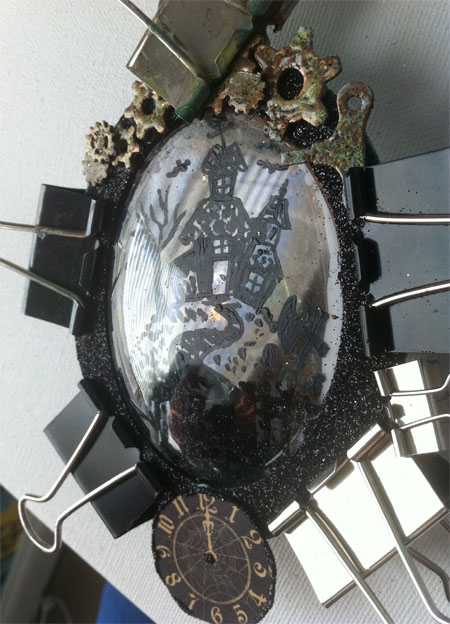
After I cut out and glittered that little gate (Still wishing I would have made it copper!), I glued it in front of my acetate house onto a chipboard ring, put down one of the clear dome bubbles, then put another ring on top which I glittered way ahead of time using
Art Institute #79 Black Ultrafine Opaque glitter. I then used some heavy duty clamps to hold it in place while the excessive amounts of glue I used, dried.
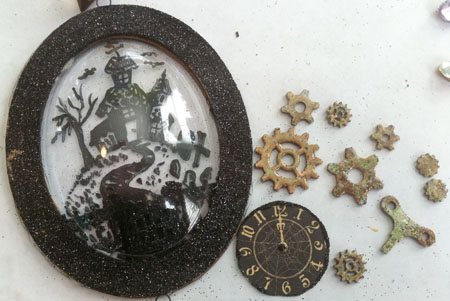
After the glittered front ring was dry (oops, looks like it's going to need some touch-up glitter!), I laid out my gears and paper clock to get ready to glue them down...
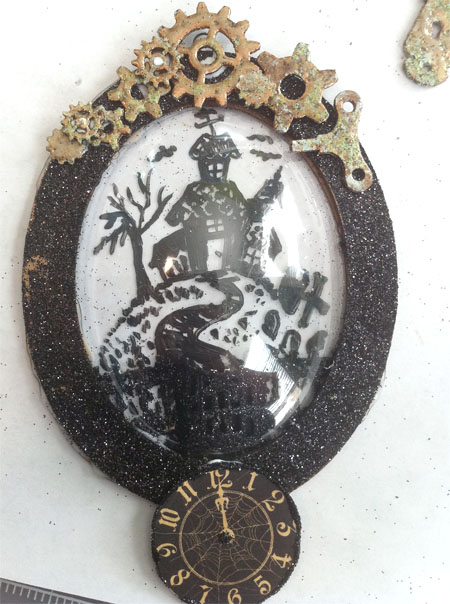
And then I glued them on using
Art Institute Designer dries clear adhesive.
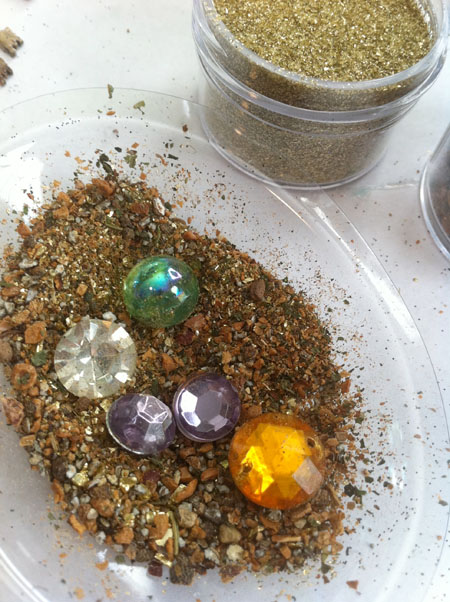
While that was drying, I poured in the Beehive Elements Glitter and the Vintage Gold Glass Glitter into the back bubble and added those crystals I had set aside...
And carefully glued it to the back of the front dome and capped it off with the back black glittered chipboard oval. Again, I used way too much glue, so I made sure not to move this while it was drying, or the loose glitter would just stick to the sides (and then it's no longer a free-sprinking snow globe, but more of just a solid mass of glitter).
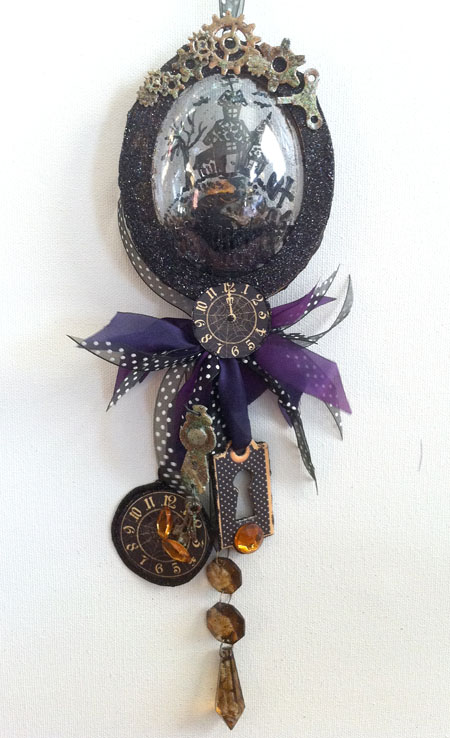
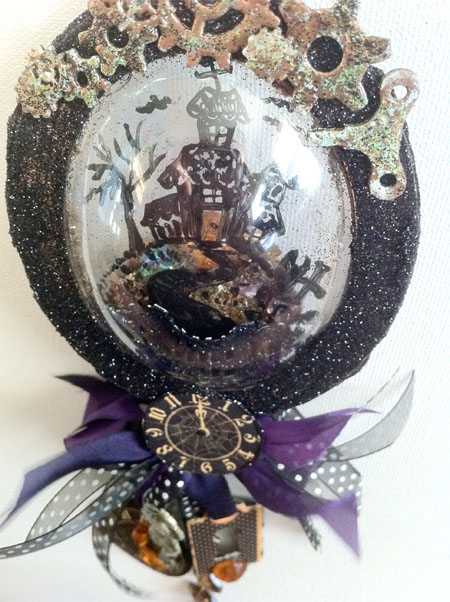
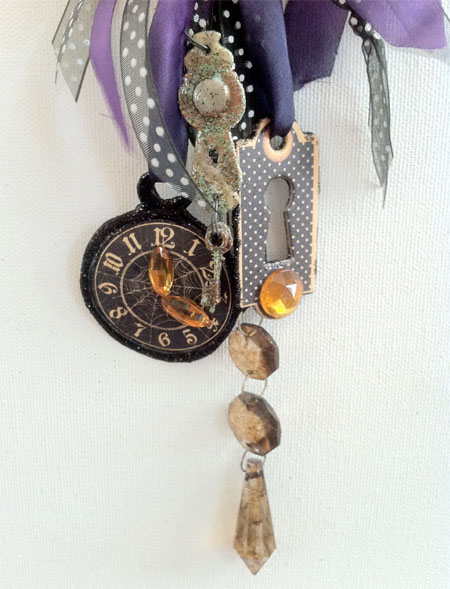
And here it is finished after I added all the keys, the pocket watch clock and that crystal and excessive amounts of ribbon!
For my first bubble ornament, it's not too shabby. It was a lot of fun to make... can't wait to make more!


Great Project Carrie! Love all the layers and textures!
ReplyDelete