

Ingredients
- Art Glitter Designer dries clear Glue
- Ultra fine Metal Tip
- Sticky tape
- Transparency Ink Pad
- Art Glitters: , #300 Camel, #183 Blue Angel, #196 Lion's Mane, #305 Goldenrod, #350 Butterscotch, #109 Cavalado, and #515 Riverbank.
- Northwoods Nora's Bountiful Squirrel Stamp
- Cream card base
- white card stock
- black and Green Cardstock
- Ranger's Vintage Photo Distress ink
- Foam Applicators
- scissors
- Black mini Ric Rac
- Fall Leaves Ribbon
- Brown Sugar Baker's Twine
- Vintage Bonanza Buttons
- Kraft Knife
- Perfect Layers Ruler
- Copics: #YG67, #B01, #BO2, # YR68, YRO4, Y14, E18, E35, E37, E55,
This month we are happy to be teaming up with Northwoods!

To celebrate, Art Glitter is having a 20% off retail sale of any $25 purchase. Just use code NW20 at Check out!
Directions
Step 1
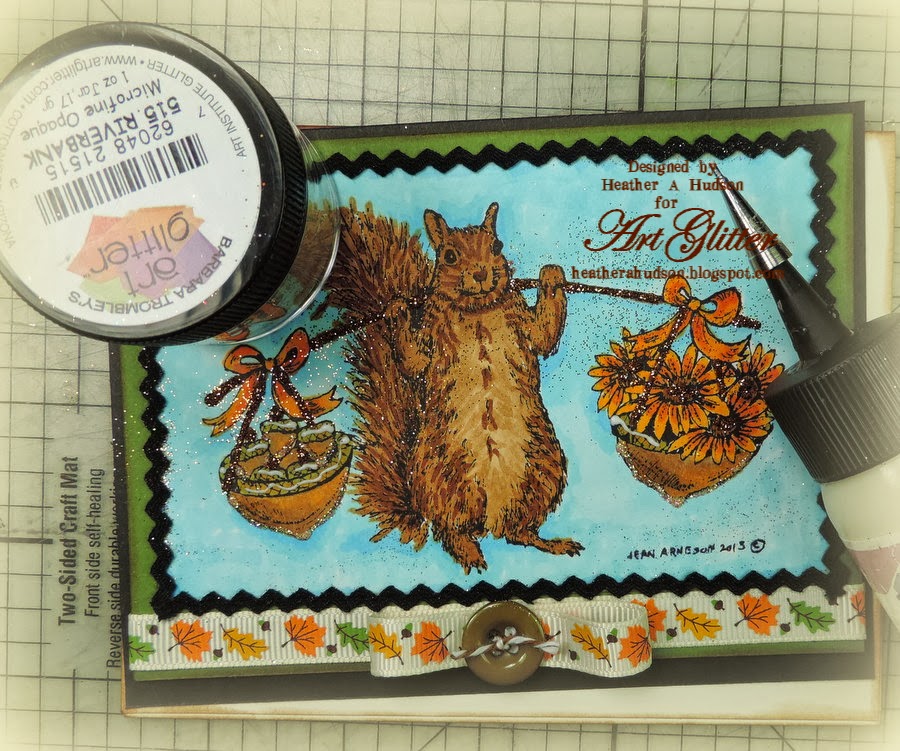
Heather started out by using the Northwoods Nora's Bountiful Squirrel Stamp and the Art Glitter Black ink pad to stamp her image onto white card stock. Heather LOVES Squirrels, so she loved playing with this adorable image!
She used Copics to color her image. #BO2 #BO1 were used for the background. The Squirrel, was colored with E35, E55, and E37, bows and flowers were colored with Y38 and YR14, Same with bows with touches of YO4 and Y68, Acorns and acron baskets with E35 and touches of Y38. Stick handle was done with E18.

Step 2
Heather used the 1/2 perfect layer ruler to cut a 1/2" mat for the bottom.

Step 3
Heather used her perfect layers ruler to create a mat out of green card stock. Sides were cut with 3/16 ruler..

Step 4
Heather used the 3/16 perfect layer ruler edge for the bottom of the next cardstock layer (black).

Step 5
Heather used the Perfect Layers Ruler to cut the sides of the black cardstock to a 5/16th" mat. This time she measured off the stamped image piece instead of the green layer.

Step 6
Heather put a strip of the red sticky tape across the bottom edge of card.

Step 7
Heather applied her Fall Leaves ribbon to the red sticky tape. The Ultra fine tip applicator and Designer dries clear glue were used to add some glue to the edges of the stamped image, and black mini ric rac was attached.

Step 8
Then she used another piece of the ribbon to create a loop, and then glued it down to the ribbon base to create a bow on the front of the card. A button tied with Brown Sugar Baker's Twine was added to form the center of the bow.
Heather added glue to the acorns and basket bottoms and used Lion's Mane Glitter.

Step 9
Heather added more glue to her image, and applied Camel Glitter.

Step 10
Glue was applied to the acorn tops and rims of acorn baskets then Riverbank Glitter was added.
Step 11
Heather continued to use the DDCG and UFTA to apply glue to the bows and then applied Butterscotch Glitter.

Step 12
Glue was applied to the squirrel, and Goldenrod glitter was used.

Step 13
Swirls of glue were added to the background and Blue Angel Glitter was applied.

Step 14
Heather used the red sticky tape and placed on her ivory card stock base which was inked with Ranger's Vintage photo. This will hold down her matted focal image. Dot of DDCG were added to the edges of the green card stock and Cavalado Glitter was added.

Step 15
Heather attached her matted image to her cardstock base.

 Some more Close ups.
Left side of card.
How about a close up of the Cute
Northwoods' Nora's Bountiful Squirrel Image!
Adorable!!
Left side of card.

Right Side of Card.

Thank you for stopping by and hope you enjoyed Heather's Tutorial using
Art Glitter and the fabulous
"Northwoods Nora's Bountiful SquirrelStamp!"
Feel free to stop by and see Heather's other projects using Art Glitter on her blog.
heatherahudson.blogspot.com

"Northwoods Nora's Bountiful SquirrelStamp!"
Feel free to stop by and see Heather's other projects using Art Glitter on her blog.
heatherahudson.blogspot.com
wow, that squirrel's tale is so lifelike!
ReplyDeleteGreat card, Heather. I love the image and what you've done with it. The mini ric-rac adds a nice touch.
ReplyDelete