Saturday, December 15, 2012

Pepermint Fun

Nothing adds a festive feel to ordinary objects like glitter!  I found this glass plate in the dollar aisle at Target and was instantly inspired with a quick and simple holiday decor idea.....a Starlight Mint Plate.

For this project I used:  Art Glitter Designer Dries Clear Adhesive (DDCA), Art Glitter Ultra fine glitters - #351 Pink Diamonds and #86 Angel Dust, Helmar Vellum Adhesive Spray, Clear Acrylic Spray Sealer.

I used a metal fine tip on the DDCA to trace one of the swirls in the glass on the back of the plate.

Then I sprinkled Pink Diamonds glitter over the glue and tapped offed the excess.

I repeated this process at even intervals around the plate and created a sunburst pattern in the center, then I set the plate aside to dry completely.

Once the glue was dry, I brushed off the excess pink glitter and sprayed the back of the plate with Helmar Adhesive spray.  While the adhesive was still wet, I sprinkled Angel Dust Glitter over the back of the plate.  

The adhesive spray and glitter give the plate a frosted look.  I set it aside to dry, and once it was dry I sprayed the back of the plate with two coats of acrylic spray sealer.  This protects the glitter and keeps it from shedding.   

Since all of the design work is on the back of the plate, you can use the plate for light use - candy dish, cookie plate, decoration, etc - but do not put it in the dishwasher or soak it in water. 

Please visit my blog for more glittering fun!

Happy Holidays!
KC

Thursday, December 13, 2012

Light Your Way - Beautiful Lantern

Art_Glitter_Linda_Neff_Victorian_Lamp_photo_7
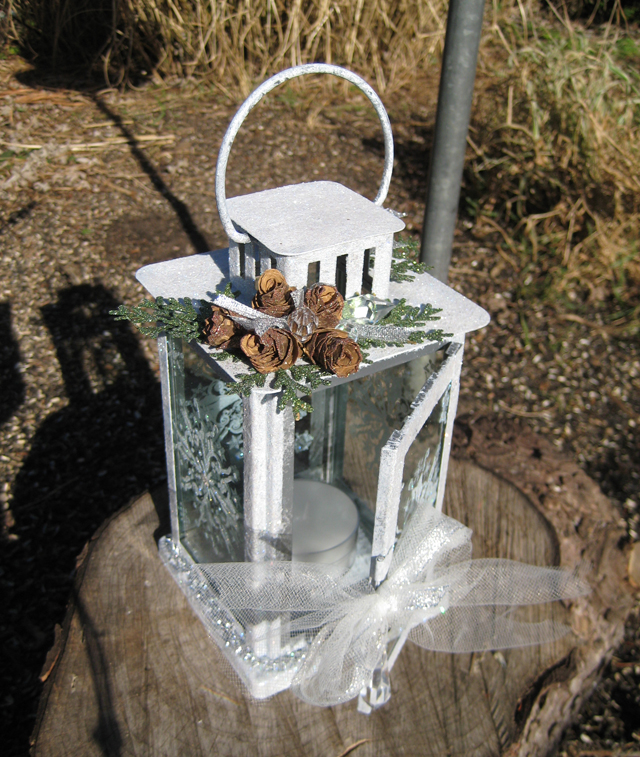
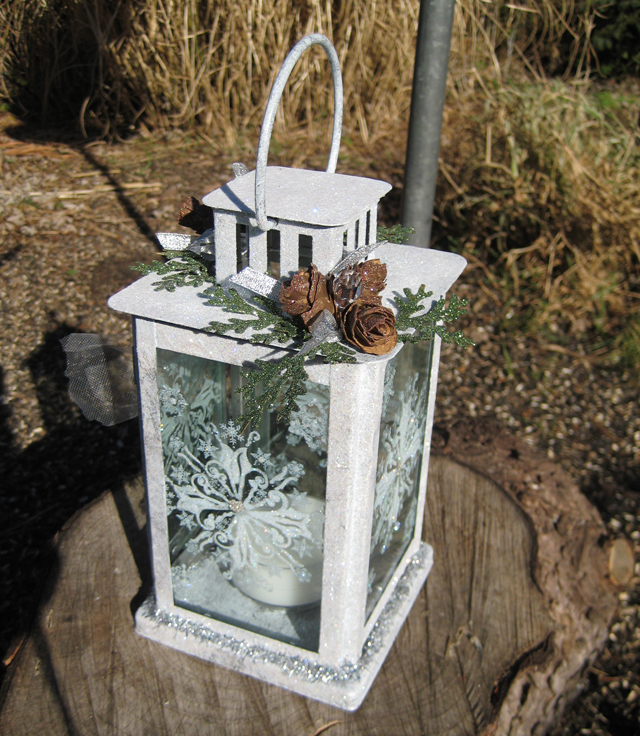
I picked up this Victorian-style lantern at a local resale shop for $1.40. There were two and after finishing this one I'm really wishing I would have bought them both. The original piece is a simple thin metal with a silver finish. I had no intention of coating the entire lantern in glitter; I liked the silver finish and felt it appropriate for Christmas. But, as you can see I sort of got a little carried away. Glitter does that to me. I start using it in small increments here-and-there and the next thing you know - I've totally covered the piece in glitter!

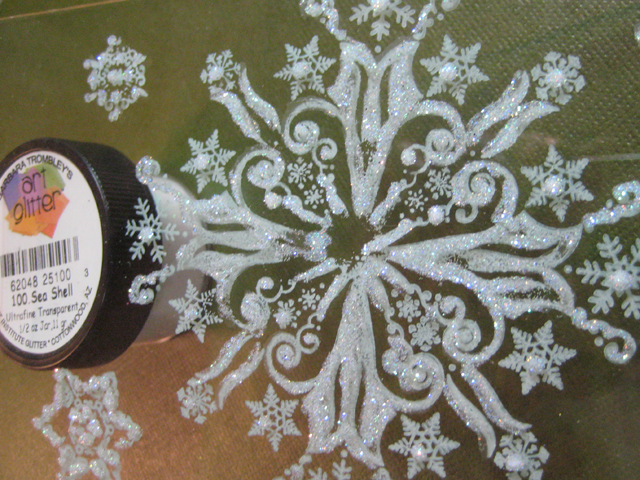
Here's how I created this project. I started by removing all the glass from the wall segments and door. I stamped them with a large clear stamp I've had for a few years and never used from BoBunny. I stamped in Butter Cream Staz-on ink on one side of the glass. Set the glass pieces aside and allow to dry completely so it doesn't smudge. After the ink is dry and working on the opposite side, I use my Designer Dries Clear glue, with Fine Metal Tip, to outline the snowflake designs and sprinkle them with Art Glitter Sea Shell Ultrafine Transparent, working in small areas so the glue doesn't skin over. Work this way till all the snowflakes sparkle with beautiful, glistening glitter; set aside to dry thoroughly. Art_Glitter_Linda_Neff_Victorian_Lamp_photo_1
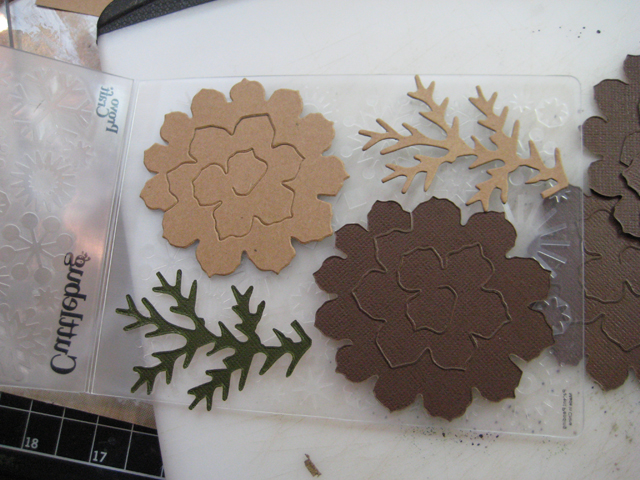
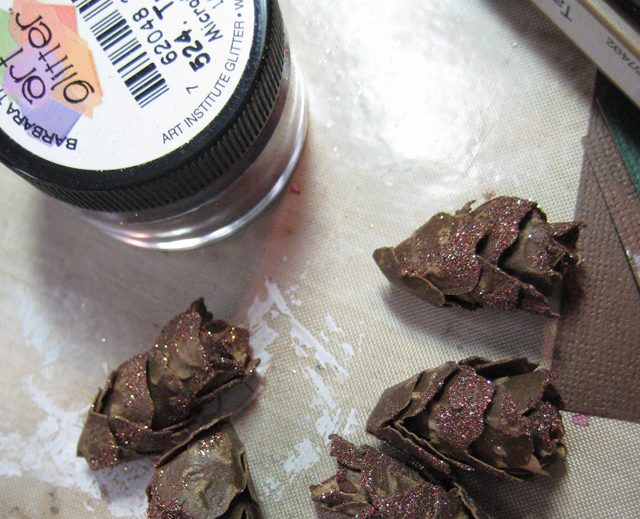
  While the glitter is drying on the glass (it's done when the glue is clear, not white) I cut and emboss several pine cones and pine boughs with Tim Holtz Tattered Pine Cones. I like to cut the pine cones from a color-core cardstock so after it is embossed and sanded it looks a little more realistic. I assembled the pine cones, painted the tips with Designer Dries Clear then rolled them in Art Glitter Tree Bark Microfine Opaque. This helps to add a little bling for the holidays. Art_Glitter_Linda_Neff_Victorian_Lamp_photo_3 The pine boughs are brushed with DDC and dipped in a container full of Art Glitter Leaf Ultrafine Opaque. The boughs are coated on both sides. Art_Glitter_Linda_Neff_Victorian_Lamp_photo_4
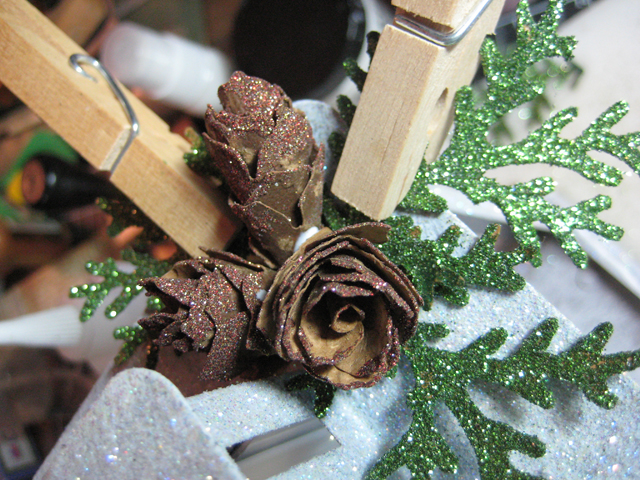
  This is where my troubles began. The pine cones and boughs are so pretty and the glass is drying beautifully, so now the dull, plain silver looks way too plain! So, I realize the lantern needs to be glitzed up as well. I grab a stipple brush and my Snow Cap Adirondack Paint Dabber and begin to stipple white paint over the entire thing. It's pretty easy to do because I still have the glass out so it's not necessary to be overly careful. I like the way the white coat is looking and decide to glitter it as well. After the paint is dry I squeezed some DDC onto a non-stick surface and stippled it onto the white paint (working in small areas) and sprinkled it with Art Glitter Crystal Ultrafine Opaque. The entire piece just sparkles! After the glass is put back in, I add the glittered pine cones and boughs using DDC and clip clothespins to secure them until dry. Art_Glitter_Linda_Neff_Victorian_Lamp_photo_2
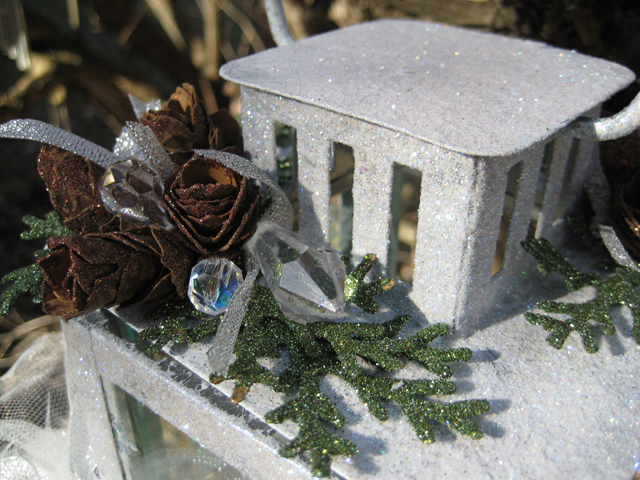
  To add a bit more bling to the piece, some Connie Crystals and snippets of silver ribbon pieces get tucked into place and held with DDC. Art_Glitter_Linda_Neff_Victorian_Lamp_photo_5
This Vintage-looking lantern turned out so much better than what I anticipated. It holds a little votive candle and looks stunning while burning in the dark. Art_Glitter_Linda_Neff_Victorian_Lamp_photo_6
Skip on over to my blog for a look at another Art Glitter project I worked on recently. -- Linda Neff

Tuesday, December 11, 2012

Christmas Wreath with Ornaments and Glitter!

Today I want to share with you my Christmas Wreath for this year. It is a take on the Christmas Bulb Wreath, and glitter of course.


I have made a bulb wreath, and homemade glittered ornaments but I hadn't made a glittered ornament wreath. So now is the perfect time!

Products used:
#280 Lime Rind, Ultrafine Opaque Glitter
#128 Quark, Ultrafine Opaque Hologram
#291 Fire Engine, Ultrafine Opaque
#175 Retro Red, Ultrafine Pearlescent
#84 Shiney Si, Ultrafine Opaque
#282 Night Vision, Ultrafine Opaque
Pledge Future Shine Floor Cleaner
Clear Glass Ornaments
Wire wreath
Hot Glue
Ribbon
Small funnel or paper funnel

To start you need to make the ornaments, and they are super simple.

I started with the clear ornaments. I took off the top, squirted in the floor cleaner, swished it around, and dumped it out.

Then I took a small funnel and poured in the glitter. I shook it around until the entire inside of the ornament was covered in glitter, then dumped out the excess glitter.

I repeated this step of all 24 large ornaments. I used six different colors; two greens (Lime Rind, Quark), two reds (Fire Engine, Retro Red), and two silvers (Shiney Si, Night Vision).

After the ornaments were finished, I hot glued them to them to the wire wreath and wrapped with ribbon.


I hope you enjoyed this fun project I made, be sure to stop by my blog, oneheartscrapper, to see how the different kinds of glitter look in each of the bulbs! I was totally surprised on how some of them turned out, they look AWESOME!

Happy Glittering!

Cherie


Saturday, December 8, 2012

Glitter Themed Tote Bag

I started out with a plain canvas tote bag and used the following glitter colors and glues:
Here's how it turned out!


I did the design freehand... which isn't that difficult to do with the simplicity of the flowers I created. I started with the glittered flowers, then decided to paint on the white poinsettias and little white flowers and then added the green leaves using acrylic paint. And just kept on adding rhinestones, more rhinestones and more glitter. I love this Helmar Gemstone Glue... it really holds those little rhinestones on VERY well. And they bend and move with ease. I'm really impressed with this product! So much so (and was having so much fun) that I set out to do another bag packed with crystals... that Helmar glue held up perfectly!! I did this all freehand, too.


For the above, here are the glitter colors I used: Imagine what you could do to any ol' boring canvas bag!


Thursday, December 6, 2012

Christmas Tray with Dreamweaver Stencils and Art Glitter

Hi all!  I don't post very often as the team is so talented, but I really wanted to share this SPARKLING project. 

Supplies:  a Tray from McGuffey Woodworking, Crackle Paint, Dreamweaver Stencils and TONS of Art Glitter and Embossing Paste. 

You will notice I used all sorts of embellishments as the tray evoloved.  I will show you panel by panel then the entire project.

I started by taking the back off the tray and then painting all the areas.  I used an acrylic paint with a crackle paint over the top.  I added embellishments/stenciled images before placing the tray grid back on the tray.

 It is difficult to see but I added Crystal Glitter to the side panels for some glimmer.
 In this panel the skates are done in paste and then crakle paste.  I dusted the panel with Crystal Glitter and then filled the small bottle with "snow".  This is a combination of Crystal Glitter and Faux Snow from Art Glitter.

This pretty little snowflake was added to the panel in Pearl White and then covered in Crystal Glitter.  (Crystal Glitter is my favorite!)
 This panel was done with paste and then I very carefully added my colors.  I used Black, Twig, Fire Engine Red, Sedona Sun, White and I am not sure of the yellow, you can choose the yellow of your choice!

More Faux Snow in the bottle and again, a light dusting of Crystal Glitter.

I think this is a fun and very pretty project for your mantel or for gift giving!  I am glad I could share this with you all today!  Enjoy the SPARKLE!

Kristi

Wednesday, December 5, 2012

Great Idea for Christmas Gifts


My grandma lives in an assisted living home.  She has always been hard to buy for, but now that she has limited space and her needs taken care of, it is almost impossible to think of something she can use. Fortunately, she has a bird feeder outside her room, that our family is responsible for filling.  She has always loved cardinals and glitter, so when I spotted this beautiful cardinal stamp, I just knew it would be perfect to use with this glitter painting technique!

MATERIALS:
Art Glitter Designer Dries Clear with Fine Metal Tip
Art Glitter Dazzlers D40 Green Vibe
Art Glitter Microfine Opaque 500 Ruby Red
Art Glitter Ultrafine Transparent 243 Gingerbread
Art Glitter Ultrafine Opaque 291 Fire Engine
Art Glitter Ultrafine Opaque 7 Red Rose
Art Glitter Ultrafine Opaque 139 Leather
Art Glitter Ultrafine Opaque 41 Green Goddess
Art Glitter Ultrafine Opaque 349 Garnet
Art Glitter Ultrafine Opaque 114 Leaf
Art Glitter Ultrafine Opaque 12 Sage
Art Glitter Ultrafine Opaque 155 Red Velvet
Art Glitter Ultrafine Pearlescent 182 Astro Turf
Art Glitter Ultrafine Pearlescent 175 Retro Red
Art Glitter Ultrafine Pearlescent 189 Pearl
Stampendous Jumbo Cardinals Stamp
Stazon Jet Black Ink
Acetate
Empty Orange Juice Container
Self Adhesive Metal (I used Lifestyle Crafts)
Dreamweaver Stencil LG 708
Stamping Details Rubber Mat
Mercart Embossed Metal Backing Paste
Mercart Teflon Coated Metal Tool
Manual Die Cut Machine (I used Cuttlebug)
Glue Dots
Ribbon
DIRECTIONS:
1)  Measure acetate so that it goes around the orange juice container.  Cut.
2)  Use Stayzon to stamp the birds on acetate.  Also, stamp 2 of the holly sprigs on a separate piece of acetate.  Let dry.

3)  Flip acetate over and start to fill in the glitter colors.  Remember that you will see the first color that is laid in place.  You will need the fine metal tip on the edge of the glue container to get into the smaller areas.  You can use any colors that you like, but I used the ones listed at the top.  I did the berries and leaves with Red Rose, Garnet, Leather, the Dazzlers, Green Goddess and Astro Turf, in that order.  I used the lighter colors for the highlights, and the darker for the shadows.  For the female bird, I first laid down a layer of the Gingerbread over all the areas that were not black or red.  I let that dry pretty well before adding Sage and Leaf right over the top of it.  That way, the colors would show through the transparent areas.  I used Fire Engine on the reds.  I used the Microfine Ruby Red on both birds beaks and Pearl behind the black areas to ensure their opacity.  I used Fire Engine, Retro Red and Red Velvet on the male bird.  Let this dry thoroughly!

4)  Meanwhile, run your bird stencil through your manual die cut machine with metal using the rubber mat.  For the Cuttlebug, use this sandwich:  A Plate, stencil face down, metal face down, rubber mat, and two B Plates.
5)  Remove backing from the metal.  Fill in embossed areas with Mercart Embossed Metal Backing Paste.  Just squeeze it into the wells you find from the back .  Let dry thoroughly!
6)  Place Glue Dots on the back of glittered birds.  Hide them behind the opaque glitter.
7)  Press in place on orange juice container.  Secure acetate on back with Glue Dots as well.
8)  Cut out the holly sprigs, place glue dots on back and secure into place.  Use one to try and cover seam.
9)  Use Glue Dots to secure the ribbon.
10)  Place metal piece on lid of orange juice container.  Press down.
11)  Use regular scissors to trim around the lid.
12)  Add strips of metal around outside of lid and use Mercart Teflon tool to press into the grooves.
13)  Lid is finished!  Add bird seed to container and cap and you are done!

Thanks for stopping by!  I hope you enjoyed this tutorial and can come up with your own take on painting with glitter!
Laura