
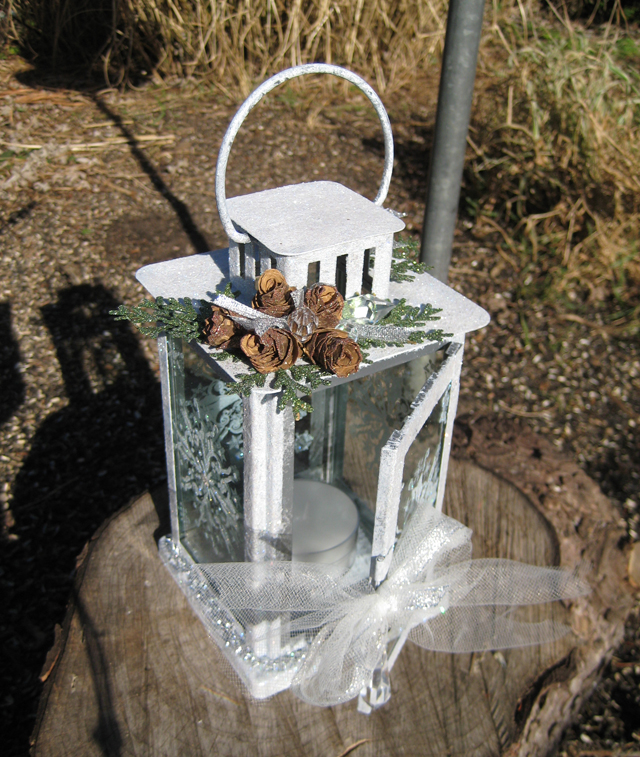
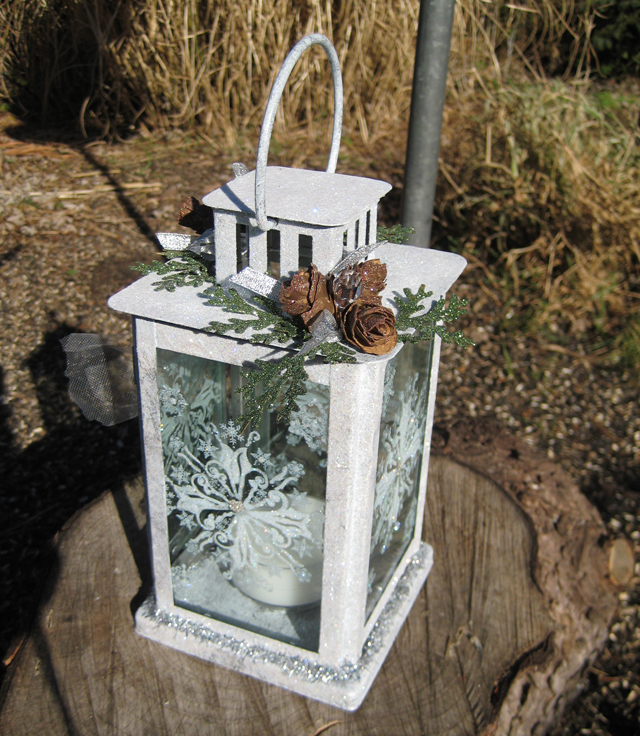
I picked up this Victorian-style lantern at a local resale shop for $1.40. There were two and after finishing this one I'm really wishing I would have bought them both. The original piece is a simple thin metal with a silver finish. I had no intention of coating the entire lantern in glitter; I liked the silver finish and felt it appropriate for Christmas. But, as you can see I sort of got a little carried away. Glitter does that to me. I start using it in small increments here-and-there and the next thing you know - I've totally covered the piece in glitter!
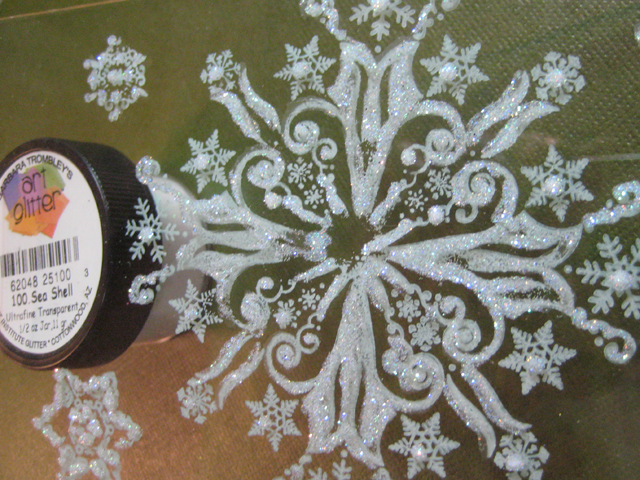
Here's how I created this project. I started by removing all the glass from the wall segments and door. I stamped them with a large clear stamp I've had for a few years and never used from BoBunny. I stamped in Butter Cream Staz-on ink on one side of the glass. Set the glass pieces aside and allow to dry completely so it doesn't smudge. After the ink is dry and working on the opposite side, I use my Designer Dries Clear glue, with Fine Metal Tip, to outline the snowflake designs and sprinkle them with Art Glitter Sea Shell Ultrafine Transparent, working in small areas so the glue doesn't skin over. Work this way till all the snowflakes sparkle with beautiful, glistening glitter; set aside to dry thoroughly.
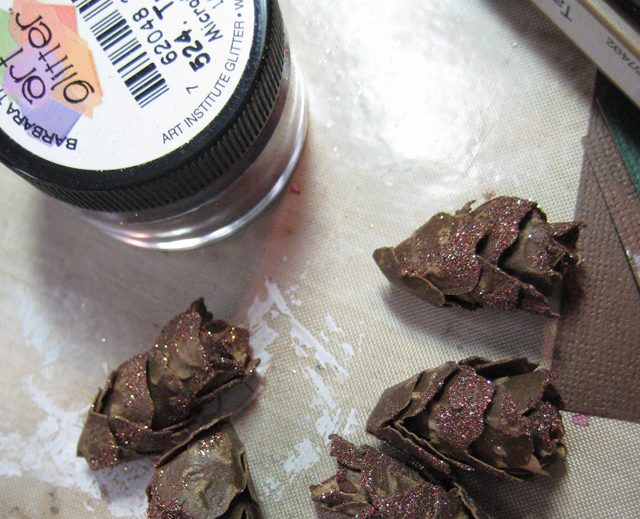
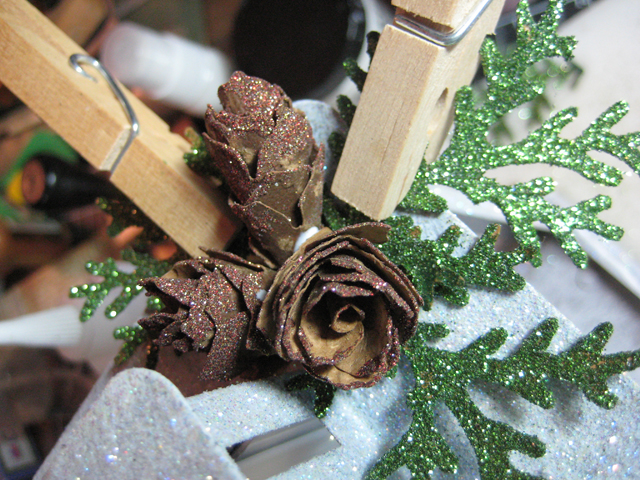
While the glitter is drying on the glass (it's done when the glue is clear, not white) I cut and emboss several pine cones and pine boughs with Tim Holtz Tattered Pine Cones. I like to cut the pine cones from a color-core cardstock so after it is embossed and sanded it looks a little more realistic. I assembled the pine cones, painted the tips with Designer Dries Clear then rolled them in Art Glitter Tree Bark Microfine Opaque. This helps to add a little bling for the holidays.
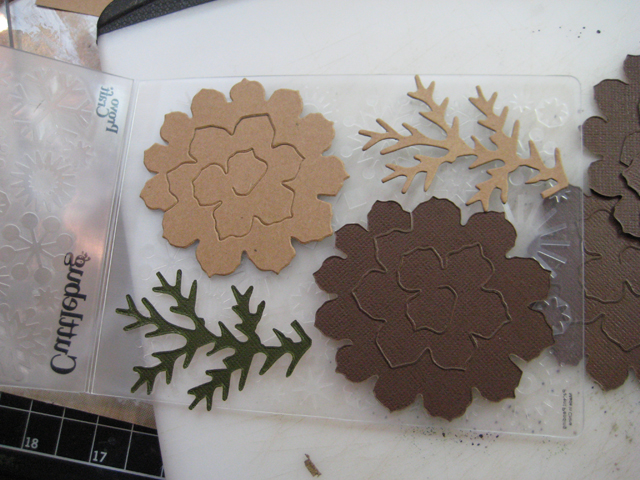 The pine boughs are brushed with DDC and dipped in a container full of Art Glitter Leaf Ultrafine Opaque. The boughs are coated on both sides.
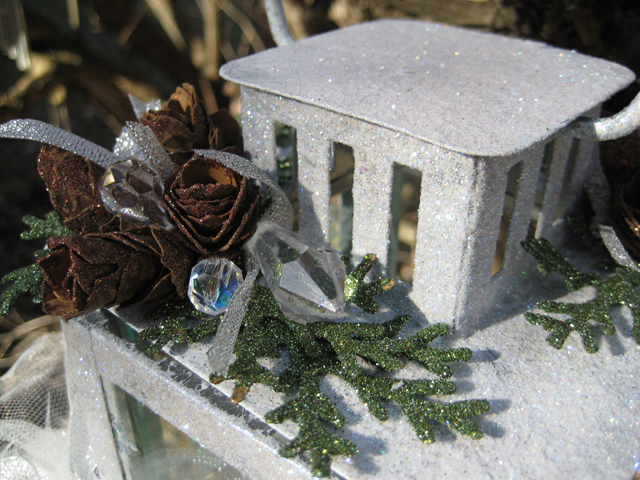
This is where my troubles began. The pine cones and boughs are so pretty and the glass is drying beautifully, so now the dull, plain silver looks way too plain! So, I realize the lantern needs to be glitzed up as well. I grab a stipple brush and my Snow Cap Adirondack Paint Dabber and begin to stipple white paint over the entire thing. It's pretty easy to do because I still have the glass out so it's not necessary to be overly careful. I like the way the white coat is looking and decide to glitter it as well. After the paint is dry I squeezed some DDC onto a non-stick surface and stippled it onto the white paint (working in small areas) and sprinkled it with Art Glitter Crystal Ultrafine Opaque. The entire piece just sparkles! After the glass is put back in, I add the glittered pine cones and boughs using DDC and clip clothespins to secure them until dry.
To add a bit more bling to the piece, some Connie Crystals and snippets of silver ribbon pieces get tucked into place and held with DDC.
This Vintage-looking lantern turned out so much better than what I anticipated. It holds a little votive candle and looks stunning while burning in the dark.
Skip on over to my blog for a look at another Art Glitter project I worked on recently. -- Linda Neff

Gorgeous!!
ReplyDeleteLove those snowflakes on the glass! So pretty!!!
ReplyDeleteThis is so beautiful!
ReplyDeleteLinda, before I scrolled down or read anything about this project, I knew it was one of yours! I LOVE your style!! Happy Holidays!
ReplyDeleteThanks for this nice post and this is very very informative blog
DeleteKızlık zarı
Genital estetik